


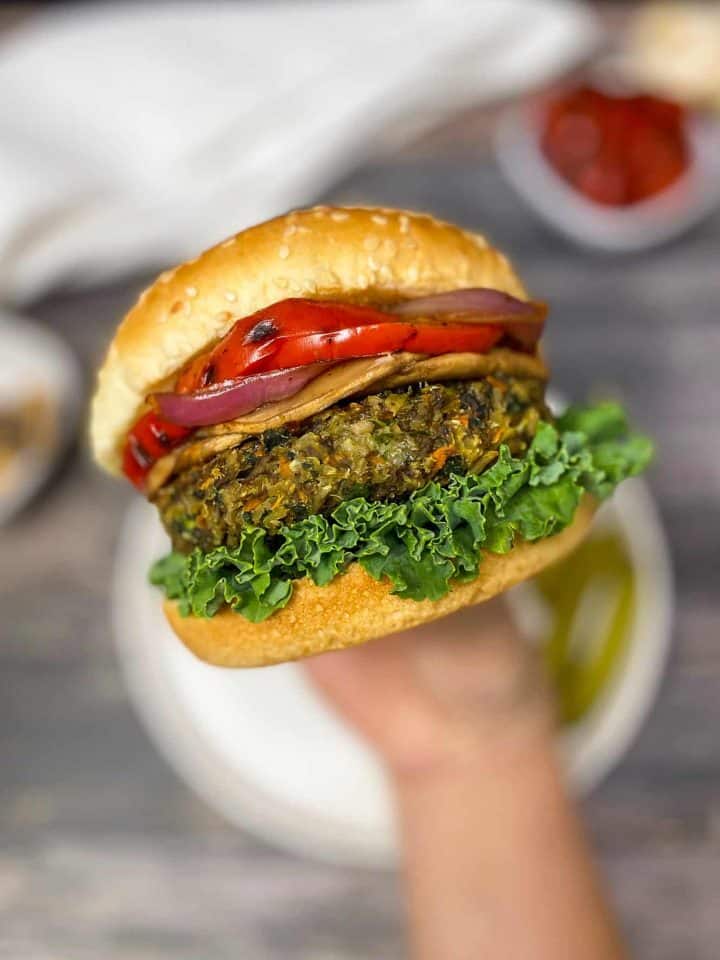
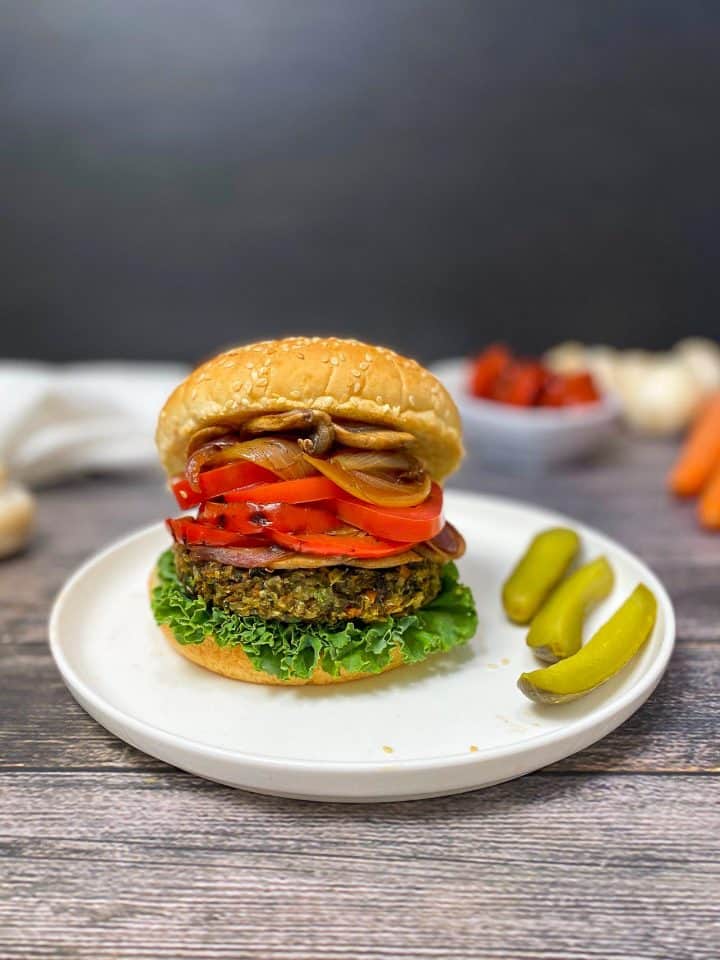
This mushroom risotto burger is hearty and rich, with a “meaty” bite. It’s bursting with umami flavour, loaded with nutrients, and won’t fall apart like many other veggie burgers.
Bonus: it’s vegan and vegetarian-friendly, gluten-free, and a great way to use up your leftover rice!
Mushrooms are surprisingly similar in taste and texture to meat once cooked, making them an absolutely perfect ingredient for my “meaty” mushroom burger recipe.
I think you’re going to love these ones! Especially if you’re a mushroom lover like I am. (You may have noticed a ton of mushroom recipes on the blog!)
If you haven’t tried a veggie burger with mushrooms yet, please try this!
You won’t be disappointed.
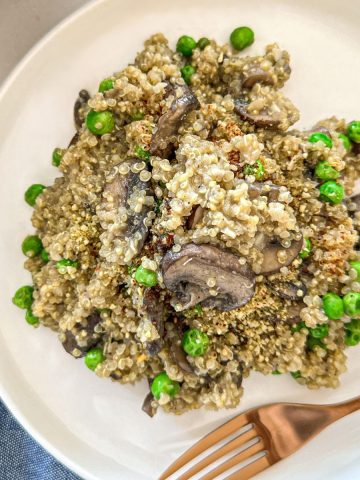
It pretty much tastes like mushroom risotto, wrapped up in a bun with all your favourite burger toppings.
Hence, mushroom risotto burger!
Except, it’s even a little healthier.
Yup!
Can you believe that?
Rather than use white arborio rice here (which is also known as risotto rice), I’m using brown basmati rice for a more nutritious and unrefined option. Win!
Ingredients
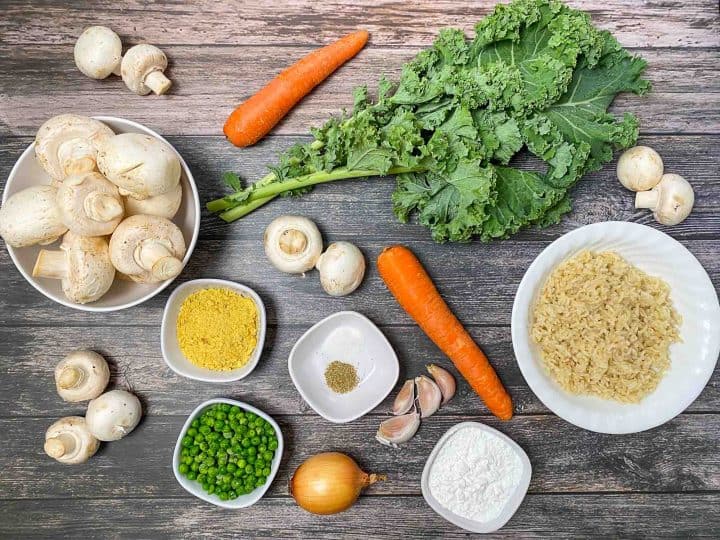
- Cooked rice
- Button mushrooms
- Yellow onion
- Garlic
- Carrot
- Kale
- Peas
- Nutritional yeast
- Oregano
- Salt
- Tapioca starch (also known as tapioca flour)
How to make a mushroom risotto burger
(This is a summary with step-by-step photos, full recipe measurements and instructions are in the recipe card below.)
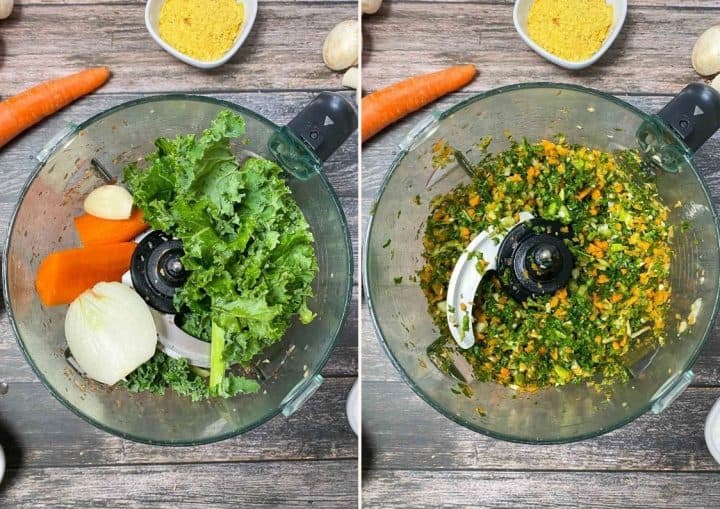
Start by scrubbing your mushrooms, add them to a food processor and very finely chop them. If you don’t have a food processor, a shredder works well too.
Work in batches and scrape down the sides as needed.
Pulse until a very fine chop is reached, without pureeing.
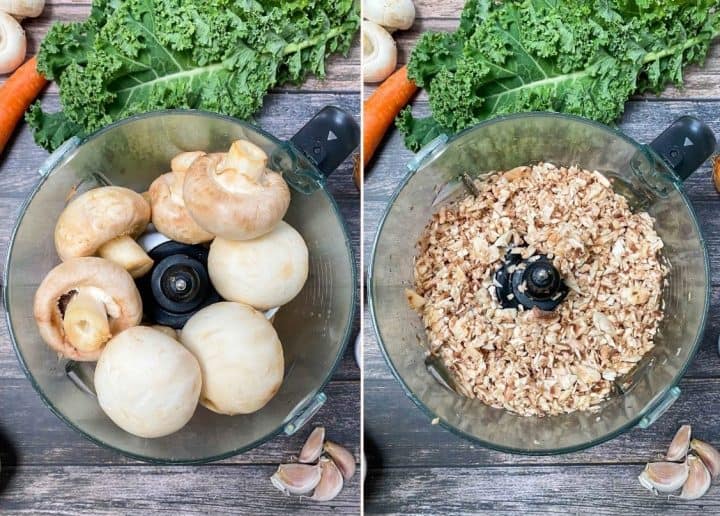
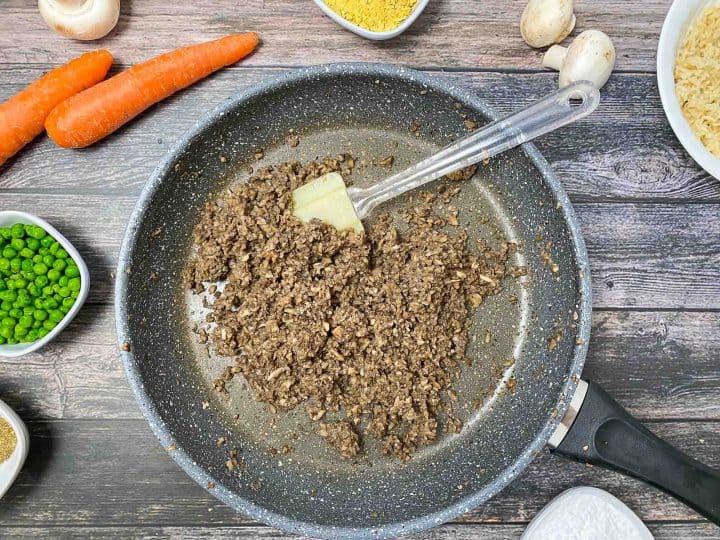
Transfer the chopped mushrooms to a large skillet and dry sauté (without oil or water as the mushrooms will release their own liquid) for about 6 to 8 minutes. Or until all the liquid releases and evaporates.
While the mushrooms are sautéing, add the onion, garlic, carrot and kale to the same processor (no need to rinse it out first) and process until all the veggies are very finely chopped.
Transfer the mixture to your skillet with the cooked mushrooms and add the peas, nutritional yeast, and the seasoning.
Sauté for 2-3 minutes until the veggies are soft. Then remove from the heat.
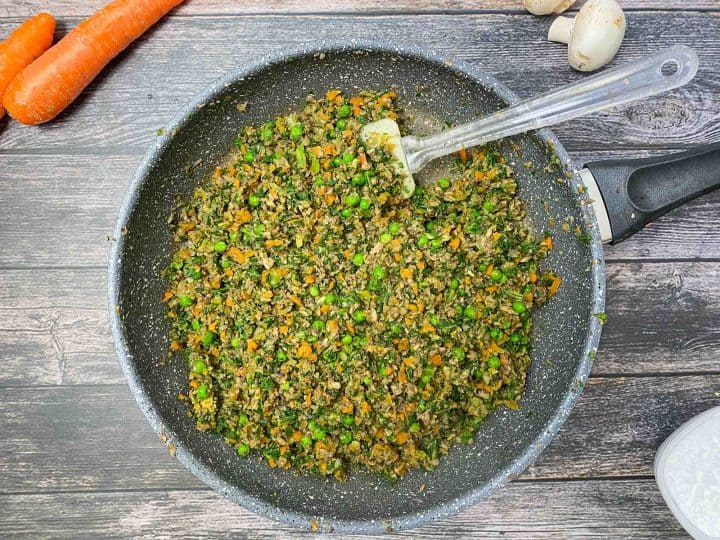
Of your two cups of cooked brown rice, add 1.5 cups directly to the skillet and blend the remaining half cup in a small blender. Add a tablespoon or two of water if needed to get it going.
Then add the pureed rice to the skillet, and four tablespoons of tapioca starch. Mix well.
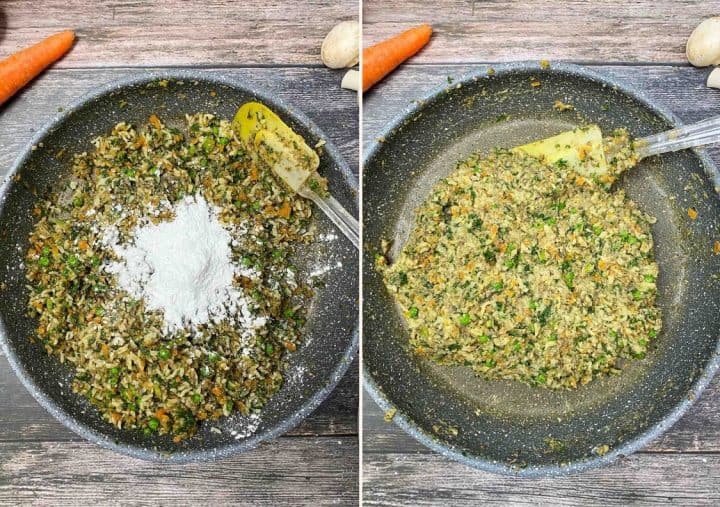
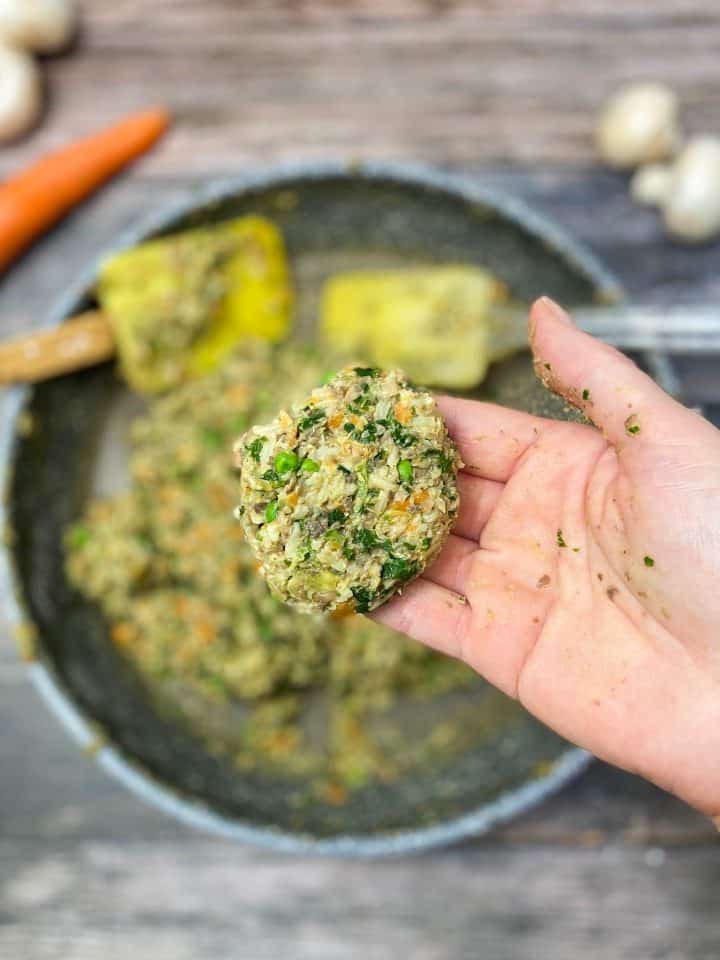
Test the consistency of the batter, using your hands. Form a ball or patty to see how well it holds or if it sticks to your hands.
Add another 1-2 tablespoons of tapioca starch if the batter is too sticky and mix again.
How to form your burgers
Start by rolling a ball in your hand, using a little less than ¾ cup of the mixture. Press the mixture firmly using both hands into a ball to ensure no gaps. This will help the patties hold together while baking.
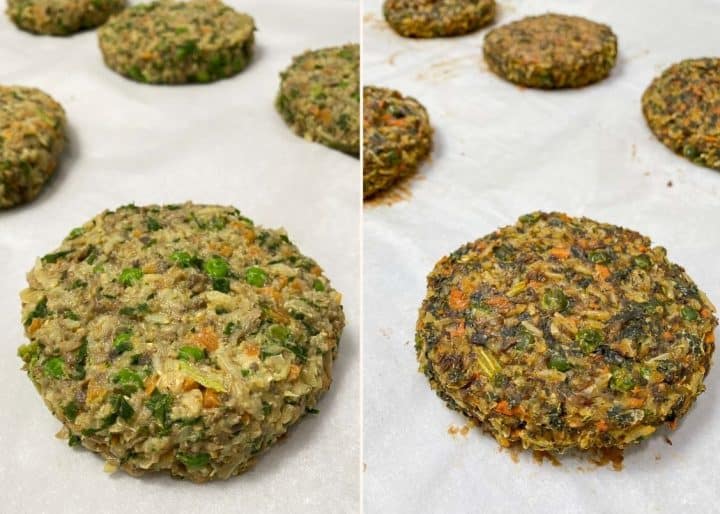
Then, using your hands, press gently into a disc shape and place your patties on the baking tray, lined with parchment paper.
Since this recipe does not contain oil, do not press the patties down onto the tray, as they may stick during baking. Form it in your hands, and then place the patty down gently.
Bake your mushroom risotto burgers for 20 minutes, then carefully flip them and bake for an additional 10-15 minutes until golden brown. Let them rest at room temperature for 5 minutes before serving.
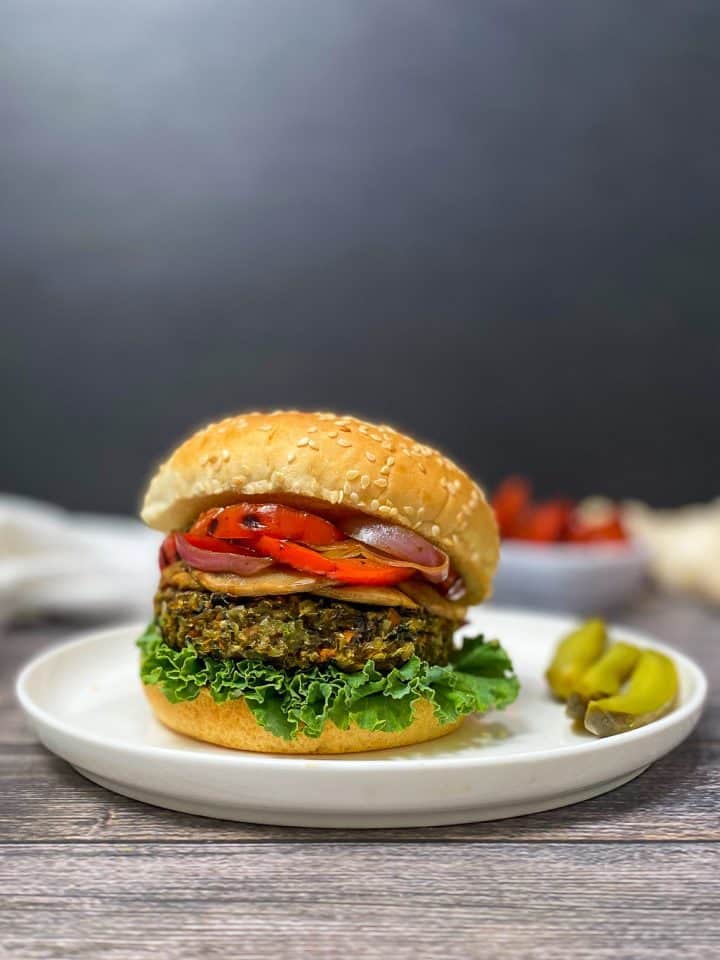
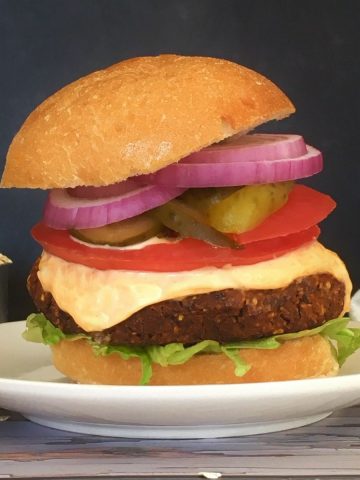
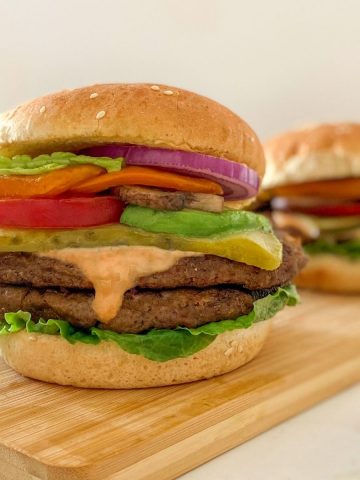
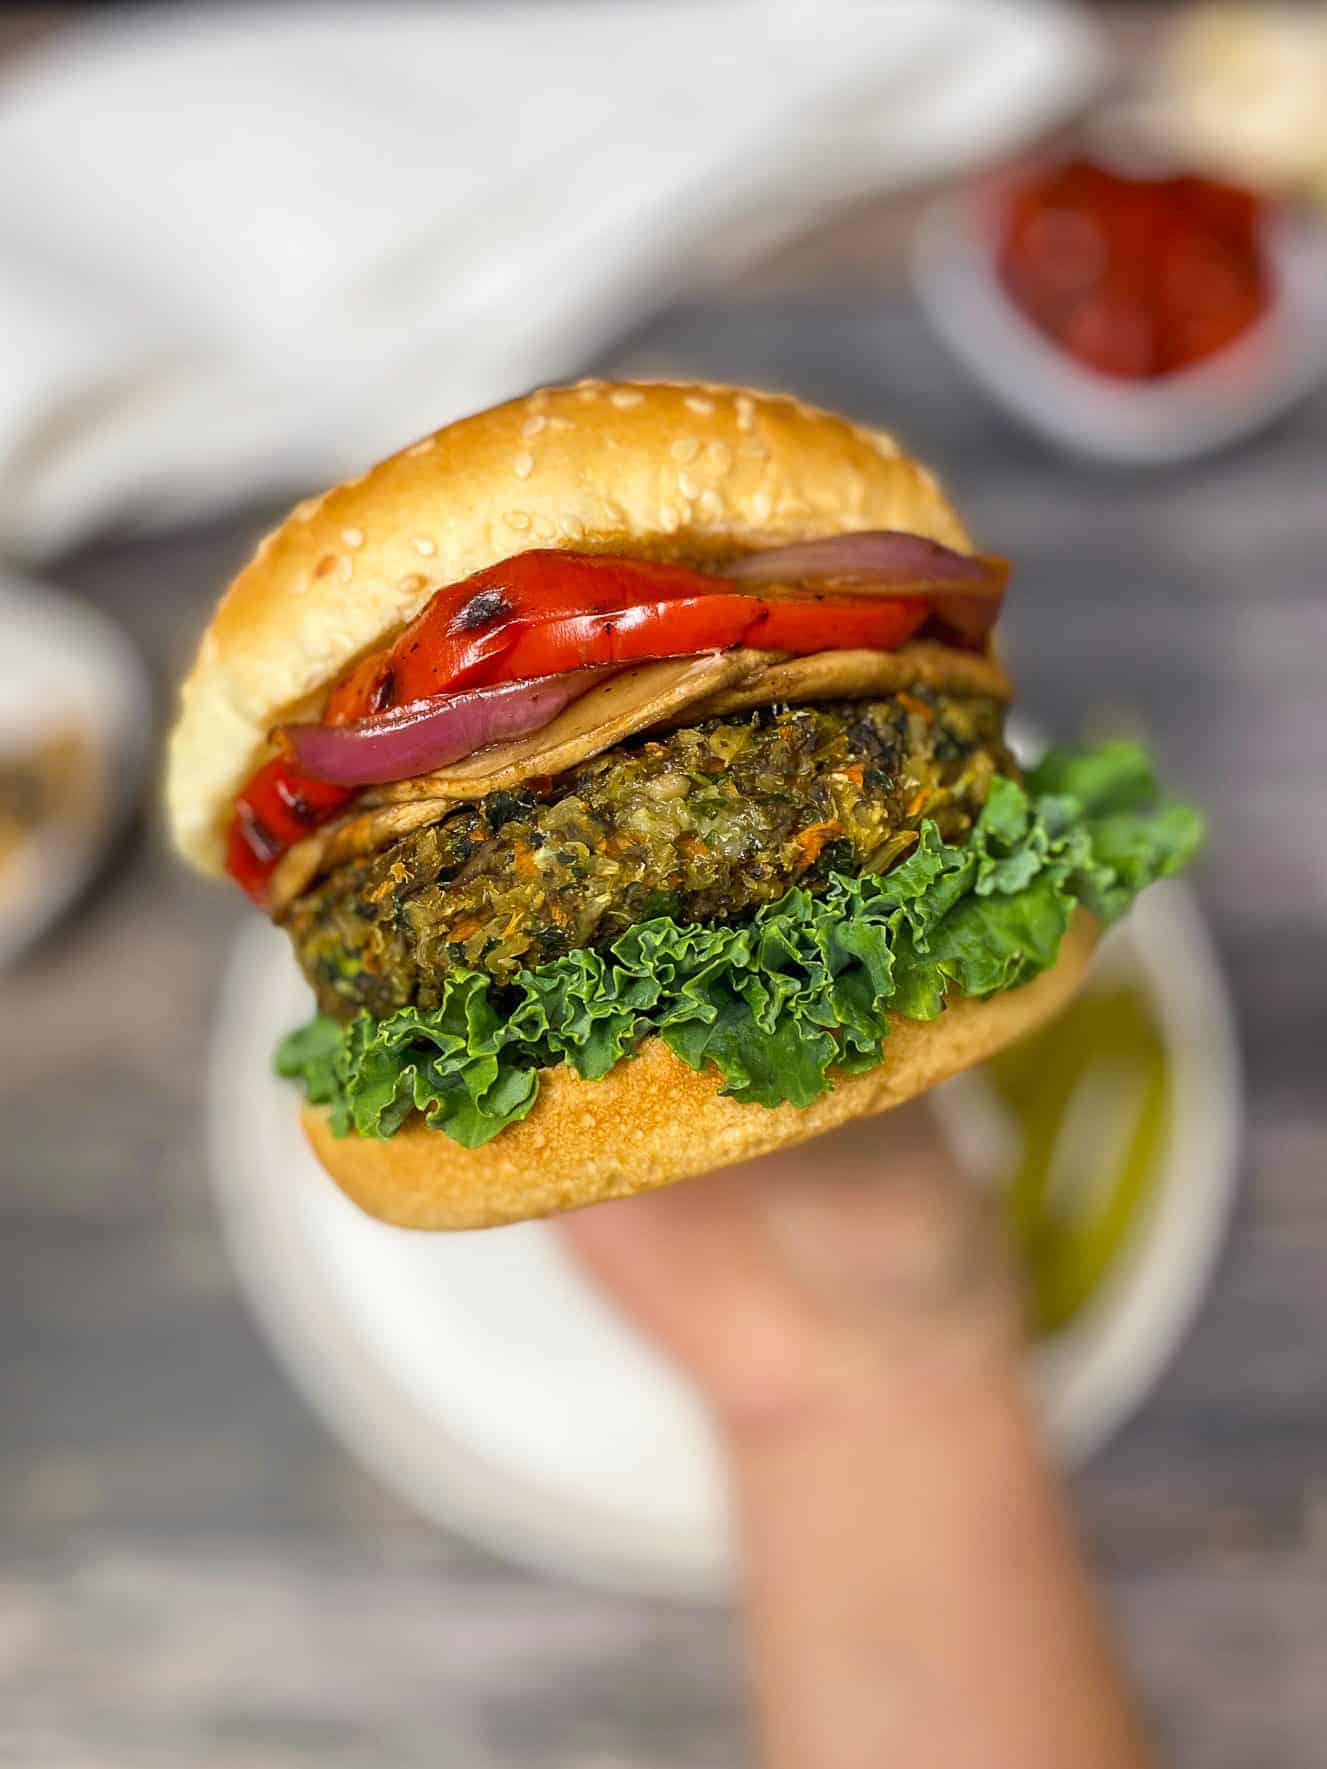
What toppings go on a mushroom risotto burger?
You may top this burger just like you’d top any other veggie or vegan burger!
Go classic with onion, pickles, tomato, ketchup, mayo and mustard.
Or, sauté some onions, peppers, and mushrooms. I love adding more mushrooms to this burger, because I can never have enough mushrooms!
For the sauce, I use some of my oil-free homemade mayo with a dash or two of sriracha to make a chipotle-style, spicy sauce. Amazing combo and highly recommend it. 🙂
Storage
Store any leftovers in the refrigerator for 3-4 days and reheat in the oven or in a skillet on the stove top.
To freeze, do so in a single layer until solid, and then transfer to a freezer-safe airtight container, using parchment paper between layers to prevent sticking.
You may keep these frozen for up to 3 months and reheat in the oven or in a greased skillet.
Expert Tips and Tricks to get it JUST right!
- For even bigger flavour, cook your rice in vegetable broth, rather than water. (If you don’t already have leftover rice in your refrigerator, that is.)
- When chopping your veggies, make sure everything is very finely chopped. You don’t want large pieces of vegetables or your mushroom risotto burgers won’t hold very well and you don’t want these delicious burgers to fall apart. That’s why using a food processor is best, and quickest.
- When you’ve made your batter, be sure to test the firmness and stickiness of your mixture. Just because a recipe calls for a specific amount of ingredients, there’s always potential for measuring errors, different brands of ingredients leading to different results, etc. So test it first. Test the batter by squeezing some of your mixture into a ball in your hands to see how well it holds. If it falls apart in your hands before baking, it won’t hold after baking either. Alternatively, if the batter is overly sticky, it may get stuck to the parchment paper on your tray, making flipping your burgers difficult. If the ball sticks to your hands, add more tapioca starch (or tapioca flour) until you have only a slightly sticky consistency.
- When forming the patties, do so in your hands. Form a ball first, squeezing the mixture together to ensure there are no gaps. You want a dense burger so that it holds together while baking. Then gently press down into a disc/patty shape and place on the baking tray. Do not form the patty on the tray itself, you don’t want to press the mixture into the tray, or it may get stuck to the paper while baking.


I do hope you give these delicious burgers a try. They have quickly become a family favourite here!
If you tried this recipe, please let me know in the comments below. I always love hearing from you! Don't forget to Subscribe to This Healthy Kitchen to be among the first to get my new recipes! You can also FOLLOW ME on Facebook, Instagram, Pinterest, and YouTube to see more delicious food.
Buon appetito
Rosa
📖 Recipe
Equipment


Ingredients
- 2 cups cooked brown basmati rice
- 1 lb white button mushrooms
- 1 yellow onion
- 4 cloves garlic peeled
- 1 medium carrot peeled
- 90 grams kale
- ½ cup frozen peas or canned
- ¼ cup nutritional yeast
- ½ teaspoon dried oregano
- ½ teaspoon sea salt or to taste
- 5-8 tablespoon tapioca starch or tapioca flour
Instructions
- If you do not have cooked rice, start by cooking according to package directions while you prepare the remaining ingredients.
- Preheat your oven to 425 degrees F and line a baking tray with parchment paper.
- Add your mushrooms to a food processor and finely chop them, scraping down the sides as needed. If you have a smaller food processor, you may need to do this in batches.
- Transfer the mushrooms to a large skillet and dry sauté over medium heat until the moisture and liquid evaporates, approx 6-8 minutes.
- Meanwhile, add the onion, garlic, carrot and kale to your food processor and finely chop these as well. Scrape down the sides as needed, and make sure there are no large chunks remaining. Transfer to the skillet with the cooked mushrooms, along with the peas, nutritional yeast and seasoning and sauté another 2-3 minutes, then remove from heat. Add 1.5 cups worth of your cooked rice to the skillet, mix well and taste the mixture and add more salt or other seasoning if desired.
- Add the remaining half a cup of your cooked brown rice to a small blender with a tablespoon or two of water, as needed to get it pureed. Once smooth, transfer to the skillet and mix well. Now add the tapioca starch, starting with 5 tablespoons and mix until combined. Form a ball in your hands to test the mixture and see how well it holds. You want the mixture to hold together, but not be overly sticky. If it's very sticky and difficult to form a ball or patty, add another tablespoon or two of the tapioca starch, mix well and test again.
- Now divide the mixture into six patties. You’ll use a scant ¾ cup of the mixture per burger. Start by forming a ball in your hands and squeezing gently to ensure there are no gaps. Then flatten in your hands into a patty shape and place down on the baking tray. Do not press the patties into the tray or they may stick while cooking.
- Bake for 20 minutes, then remove from the oven and carefully flip each one. Return to the oven for another 10-15 minutes, until the edges are golden brown. Remove from the oven and let them rest at room temperature for 5 minutes before serving.
Notes
- For added flavour, cook your brown rice in vegetable broth.
- Make sure your veggies are very finely chopped, but not pureed. Large chunks of veggies will not hold well.
- When testing the mixture, squeeze some into your hands to see how well it holds together. The pureed rice will make the batter a little sticky, which acts as a binding agent. However, it should not be so sticky that you can’t form a ball or patty without the batter completely sticking to your hands. Add more tapioca starch until you reach a slightly sticky consistency. You should need somewhere between five and eight tablespoons. (It will depend on how much water you used to blend your rice.)
- When forming your patties, do so in your hands and not on the tray. Since there’s no oil in this recipe, if you press them into the tray too much, they will stick to the parchment paper. Squeeze the mixture into a ball in your hands, and then flatten into a patty shape and place on the tray gently. If the patties are still sticking to your hands, use slightly damp hands to form them.
Barbara Thorpe says
Is it 2 cups of cooked rice or 2 cups of rice, cooked? The latter seems like a ton of rice!
Looking forward to trying this.
Thank you
Barbara
Rosa says
It’s 2 cups of cooked rice. Enjoy!
Tina says
Do you think I could use wild rice instead of brown basmati?
Rosa says
Hi Tina, I haven’t tried that so I can’t say for certain.
Nancy says
Delicious! Love the full body flavors of the mushrooms, carrots, kale. onion and spices. Love the crunchiness from the baked brown rice in the burgers. Look forward to making again.
Rosa says
Thanks so much for the review Nancy. So glad you enjoyed the burgers. 🙂
Darlene says
Hi there! This recipe seems so good. I’d really like to make it! I do not do Nutritional Yeast. So I’m sure it will be ok to omit, right?
Thanks in advance ,
Darlene
Rosa says
Hi Darlene, it should be fine without, it’s mostly for flavour. But you may need to adjust the tapioca as indicated in the recipe, if the batter feels sticky. Enjoy!
Lucie says
Mmm 😋 this was SO GOOD 😋
Rosa says
So glad you enjoyed Lucie!
Jennifer Kluender says
Can I use corn starch in place of the tapioca flour/starch?
Rosa says
Hi Jennifer, that should work, hope you enjoy. 🙂
Gary says
This is my go to burger recipe. Not too mushy, like many other recipes. Great flavor. It does take some time for me to finely chop all of the ingredients, but it is worth it.
Rosa says
Thanks so much for the review Gary! So happy you love it. 🙂
Wayne says
Is this 300 calories for all 6 burgers or just the one?
Rosa says
The nutritional info is for one burger. Enjoy!
Wayne says
Just looking at the ingredients I don’t see 300 calories so I reduced the recipe to 1 burger and loosely recalc’d the calories.
58 rice
20 mushrooms
10 onions
4 carrots
6 NY
10 Peas
40 tapioca starch
=== 160 kCalories. Where did I mess up.
Rosa says
Hi Wayne, thanks so much for pointing that out. It looks like my app was using uncooked rice, instead of cooked rice, which made a big difference! I’ve updated the nutritional info to reflect COOKED rice and now I’m getting 150 calories a burger. I apologize for the error. 🙂
Gary Jorgensen says
This is my new favorite burger. Great flavor, holds together well.
Rosa says
Thanks so much for the review Gary. Thrilled you enjoyed!
Linda says
Is there an alternative to the tapioca starch or flour?
rosa says
Hi Linda, oats might work, but I haven’t tried it that way. Let me know if you give it a try.
Linda says
Thanks! I will blend them in the vitamix to make a flour and try that.