


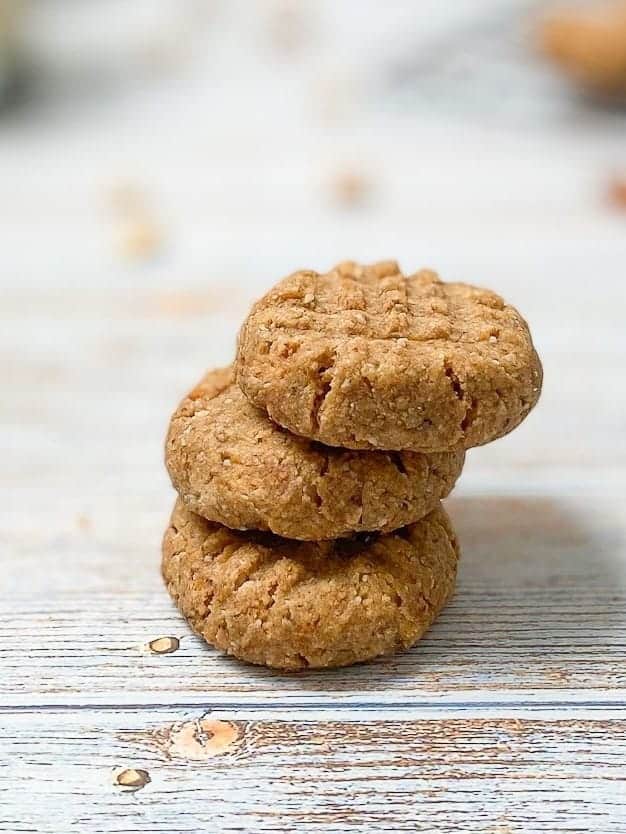
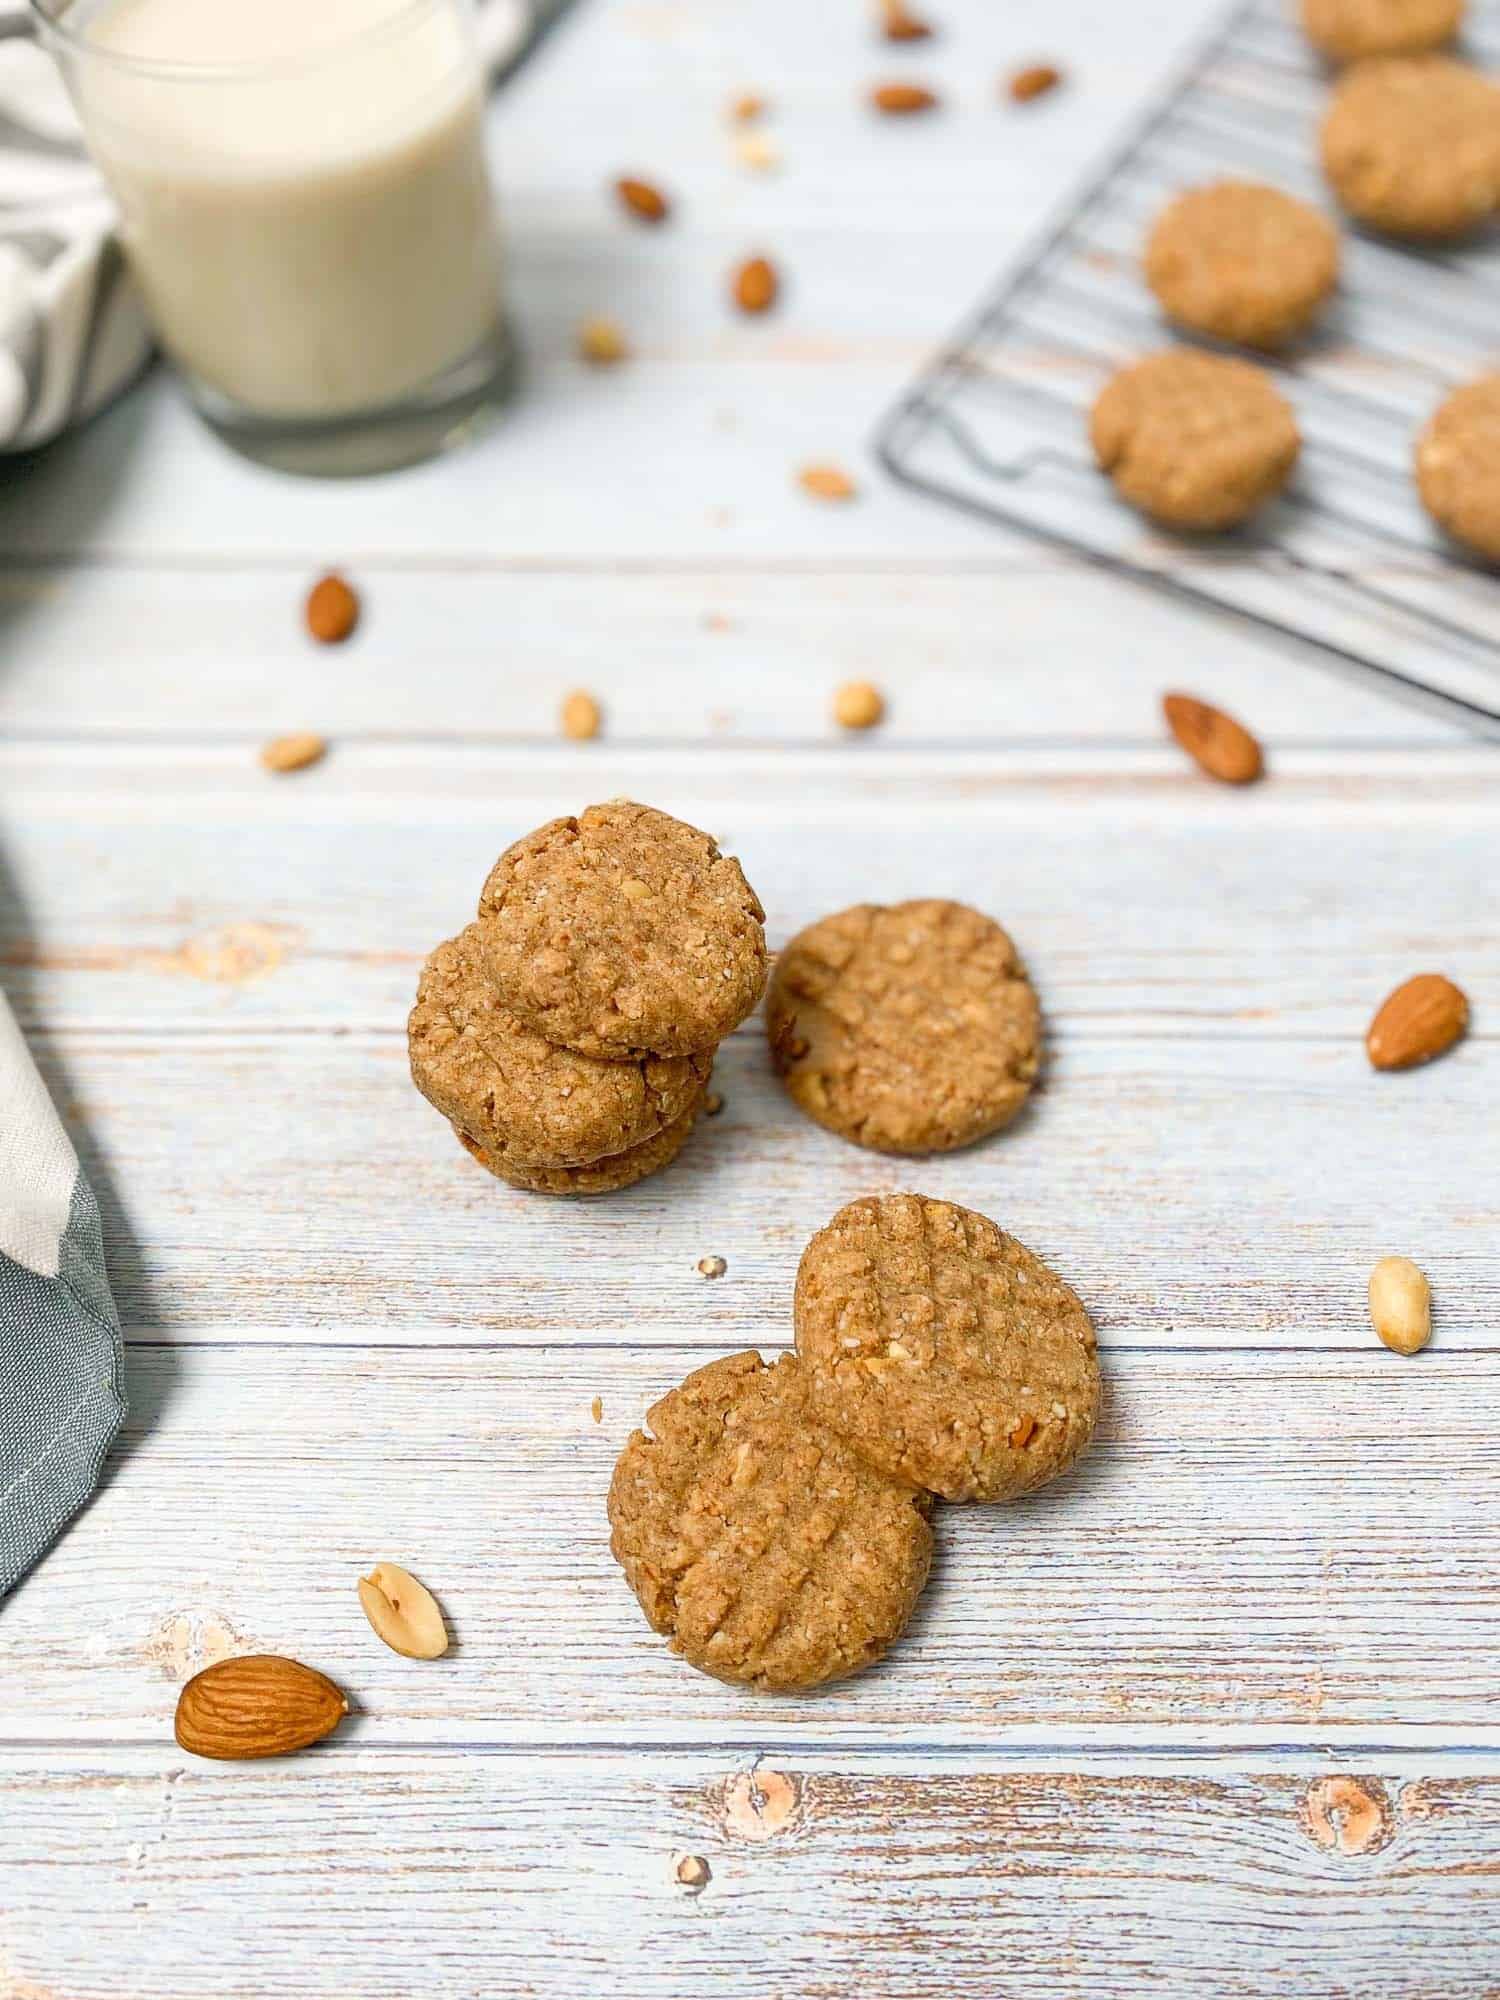
Moist with crunchy edges, and tons of nutty flavour, these almond flour peanut butter cookies are bursting with deliciousness. They’re simple to prepare, only 6 ingredients and 20 minutes is all you need to get these done. Clean ingredients have never tasted this good!
The smell of these cookies baking in your oven is nothing short of heavenly! Just like my almond flour cookies, you’ll want to dig in to this peanut butter version before they’re ready, but please, please wait. You won’t regret it, promise!
Why you’ll LOVE these cookies
- They’re pantry friendly, made using ingredients that you probably already have available, especially if you enjoy baking.
- Using simple methods, it can be a fun activity to do with your kids.
- Since there’s no eggs or raw flour in these, feel free to sample the batter! Just don’t go overboard! 😉
- There’s tons of protein in these, from the almond flour and peanut butter, so you can enjoy them for breakfast, a healthy dessert or an after workout snack.
- Plus, there’s no refined ingredients here at all, making these suitable for a whole food plant based (WFPB) diet. No oil, no refined sugar, no refined flour, just real food and ingredients. As an added bonus, these cookies are also gluten free, so perfectly suitable for anyone with a gluten intolerance.
- Almond flour has a slightly sweeter flavour (and nuttier, of course). That means you can use less sugar (as I’ve done) and still get wonderfully sweet baked goods.
- Do you have 20 minutes? That’s all you need to get these delicious cookies made! Yippee!
What kind of peanut butter to use
You want to use thick peanut butter that is unsweetened and unsalted. Make sure to check the ingredients so that it contains ONLY peanuts. Alternatively, you can make your own homemade peanut butter.
If you can’t find any without salt, that will still work, just skip the called for salt in the recipe.
But definitely avoid any added oil as the texture of your cookies will be affected.
How to make this recipe
(This is a summary with step by step photos, full recipe measurements and instructions are in the recipe card below.)
Start by gathering your ingredients, and use the weight measurement for measuring the almond flour if possible.
Weight is always most accurate, and especially important for baking. Almond flour weighs less than regular flour, so again, try not to go over.
If you don’t have a kitchen scale and must use volume, spoon and level your measuring cup, rather than scooping.
To a large mixing bowl, add the peanut butter, maple syrup and vanilla and mix very well. (photos 1-2)
In another small bowl, whisk together the almond flour, baking soda and salt. (photos 3-4)
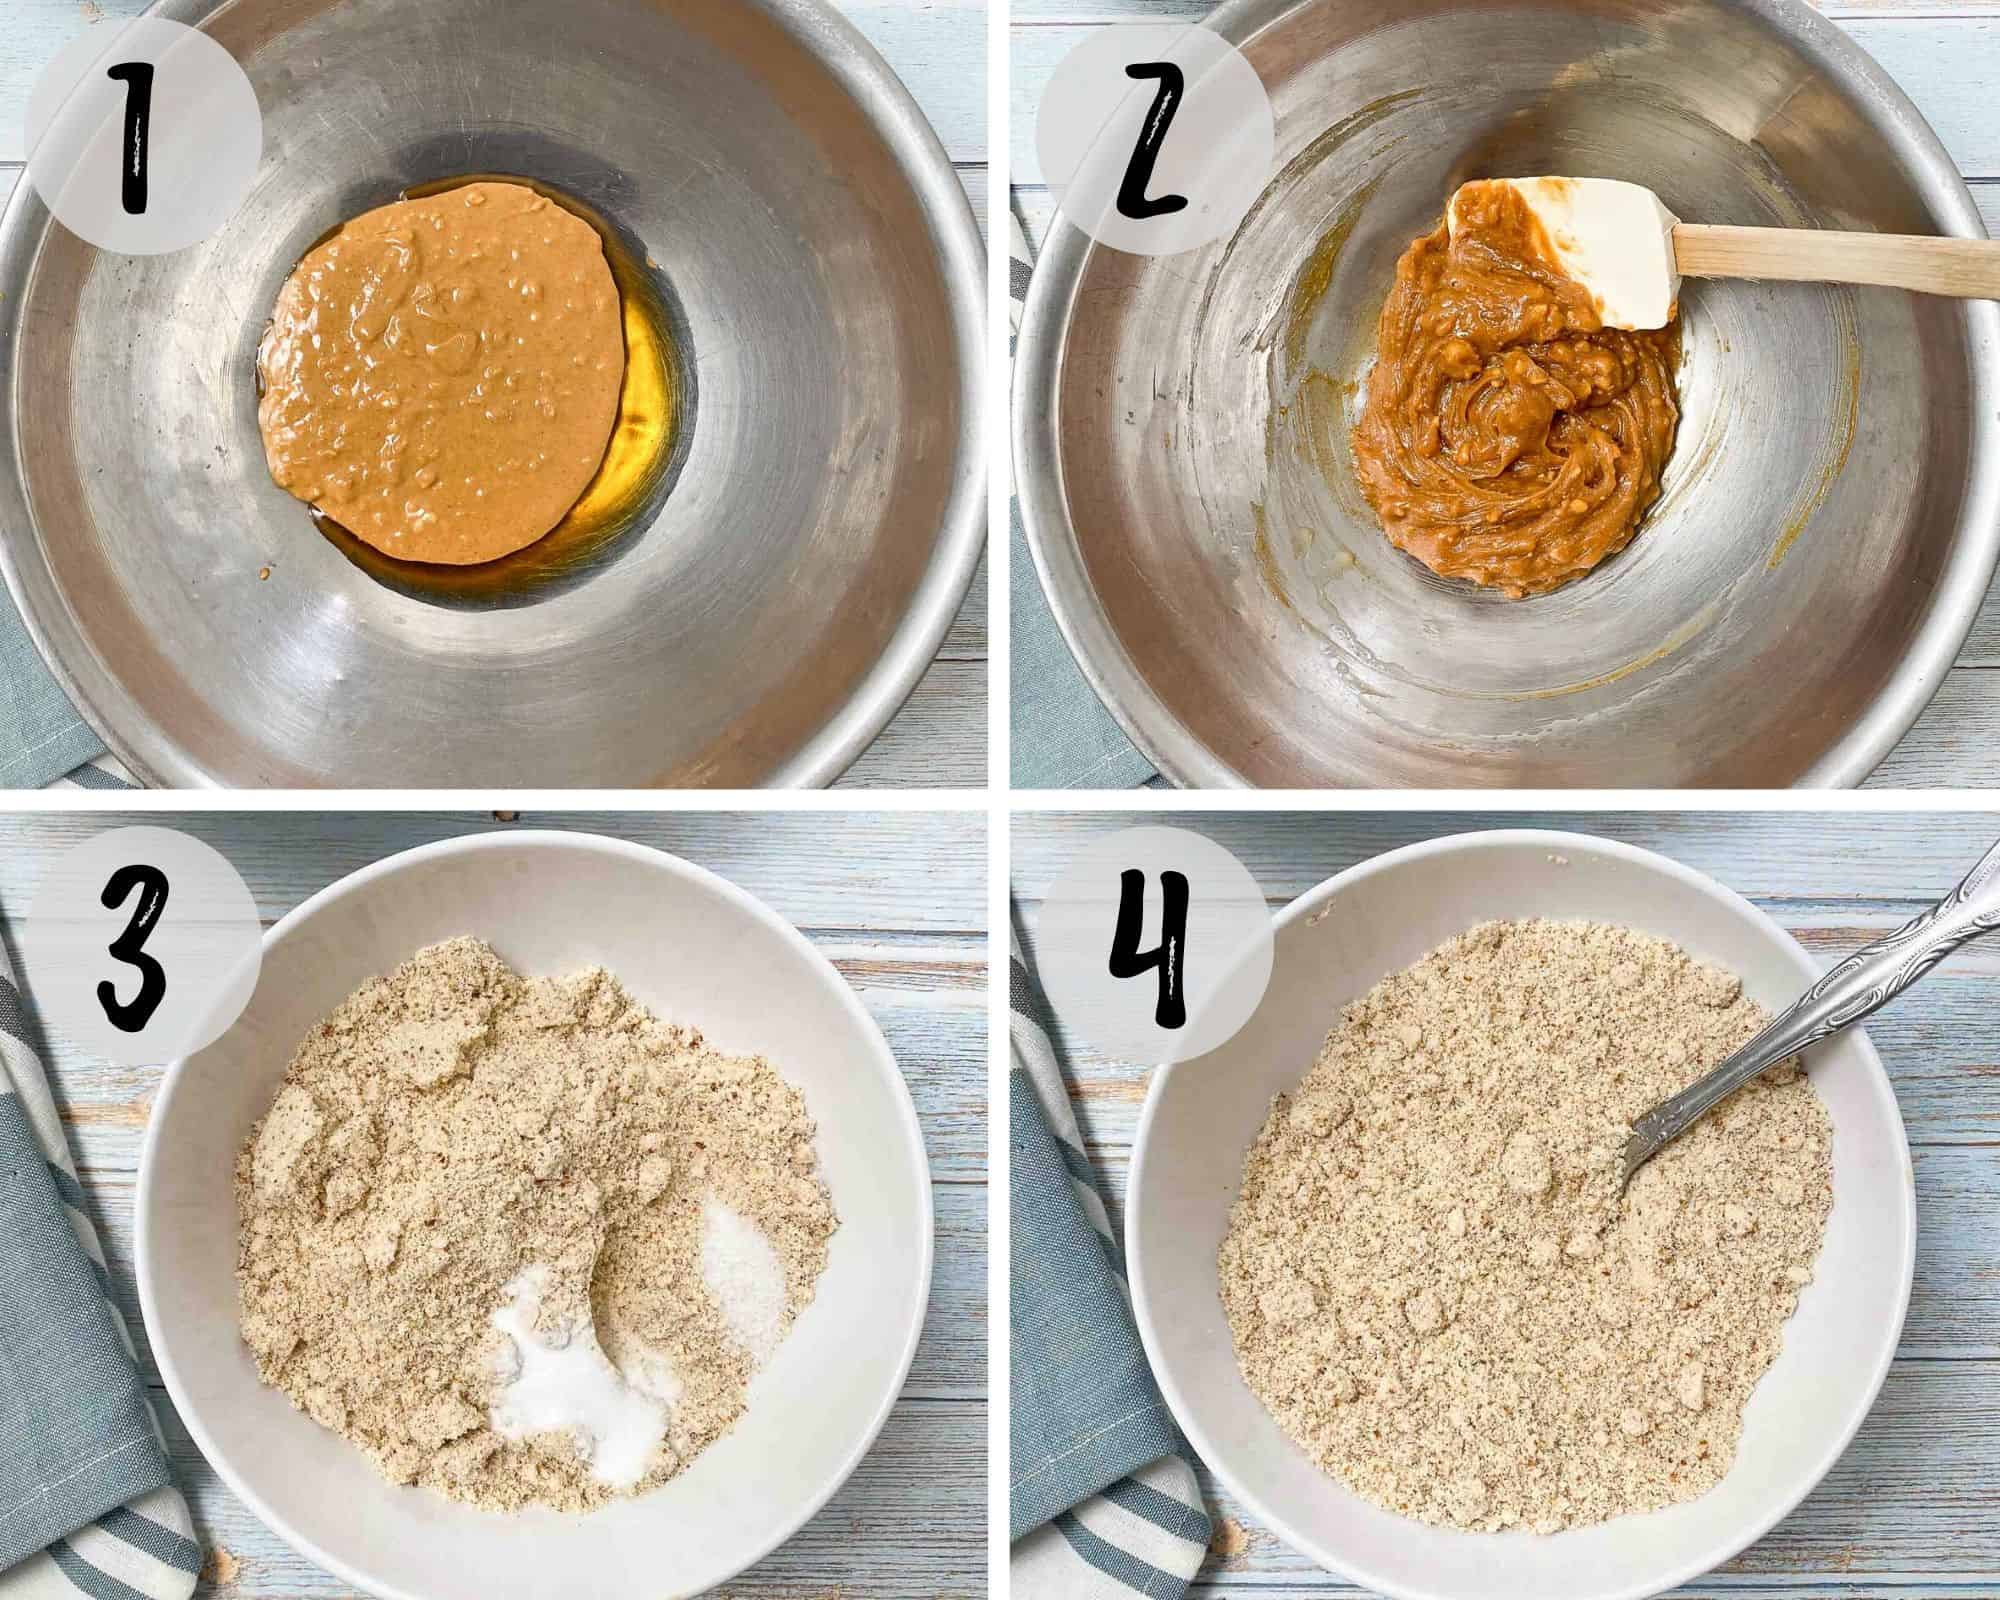
Now add your dry mixture to the bowl with the wet and mix well. Keep mixing until incorporated. (photos 5-6)
The mixture will be thick and sticky, but that’s what you want so the cookies will hold their shape when baking.
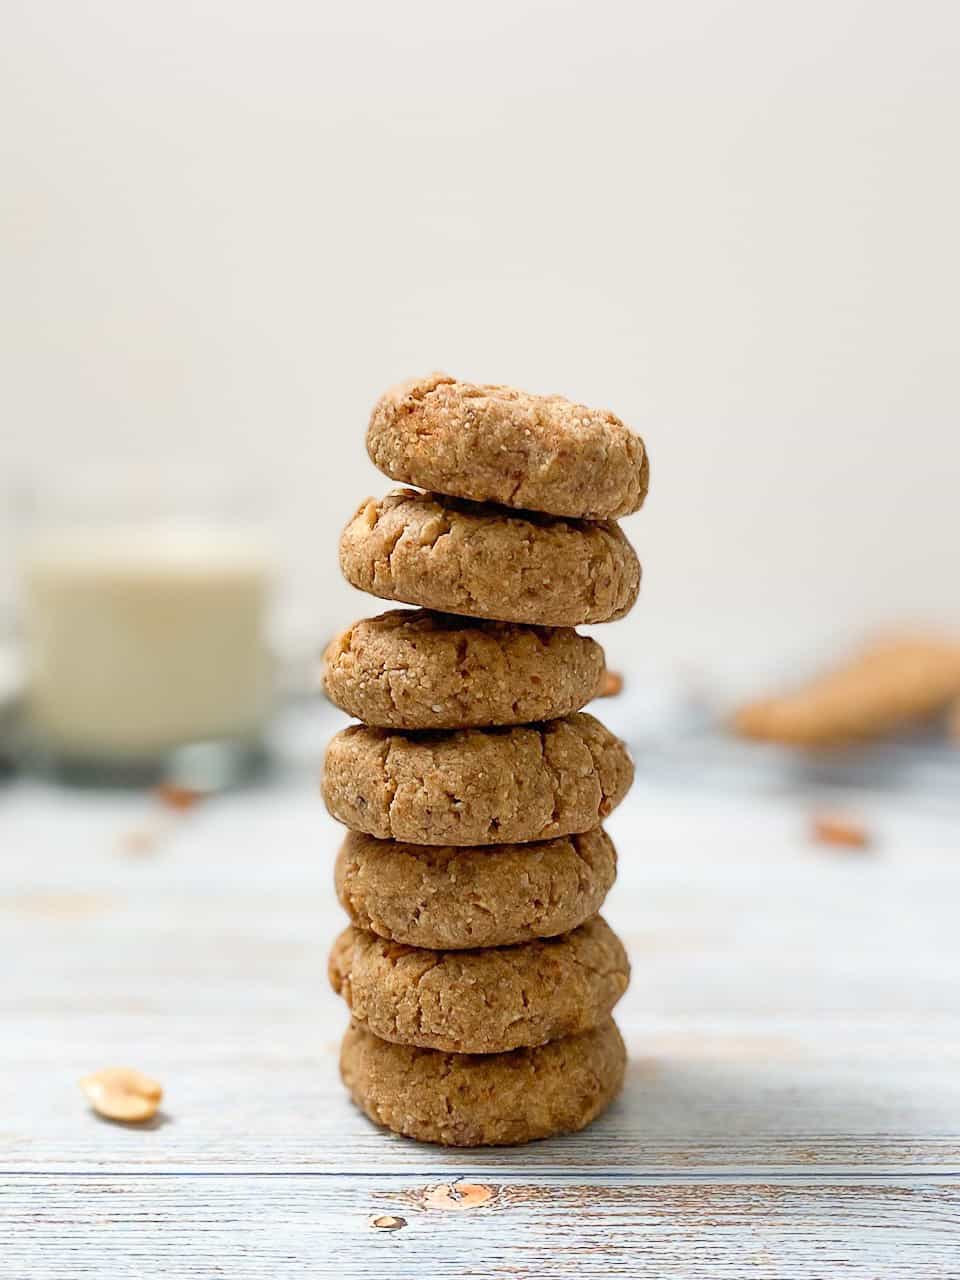
Once thoroughly mixed, divide your batter to make 16 portions. I separate mine into an 8 “slice” pie shape (photo 7) and then use each wedge to make 2 balls of dough.
This will help ensure you have uniform, same sized almond flour peanut butter cookies, but it is not crucial to the final result.
Now roll two balls out of every wedge. The dough will be thick, so use a bit of pressure to roll out smooth balls of cookie dough. (photo 8)
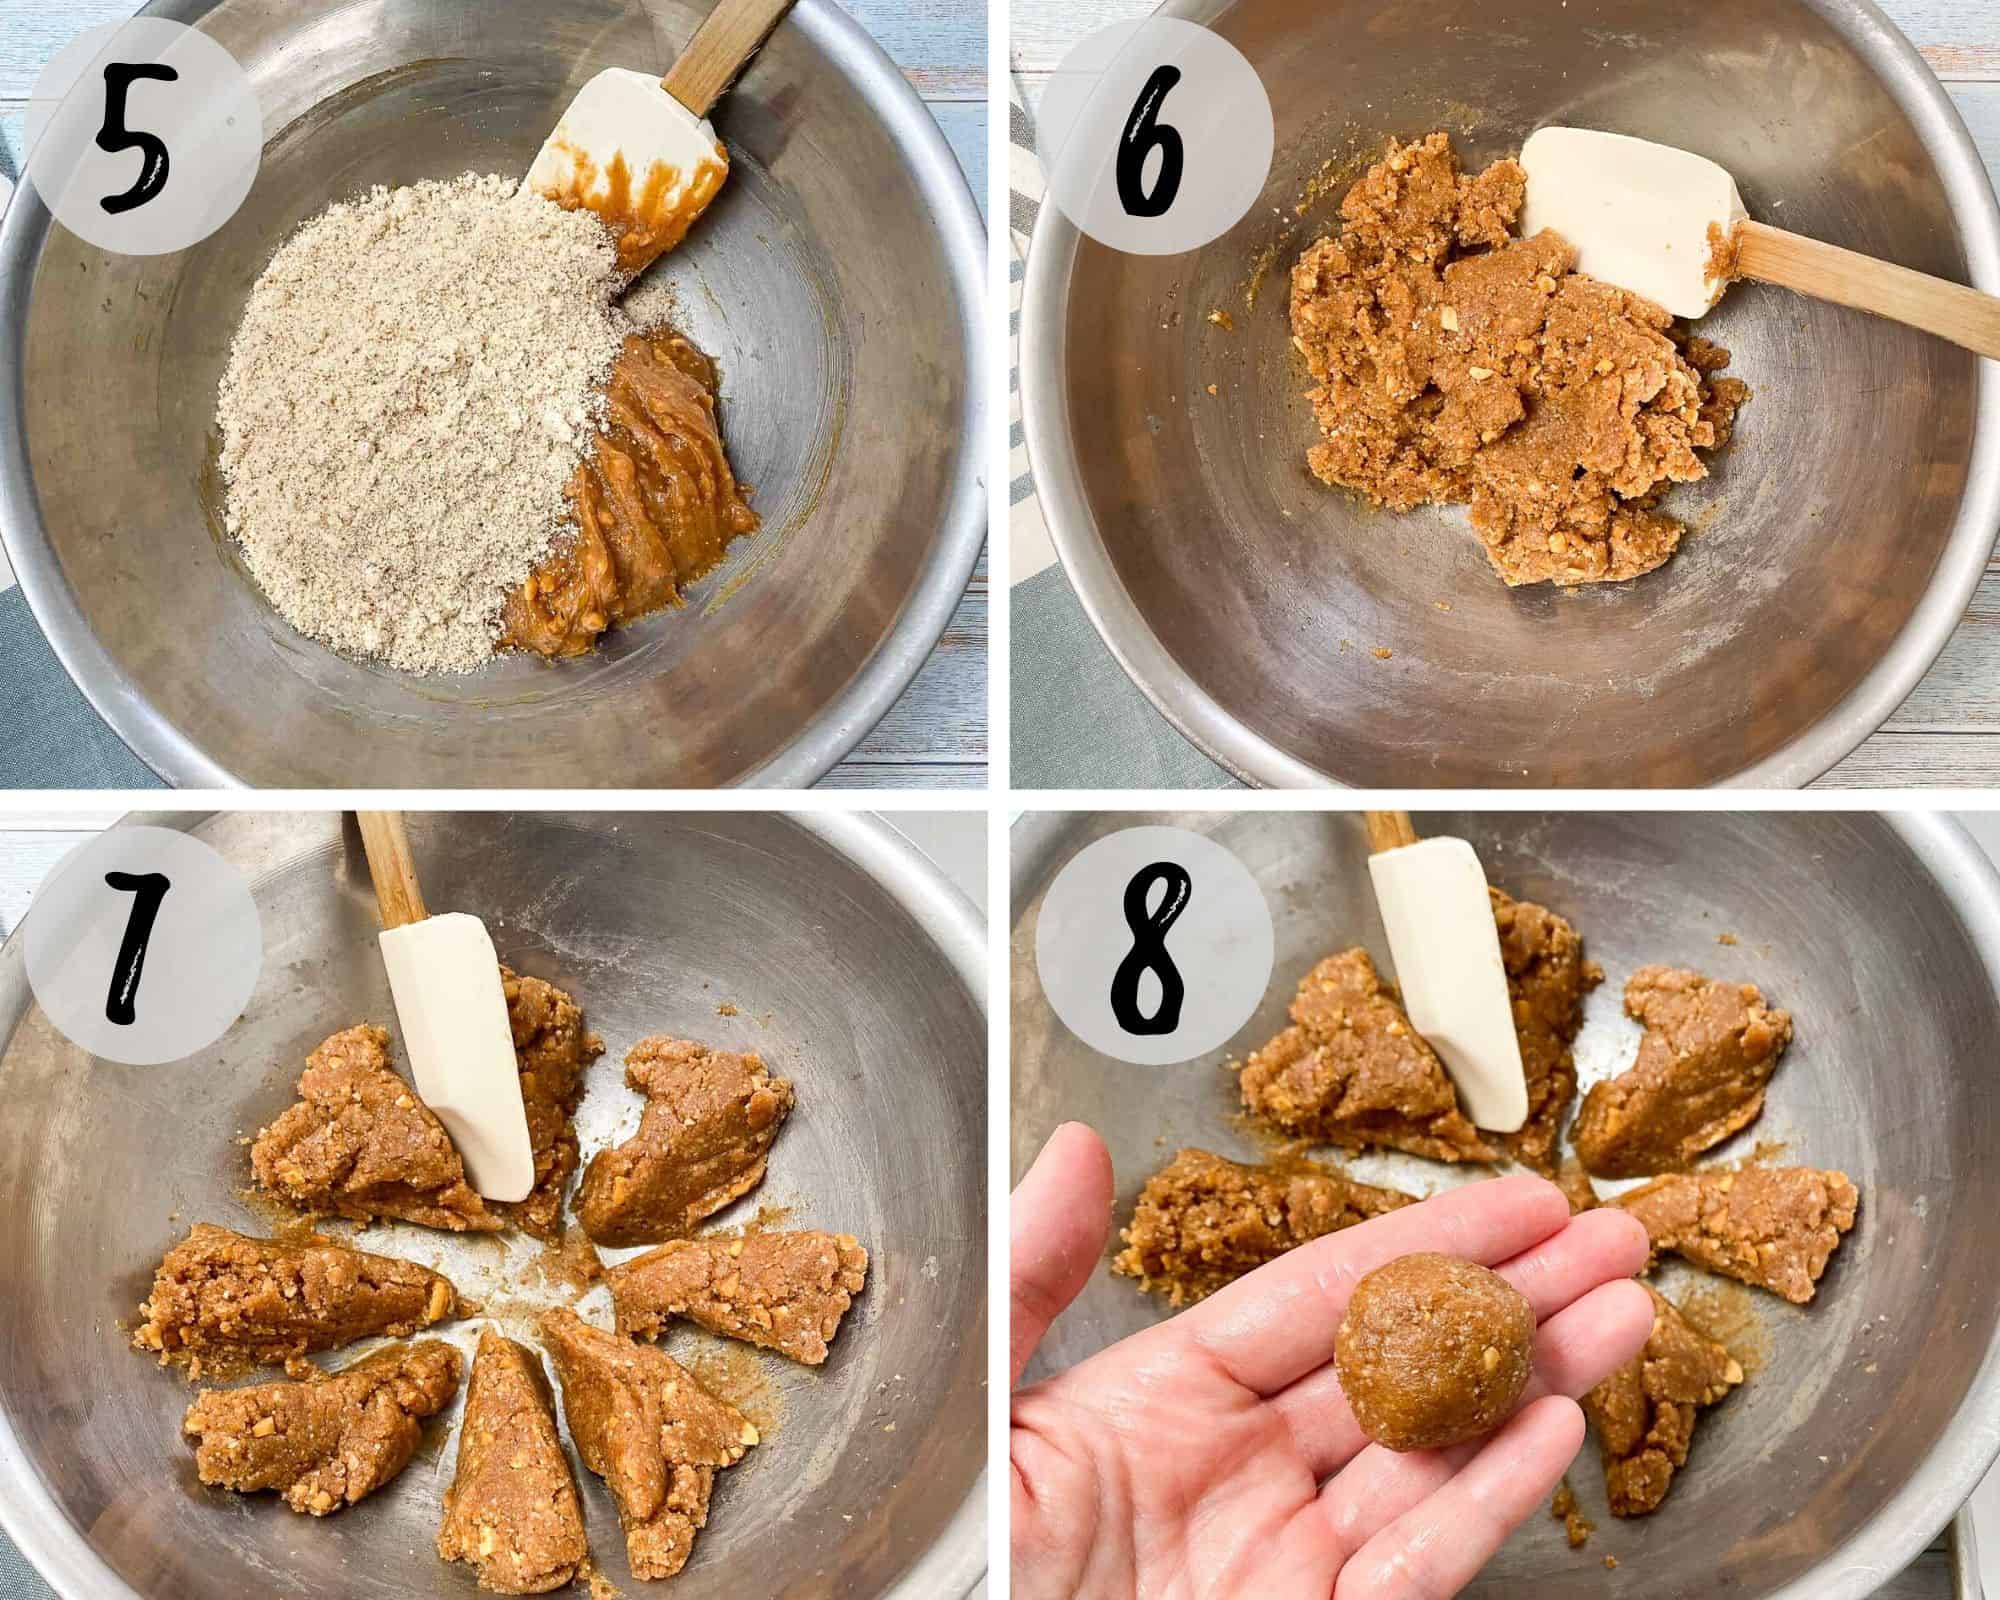
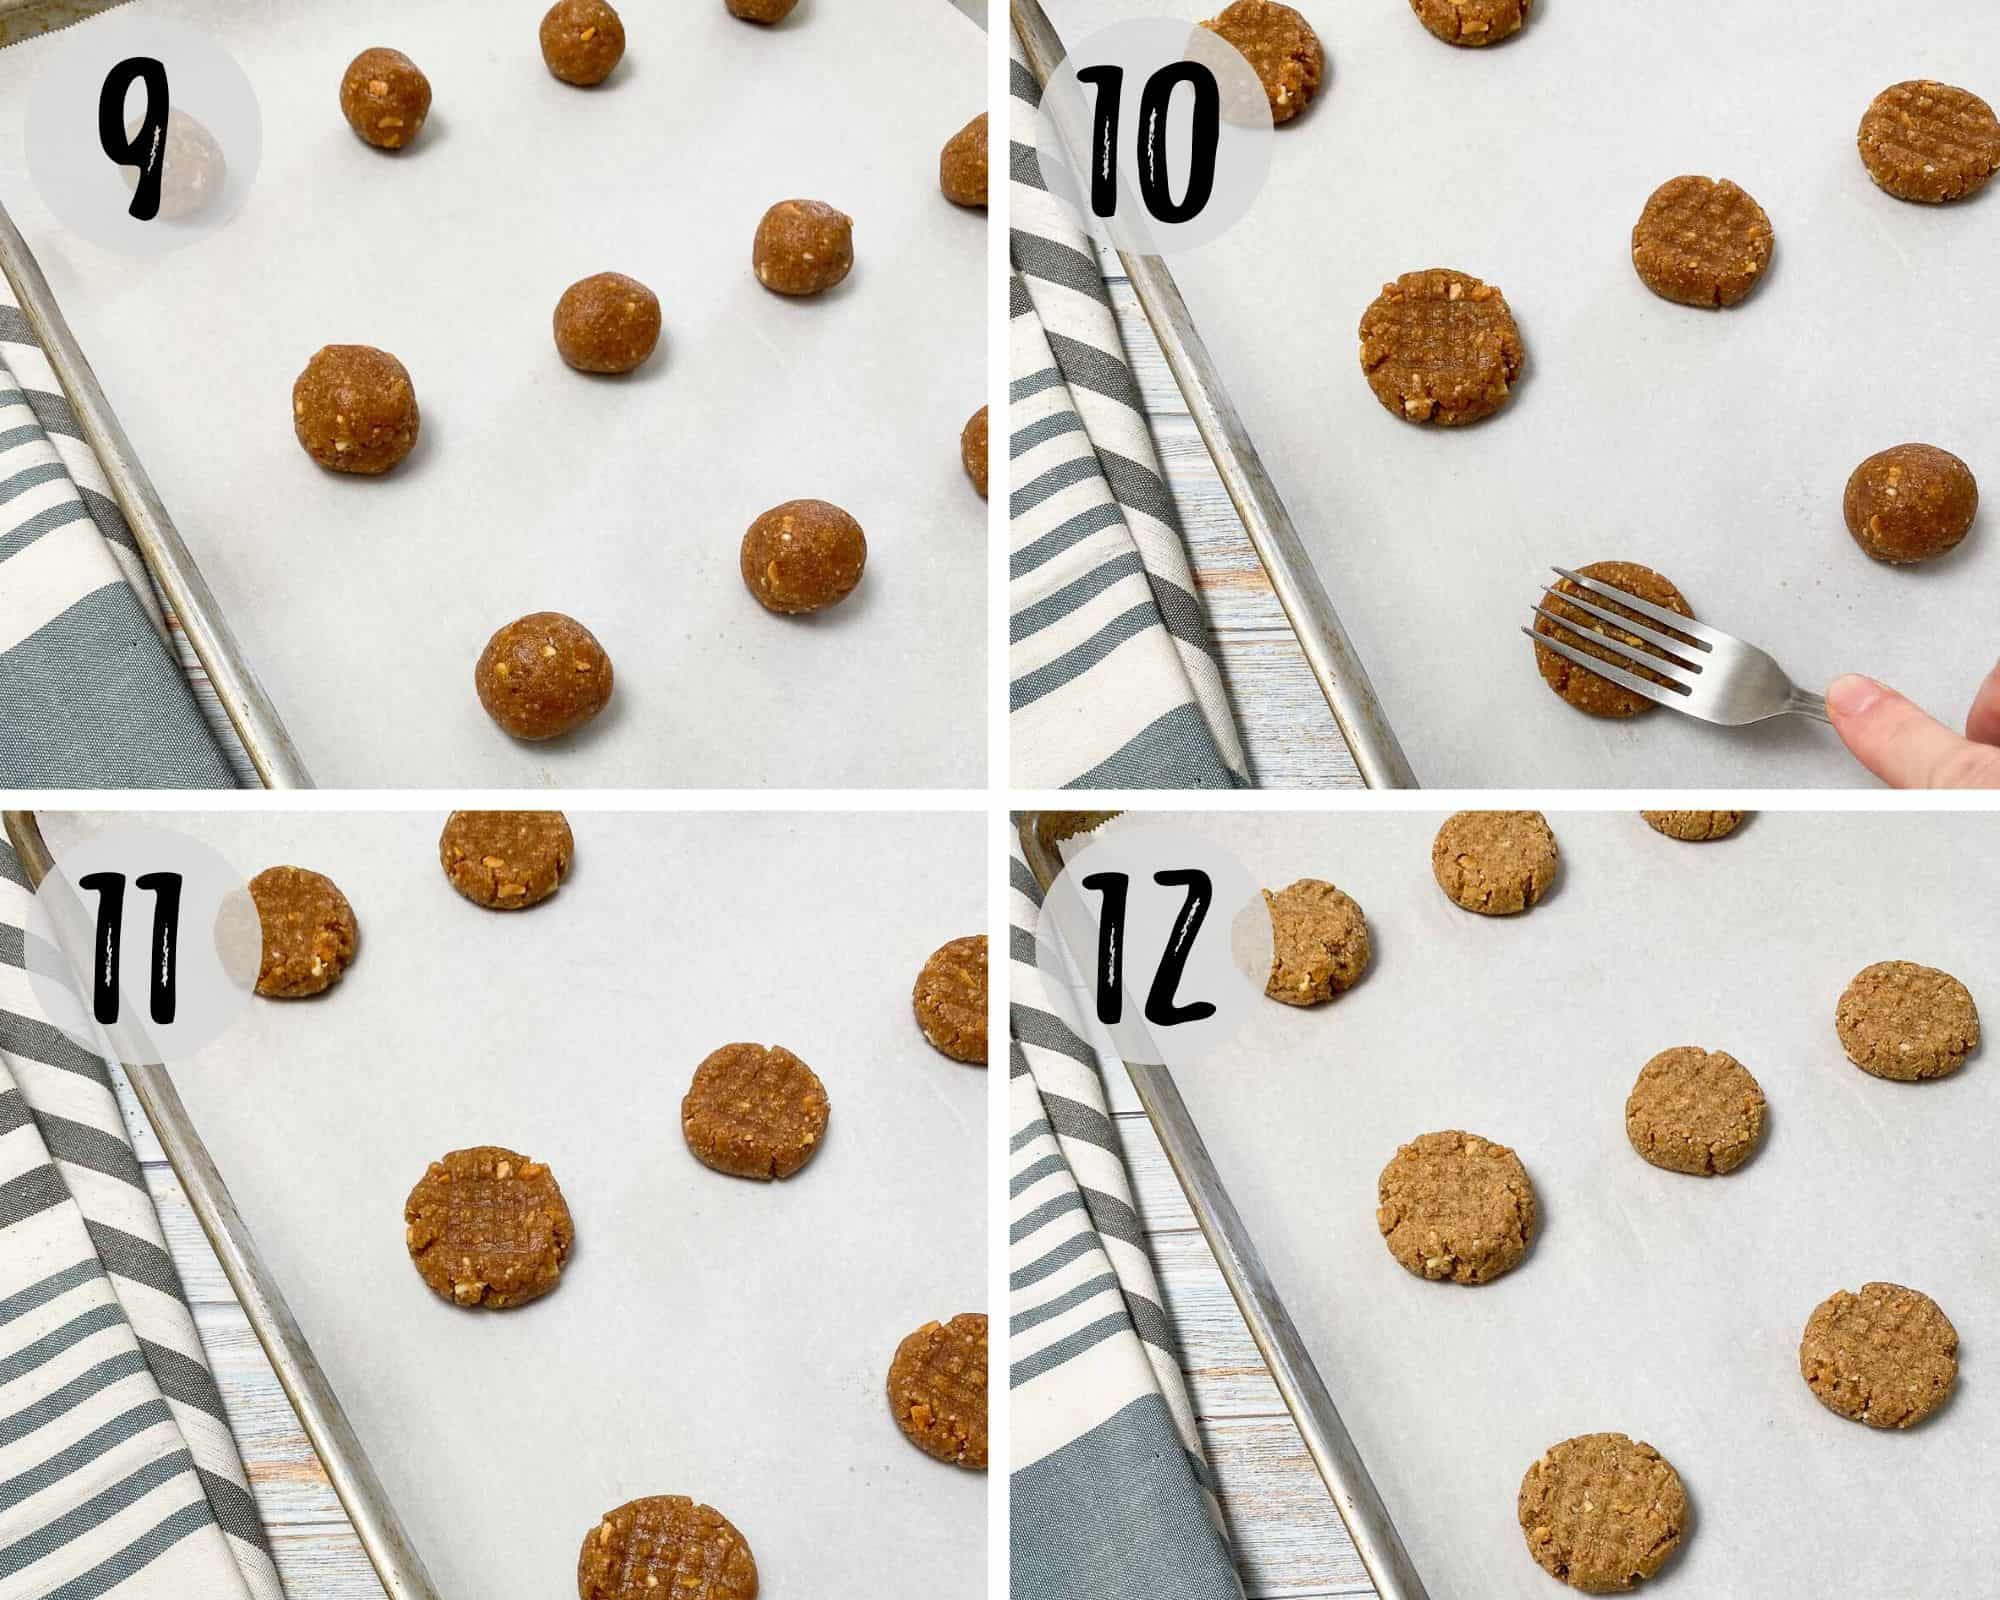
Place each one on your prepared baking tray or cookie sheet. You should get 16 cookie dough balls. (photo 9)
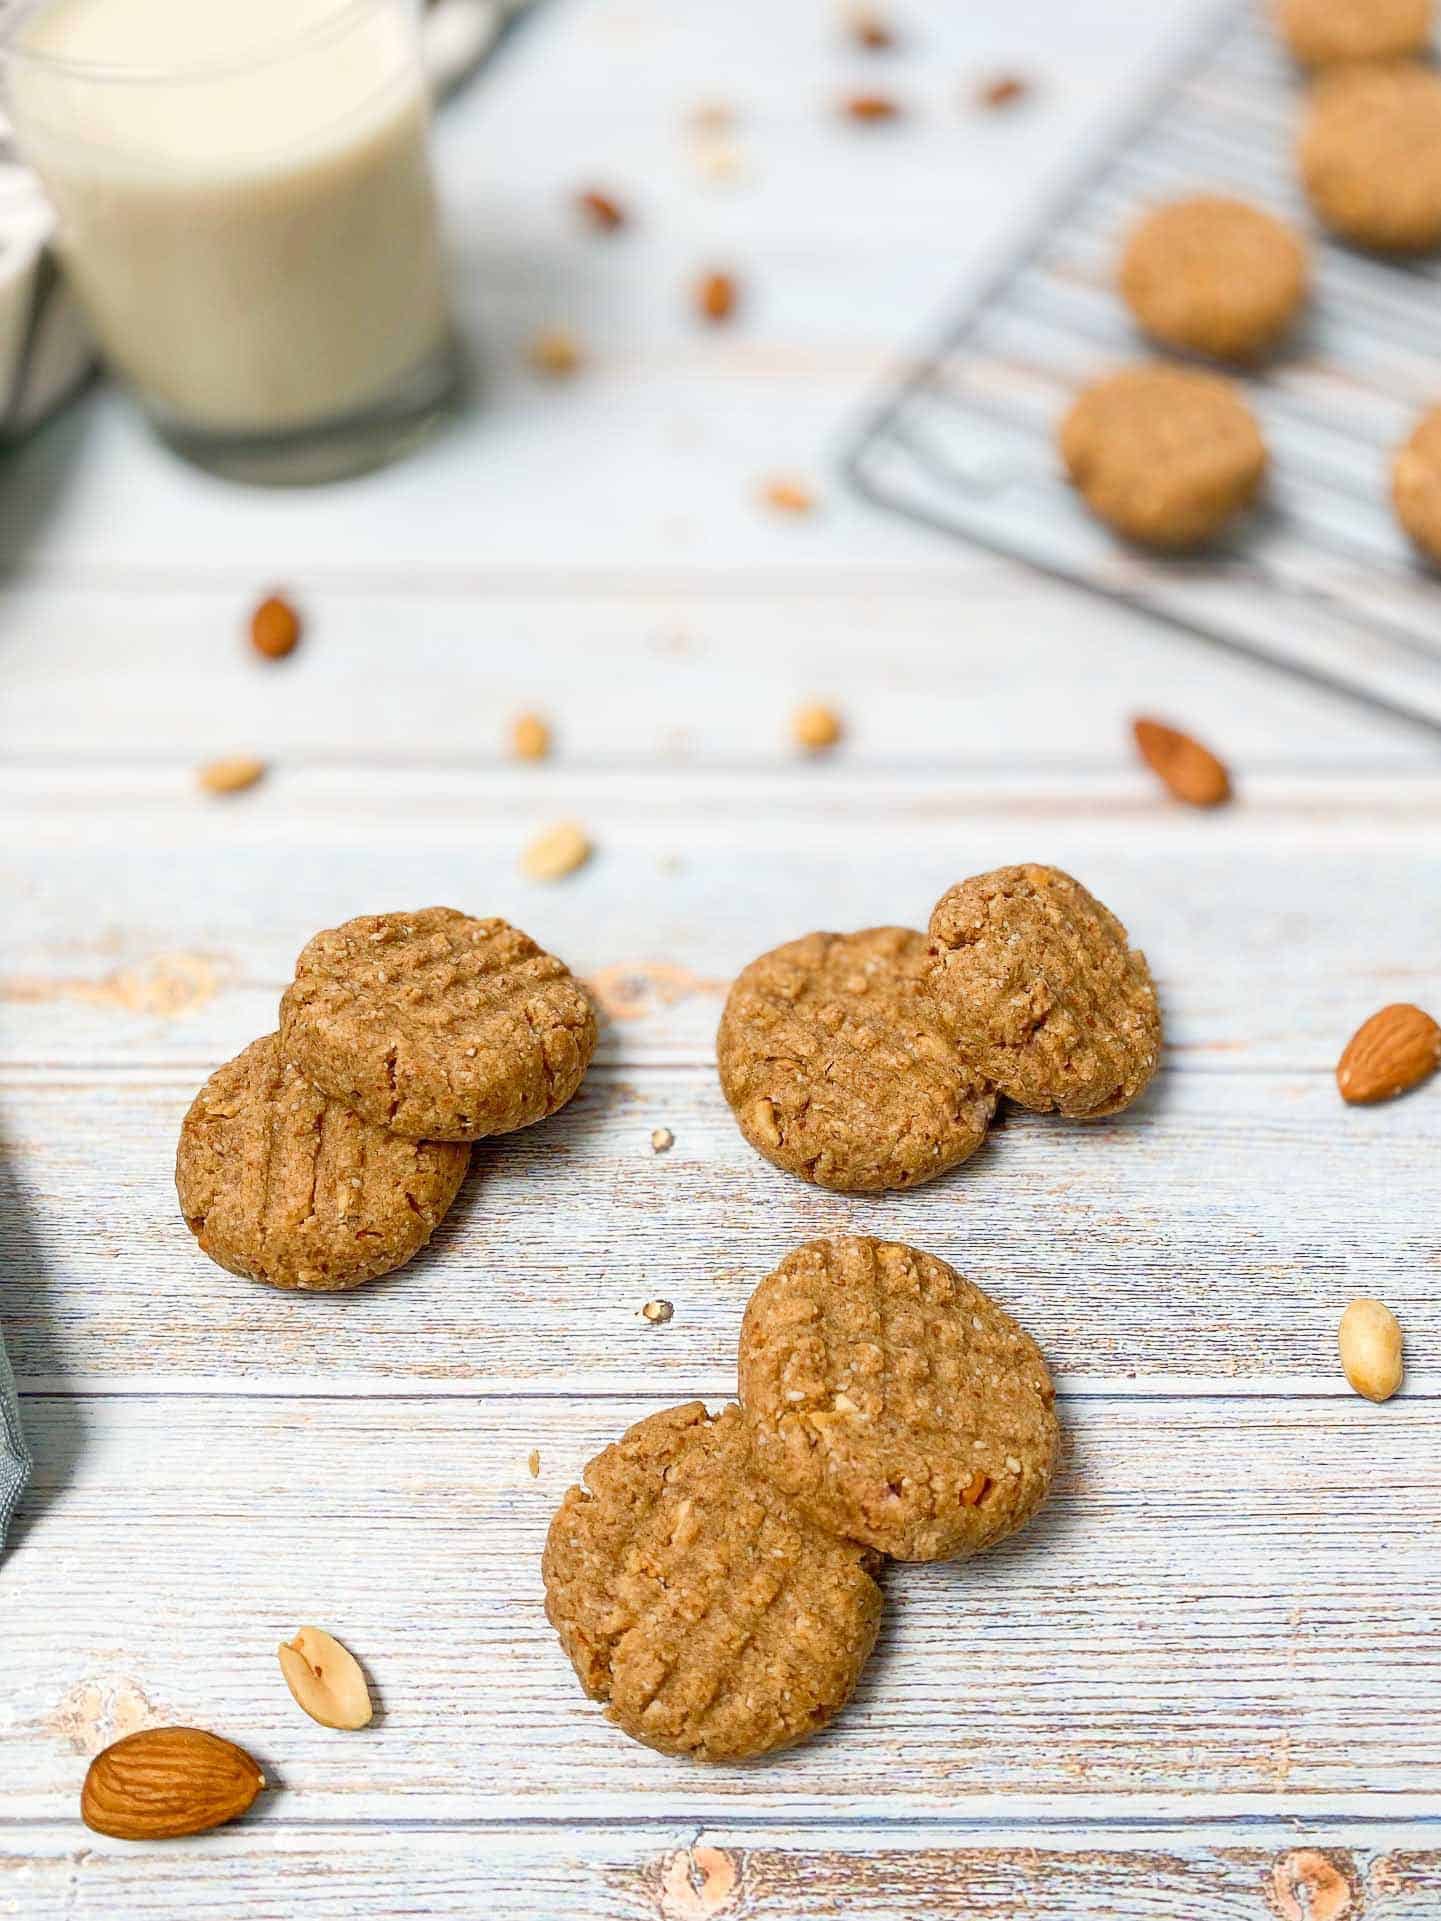
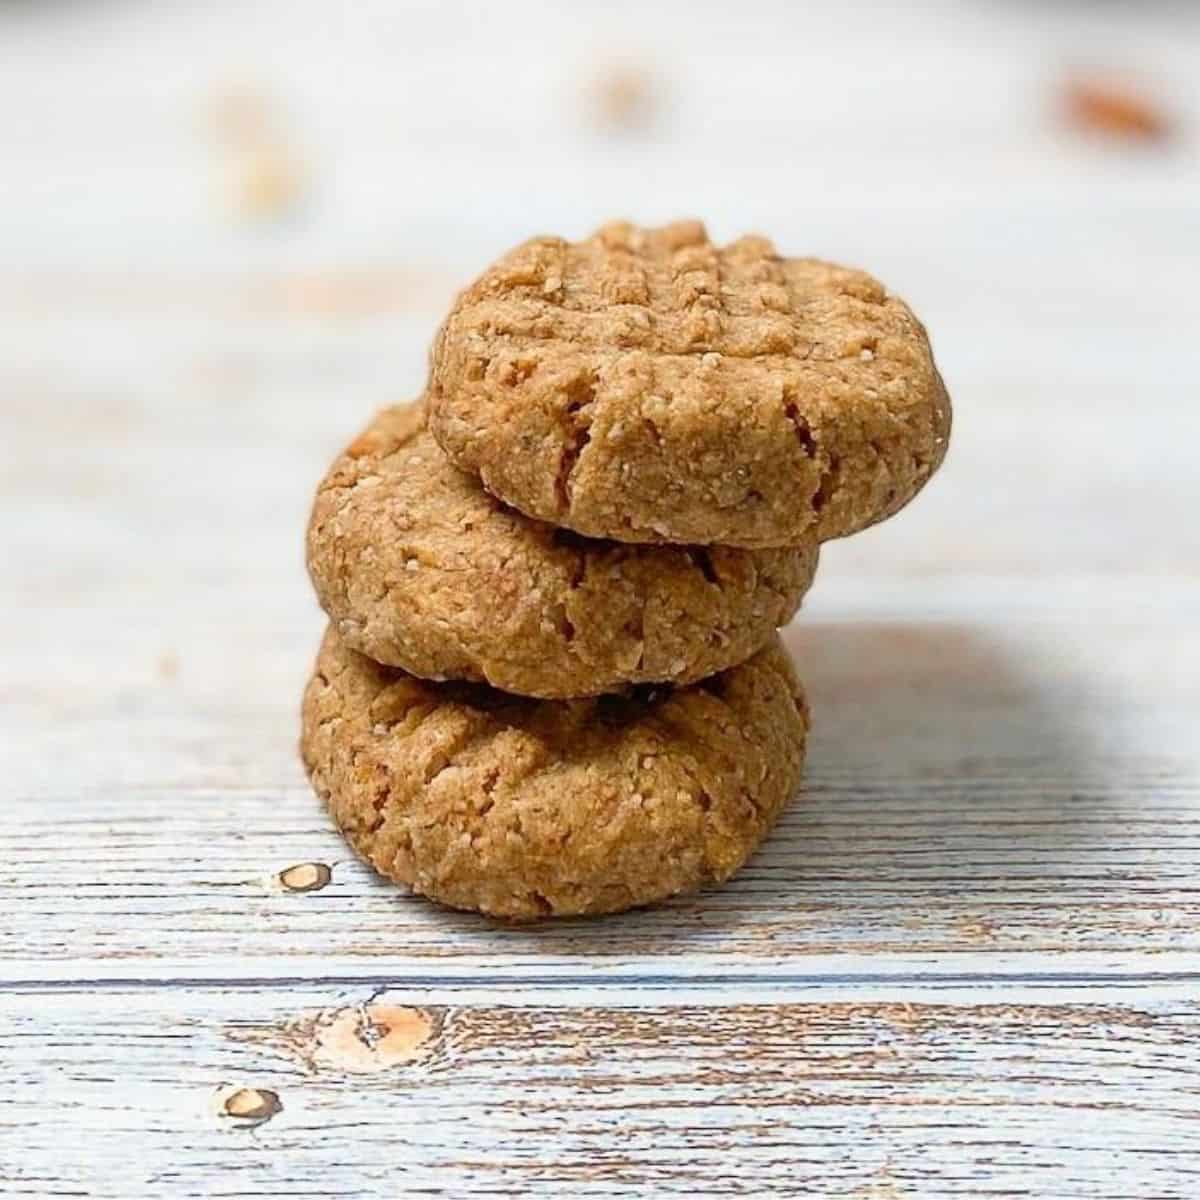
Now, using a fork, press each one down to make a crisscross pattern on top of each cookie. (photos 10-11)
EXPERT TIPS: Wet the fork to prevent it from sticking to your dough. Also, ensure that your cookies are as flat and shaped as you want them to be, as they will not spread much while baking.
When you’re happy with how your peanut butter cookies look, bake them in your preheated oven for 10 minutes. NOT LONGER! Then remove them from the oven and let them rest for 10 minutes before touching them. (photo 12)
The 10 minute rest is crucial to your cookies!!
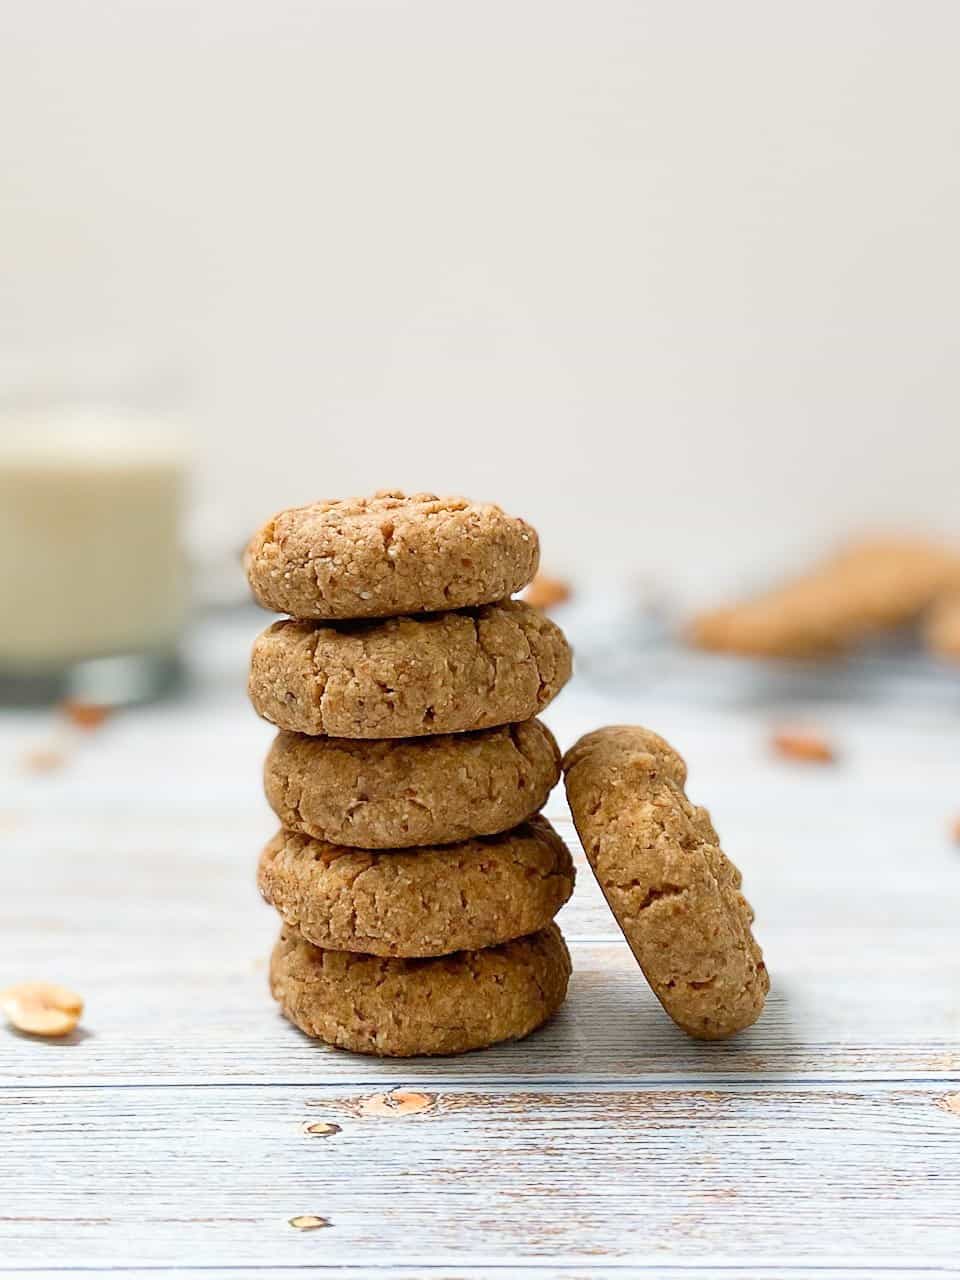
They will be very soft when you take them out of the oven, but I promise they will harden and set into crunchy on the outside, perfectly moist, crumbly and soft in the middle. The way a perfect peanut butter cookie should be. 🙂
After the 10 minutes, very gently transfer them to a cooling rack to continue to cool to room temperature for another 5-10 minutes before digging in!
Trust me, it’s worth the wait.
Expert Tips
- Firstly, I recommend a double batch. They go quickly, and you’ll thank me for this later. 🙂
- Use the weight measurement for the flour, whenever possible. This will ensure the most accurate results. If you MUST use volume, make sure to spoon and level the almond flour. Do not scoop using your measuring cup or you may end up with too much flour.
- If you’re having trouble mixing your batter with a spoon or spatula, use your hands to help get the ingredients mixed in. The batter will be slightly sticky and thick.
- Divide the batter as I’ve shown in photo 7 above if you care about having cookies that are roughly the same size.
- These don’t spread much, so make sure to shape the cookies to the size and thickness you like before you bake them.
- When making your crisscross pattern, wet your fork with water before pressing into your cookies. This will help prevent the fork from sticking to them. Dip the fork into some water after every few cookies or so.
- Do not over-bake the cookies. Yes, they will feel soft and they might even look under cooked, but that is perfectly okay! In fact, that’s exactly as they should be.
- Make sure to let your cookies cool down! Do not touch them while they’re in the oven and do not touch them for at least 10 minutes after you’ve removed them from the oven. They will be soft, but I promise, they will harden as they cool.
- When your 10 minutes are done, very carefully transfer them to a wire rack to continue cooling. This extra time is really crucial to give your almond flour peanut butter cookies those delicious, crunchy edges. At a minimum, leave them for 5 minutes on the cooling rack, but a little longer won’t hurt either.
How long do they keep?
Your almond flour peanut butter cookies will keep in a sealed container, or tightly wrapped, at room temperature for up to 3 days, or you may refrigerate for up to 1 week. But seriously, they probably won’t last that long.
If you want to save some for later, I suggest freezing half the batch. Make sure they are completely cooled to room temperature, and then freeze in an airtight container for up to 2 months.
Substitutions/Variations
- Natural peanut butter is really the best to use here. You may use chunky or smooth, both work well.
- You may use almond butter instead of peanut butter if preferred. Just sub at a 1:1 ratio.
- If you want to add some mix ins, my favourites are a third cup of dairy free chocolate chips OR raisins. Don’t go overboard with mix ins and only choose one or your batter will not hold well.
If you tried this recipe, please let me know about it in the comments below. I always love hearing from you! Don't forget to Subscribe to This Healthy Kitchen to be among the first to get my new recipes! You can also FOLLOW ME on Facebook, Instagram, Pinterest and Twitter to see more delicious food and get all the latest updates.
Buon appetito,
Rosa
📖 Recipe
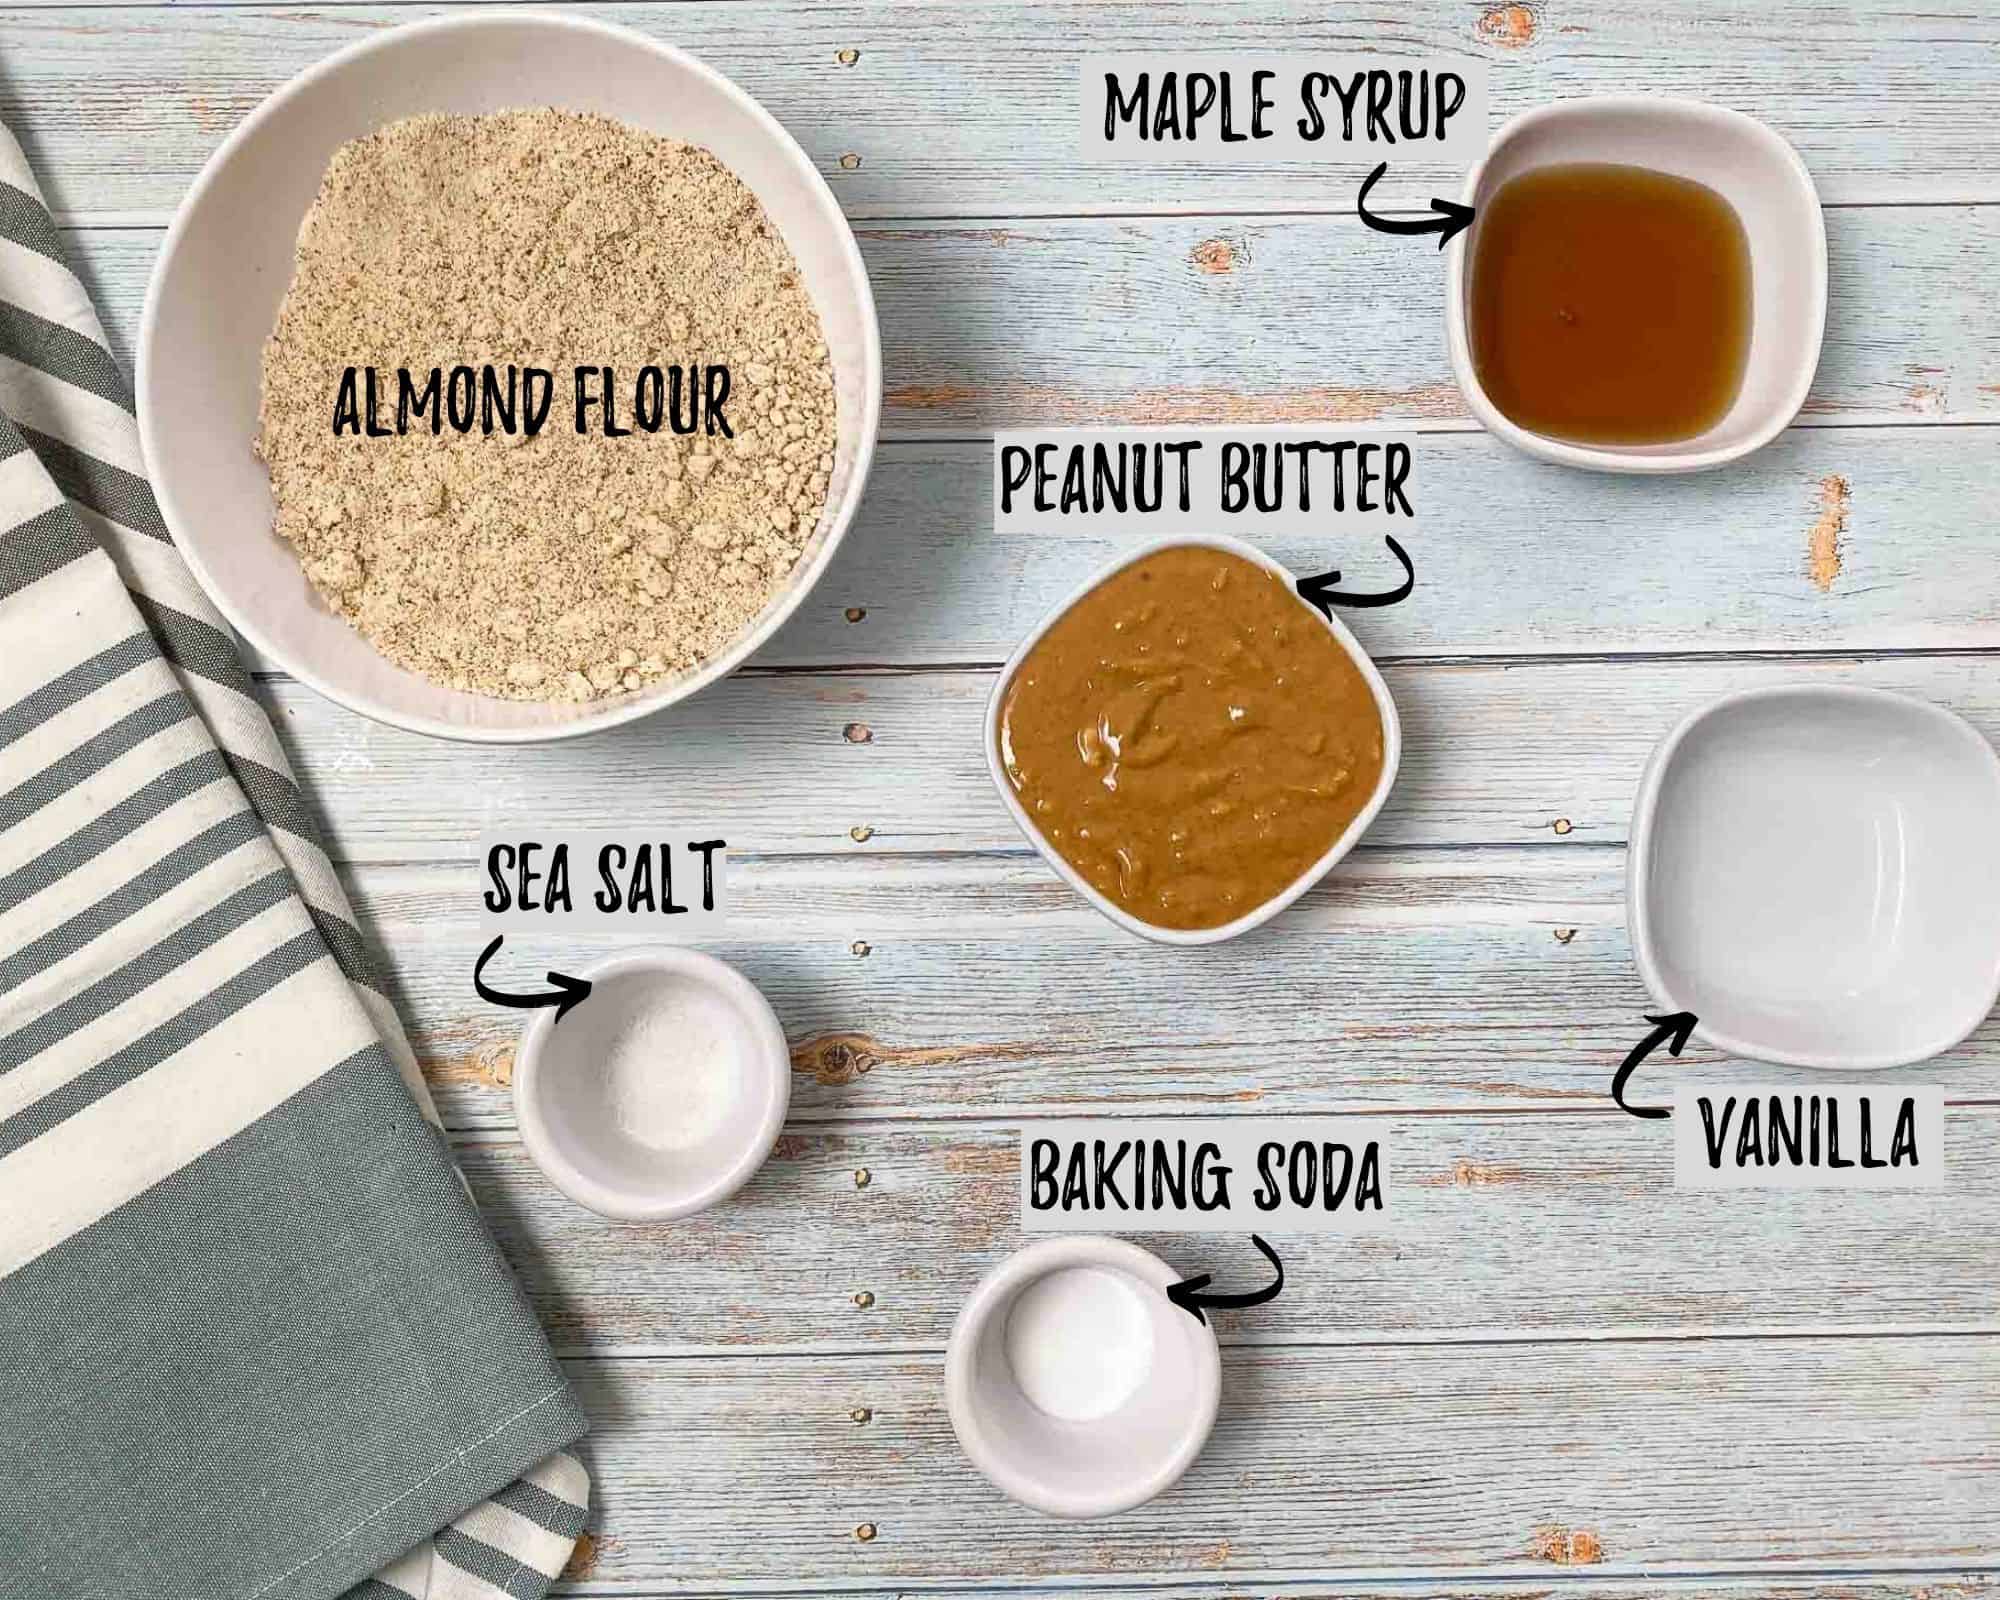
Ingredients
- ½ cup natural peanut butter smooth or crunchy (unsalted)
- 4 tablespoon maple syrup
- 2 teaspoon vanilla
- 150 grams almond flour approx 1.5 cups
- ½ teaspoon baking soda
- ¼ teaspoon sea salt
Instructions
- Preheat the oven to 350 degrees F and line a cookie sheet with parchment paper.
- In a medium mixing bowl, add the peanut butter, maple syrup and vanilla, and mix well. Use a fork or silicone spatula to ensure the ingredients are well combined.
- In a separate, small bowl, whisk together the almond flour, baking soda and the salt. Then add the dry ingredients to the bowl of wet. Mix well. The batter will be sticky and thick, but just keep mixing until incorporated.
- Divide the mixture into 16 balls of dough and place on your tray. Then using a slightly wet fork, press down on each ball to form a crisscross pattern on top of each cookie.
- Bake for 10 minutes, then remove from the oven and let cool for 10 minutes and do not touch the cookies during this time. After the 10 minute rest, transfer the cookies to a cooling rack for another 5-10 minutes. This cooling off period is crucial for the cookies to completely set and for the edges to get nice and crunchy.
Lyn says
At what temperature you bake the cookies. Isn’t it an important information for baking recipes? Very disappointing!
Rosa says
Hi Lyn, you must have skipped right past the recipe to make it down to the comment section. If you scroll up a bit you’ll find the directions, 350 degrees F. Enjoy the cookies! 🙂
Janice says
The dough was crumbly, not sticky. Don’t know what I did wrong.
Rosa says
Sounds like too much flour. Did you weigh it? Scooping from the bag can sometimes add too much.
Valerie Rosenbaum says
Because my natural peanut butter was the bottom half of the jar it was a little dry. So, I added coconut oil & an egg. It was a must. Also I added one teaspoon of apple cider vinegar. The cookies turned out delicious. I also rolled them in some natural sugar, and then I pressed them with the fork. I’m not a big sweet lover, but they needed just a tad more sweetness. They turned out great!
Rosa says
Thrilled you enjoyed these, Valerie!
Janelle says
Absolutely addictive!!! I substituted with Steve’s sugar free maple syrup. My only regret, not doubling the recipe because I can’t get enough of them 😉
Rosa says
So happy to hear that, Janelle. Thanks for the review. 🙂