

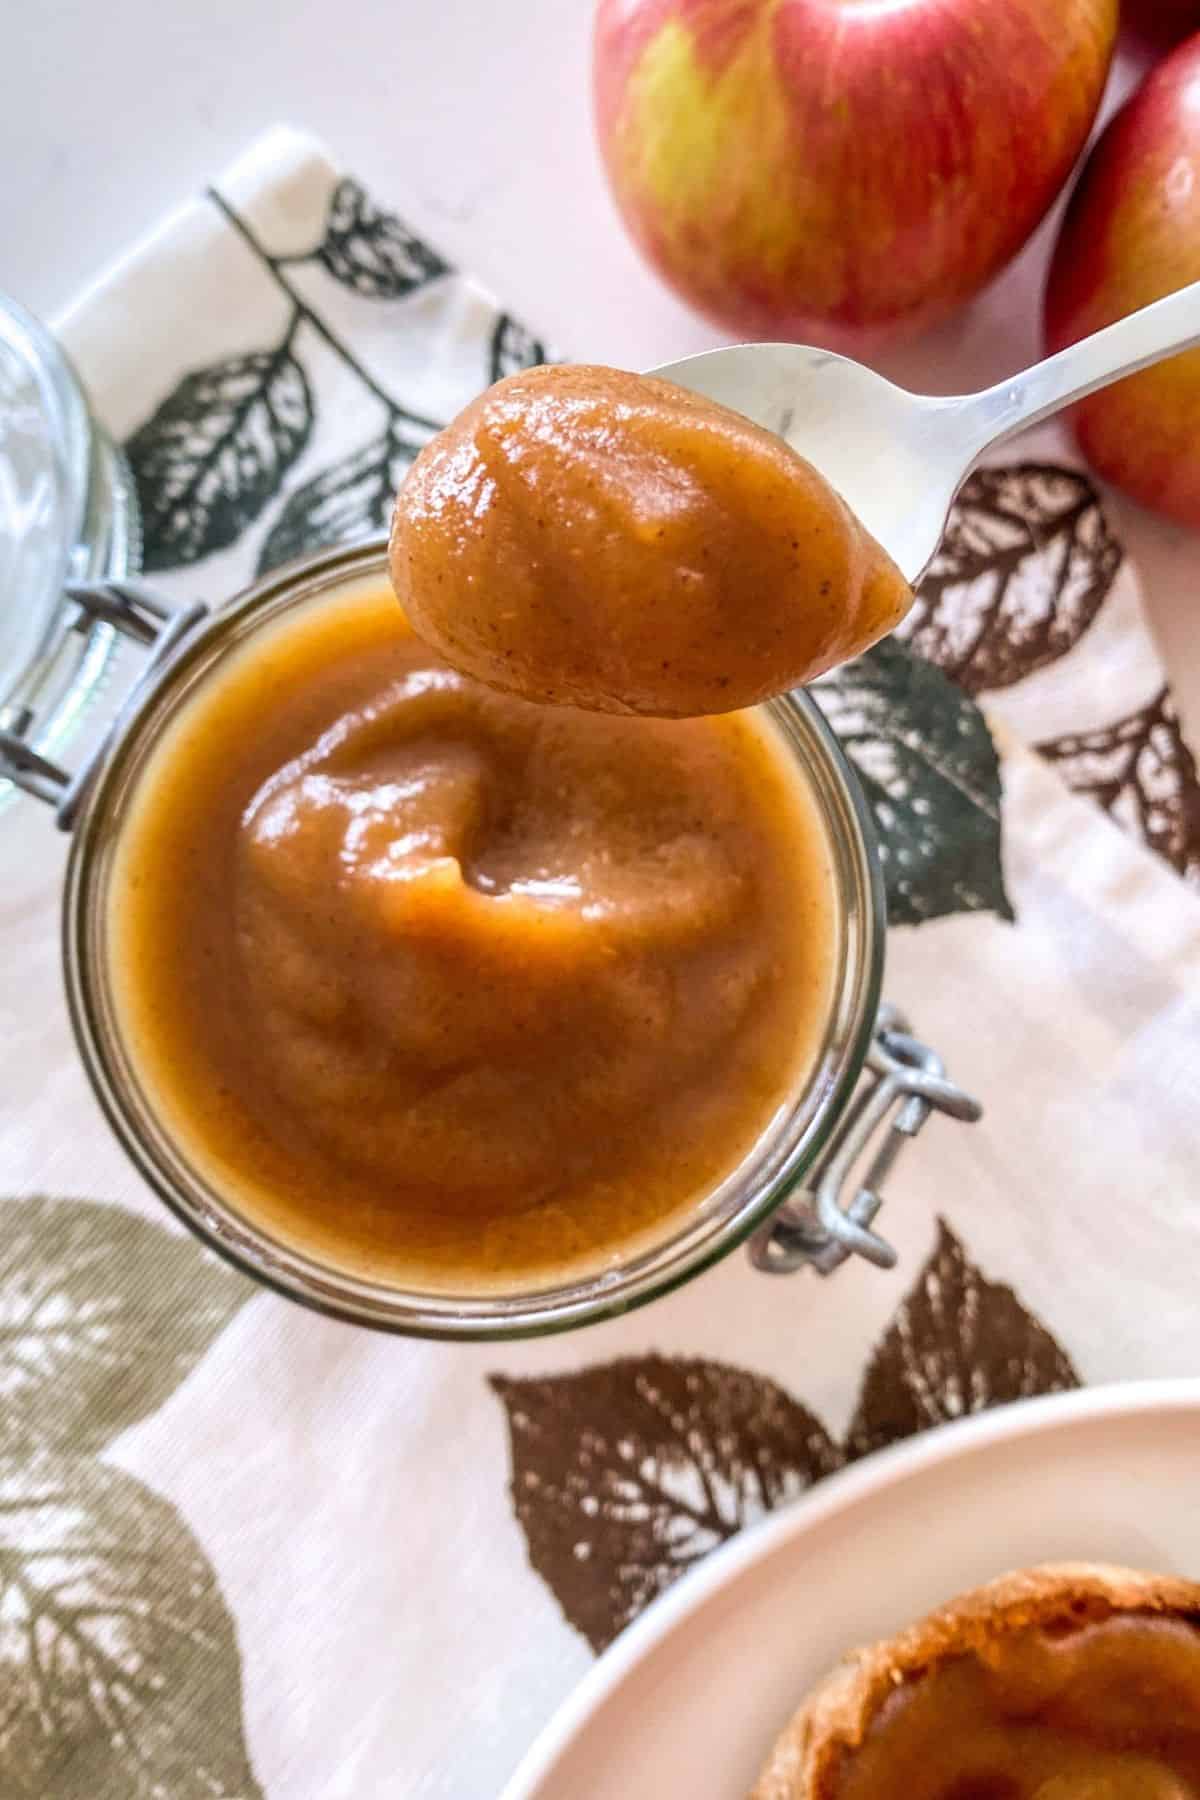
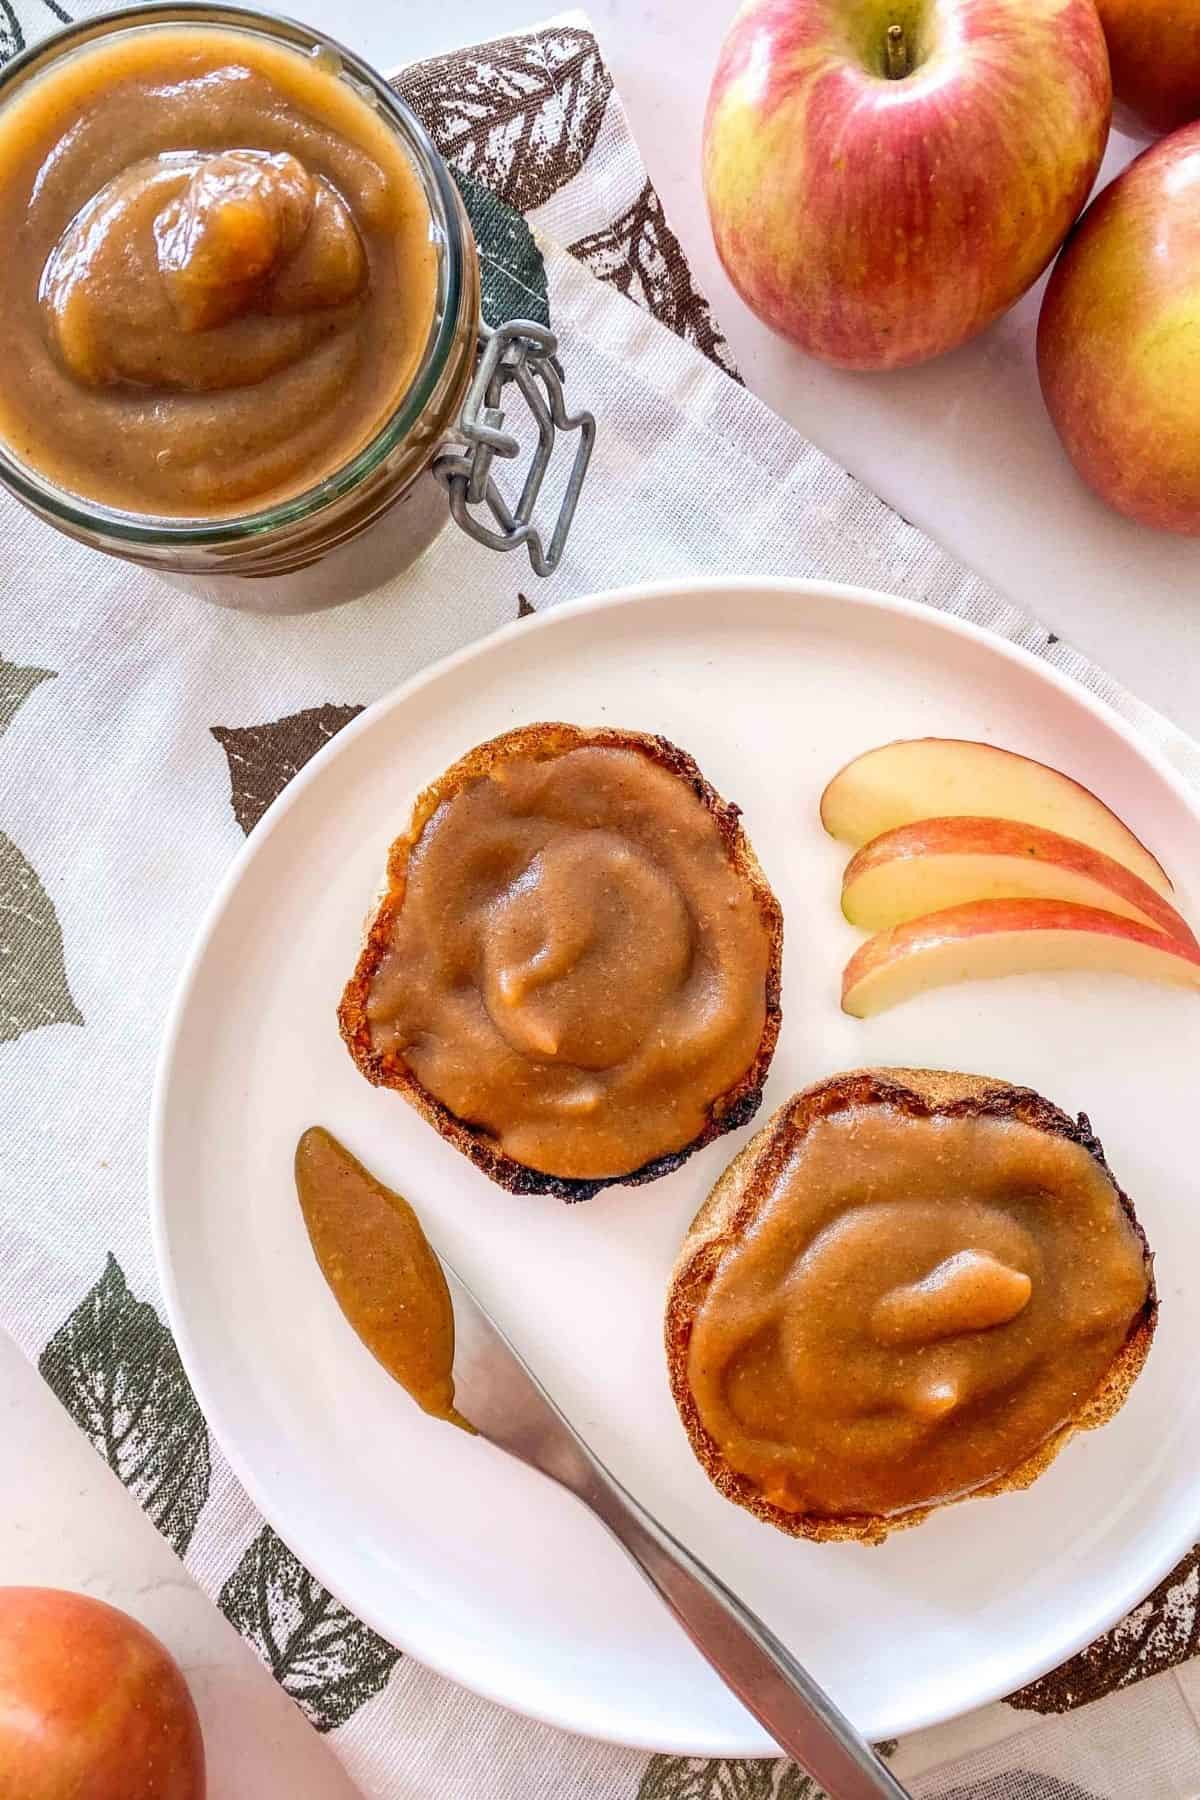
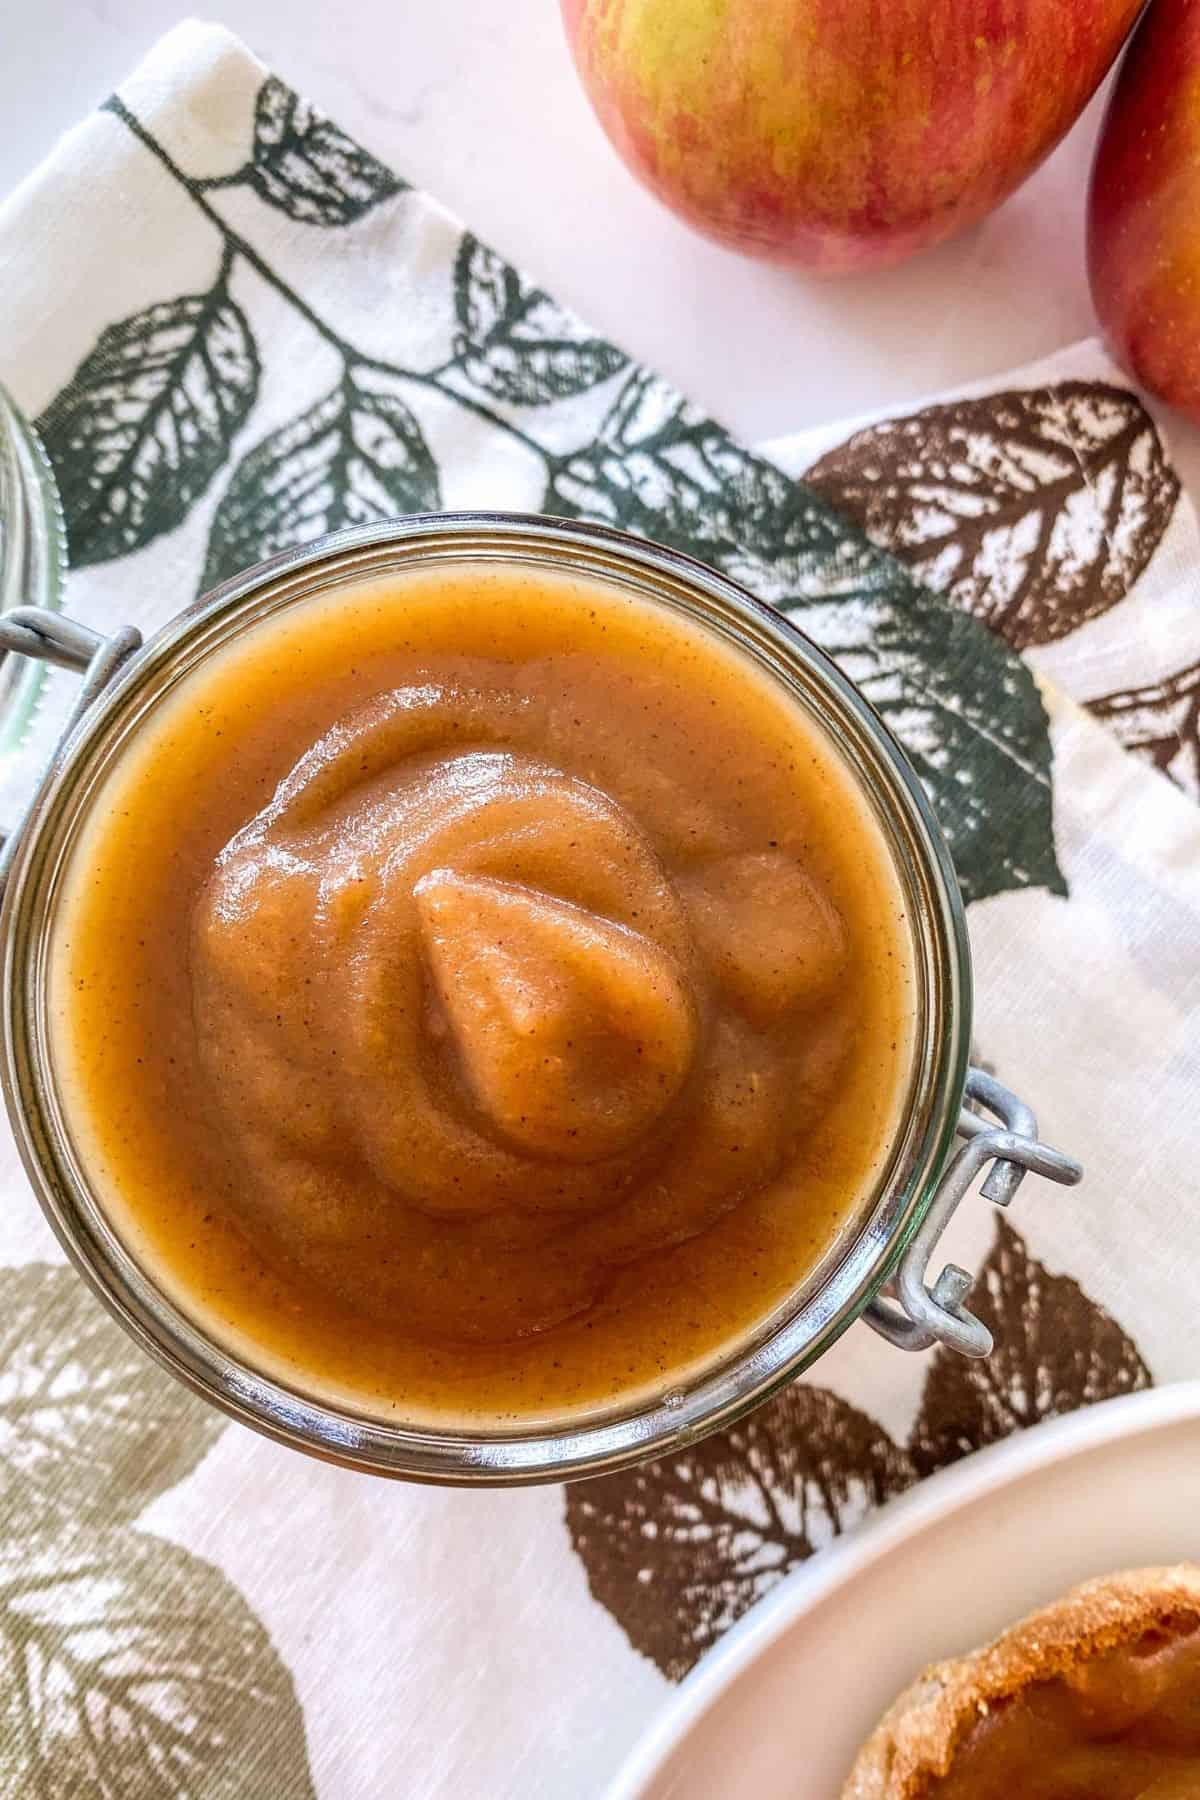
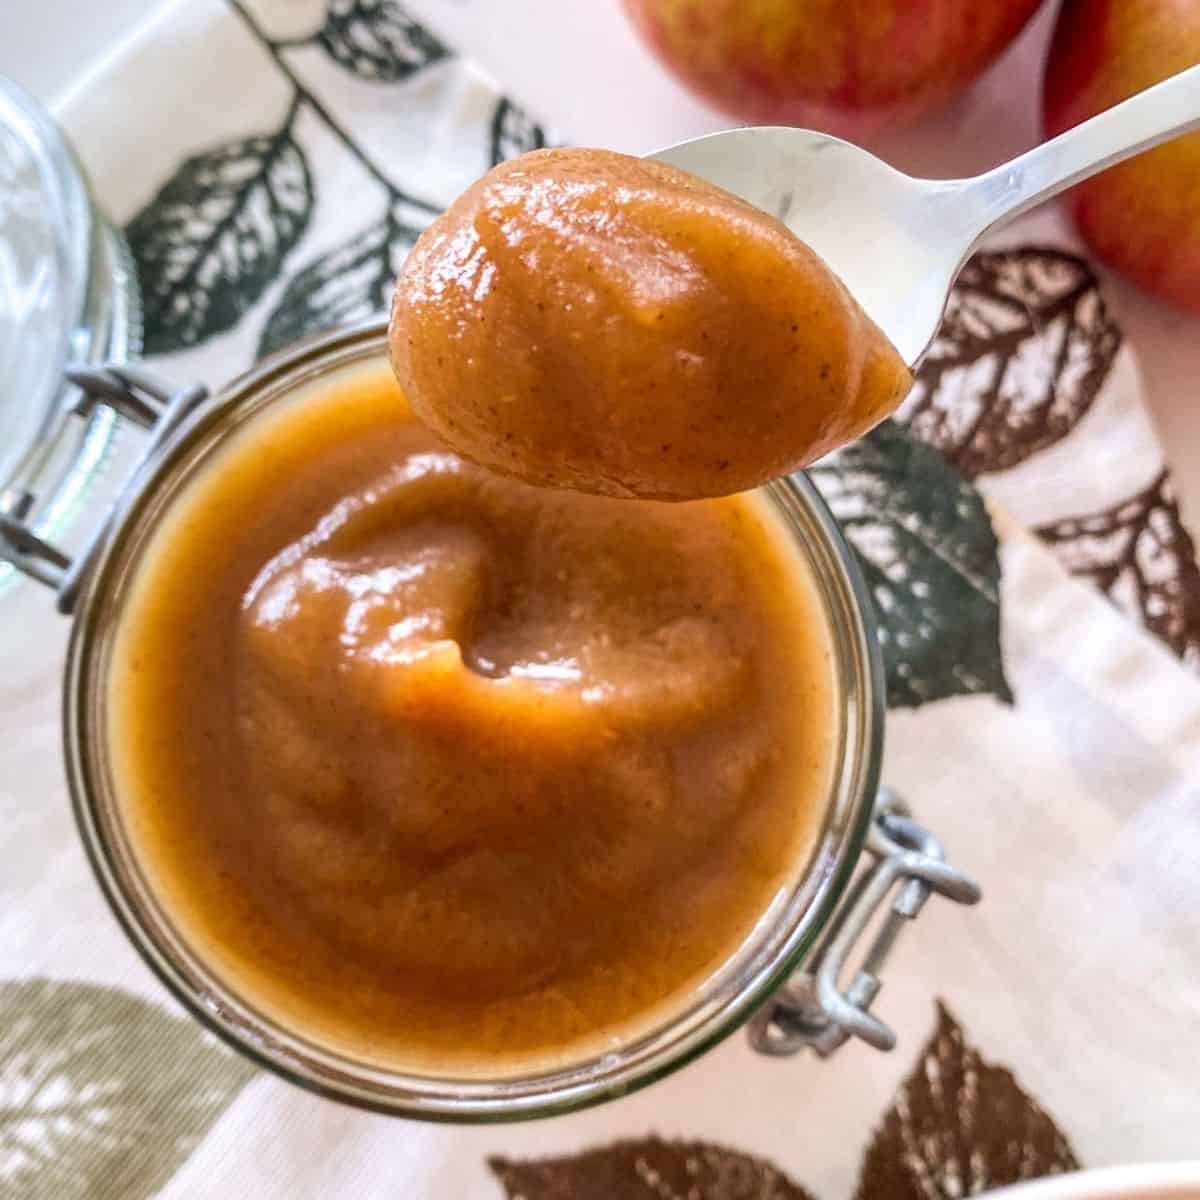
Thick, sweet and delicious Instant Pot apple butter, without any peeling and with no added sugar required! This foolproof method will have you ditching your stove top recipe forever.
Apples are a staple in all grocery stores and this dish is one you can make all year long. But if it’s apple season, that really makes for the absolute best flavour.
It’s made in your pressure cooker for a faster and simpler method and pairs beautifully with my amazing apple bread!
You’re going to LOVE this homemade apple butter.
Jump to:
Ingredients
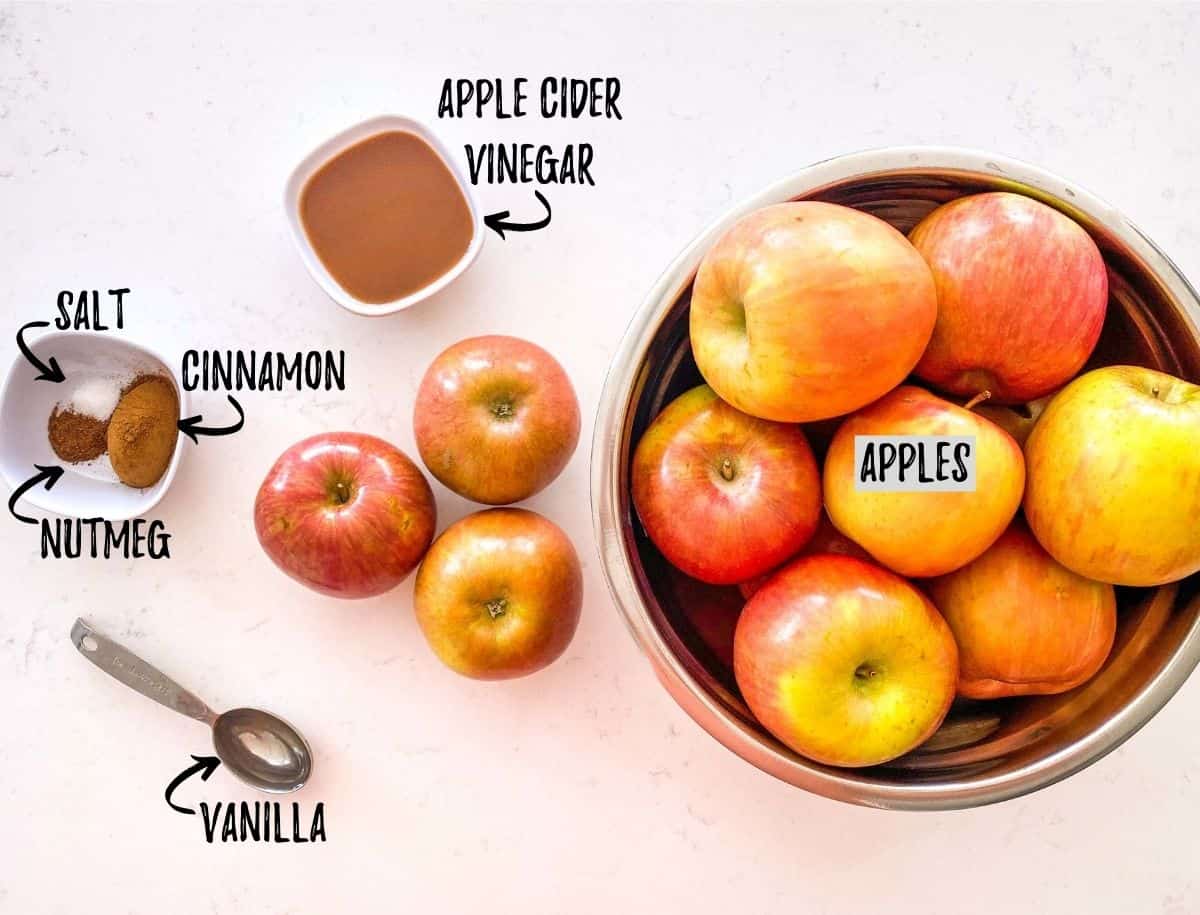
All you need is apples, vinegar and some seasoning to make delicious Instant Pot apple butter!
Use naturally sweet apples to avoid adding sugar later. I like Fuji, but Ambrosia, Gala and Honeycrisp are also great choices.
How to make it
(This is a summary with step by step photos, full recipe measurements and instructions are in the recipe card below.)
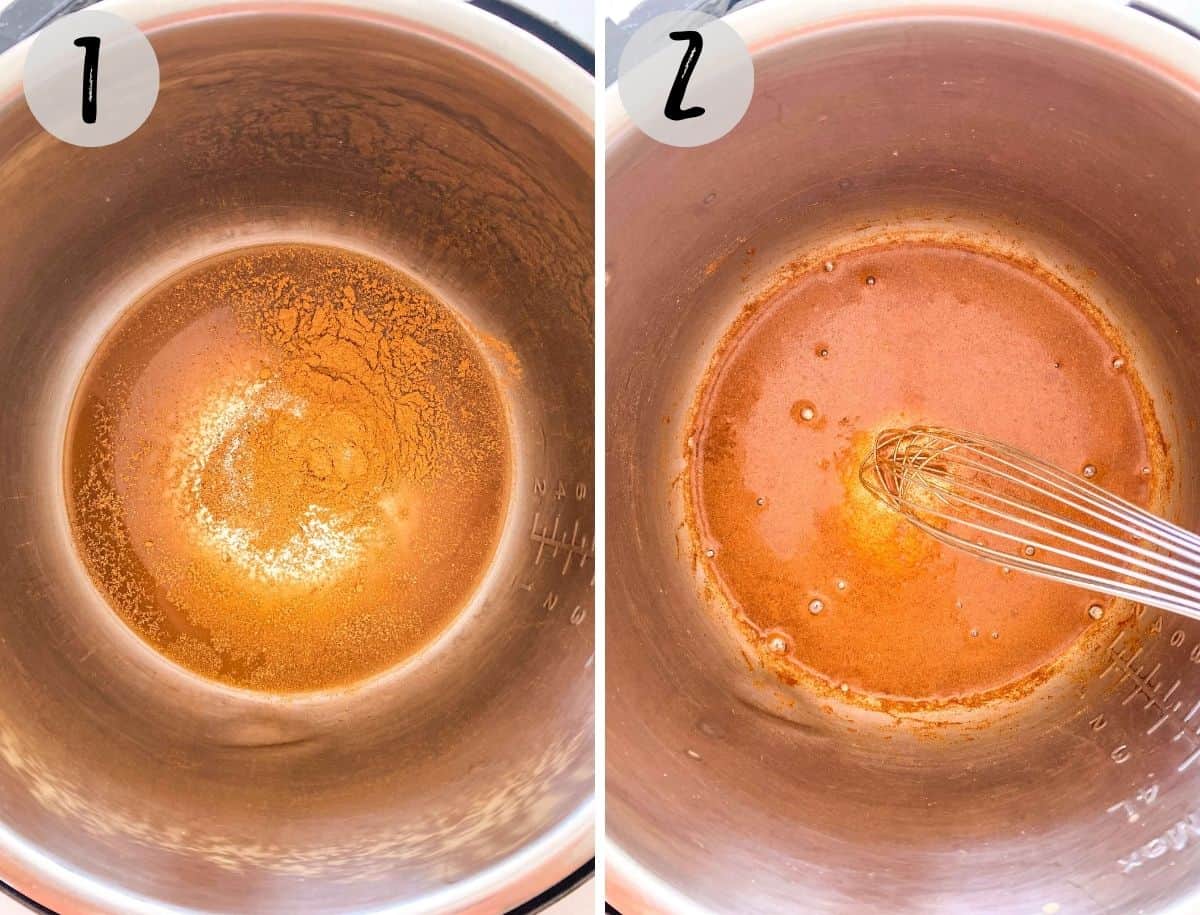
Begin by adding your apple cider vinegar, vanilla and all the spices to your Instant Pot. Then give it a good whisk. (photos 1-2)
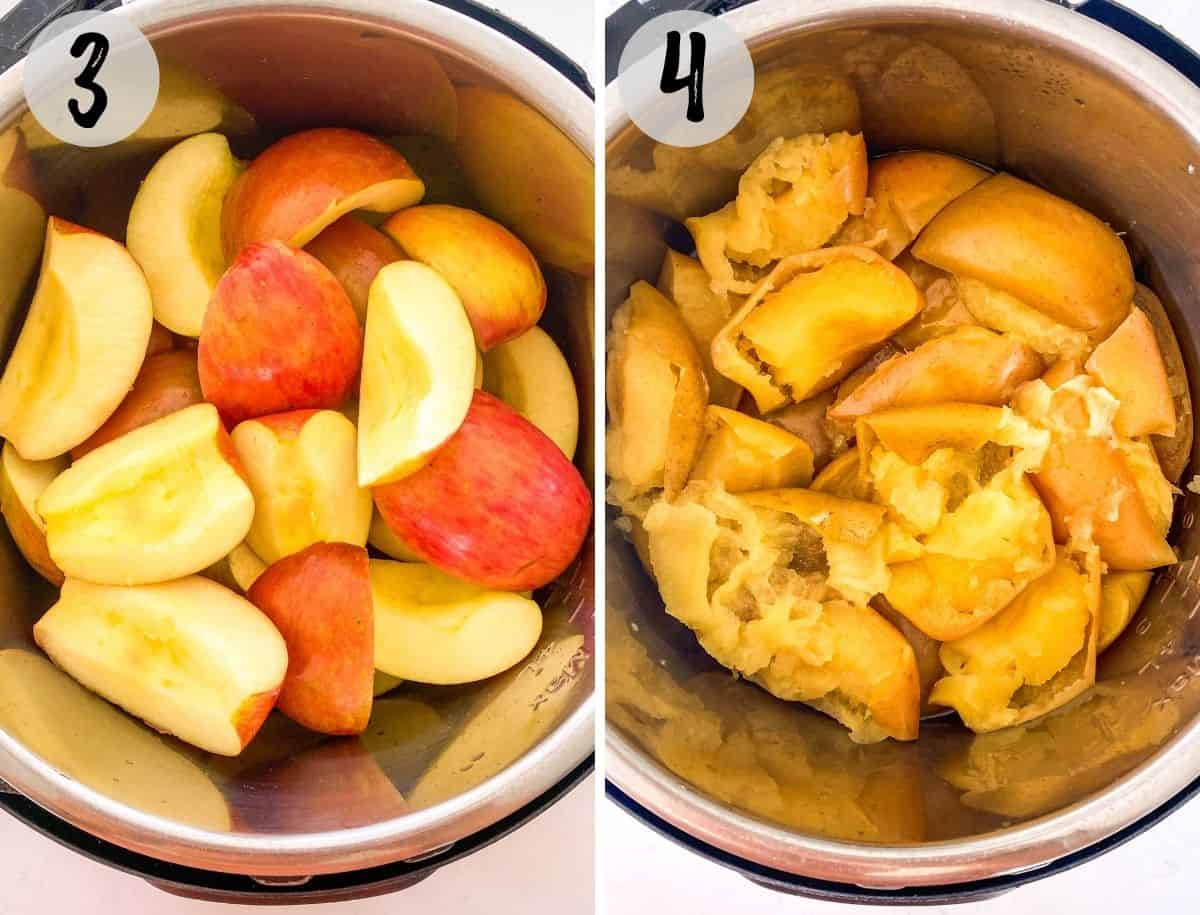
Then thoroughly wash your apples, cut them into quarters and remove the core. Place them inside your pot and pressure cook for 5 minutes, followed by a 20 minute natural release. (photos 3-4)
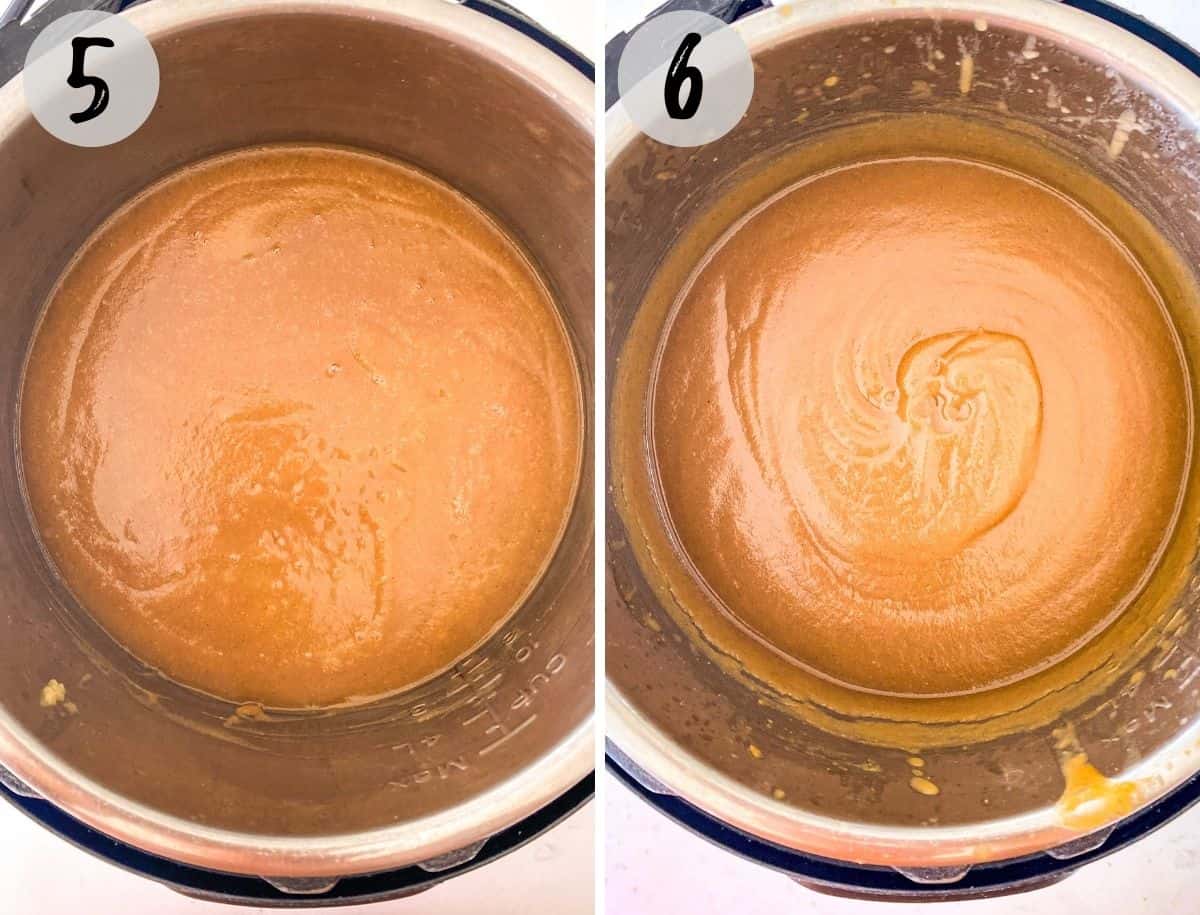
Use an immersion blender (or carefully transfer to a stand blender, in batches) to puree your apples. (photo 5)
Then choose one of the two cooking methods (sauté or slow cook, details in the recipe card below) to thicken your apple puree into butter. (photo 6)
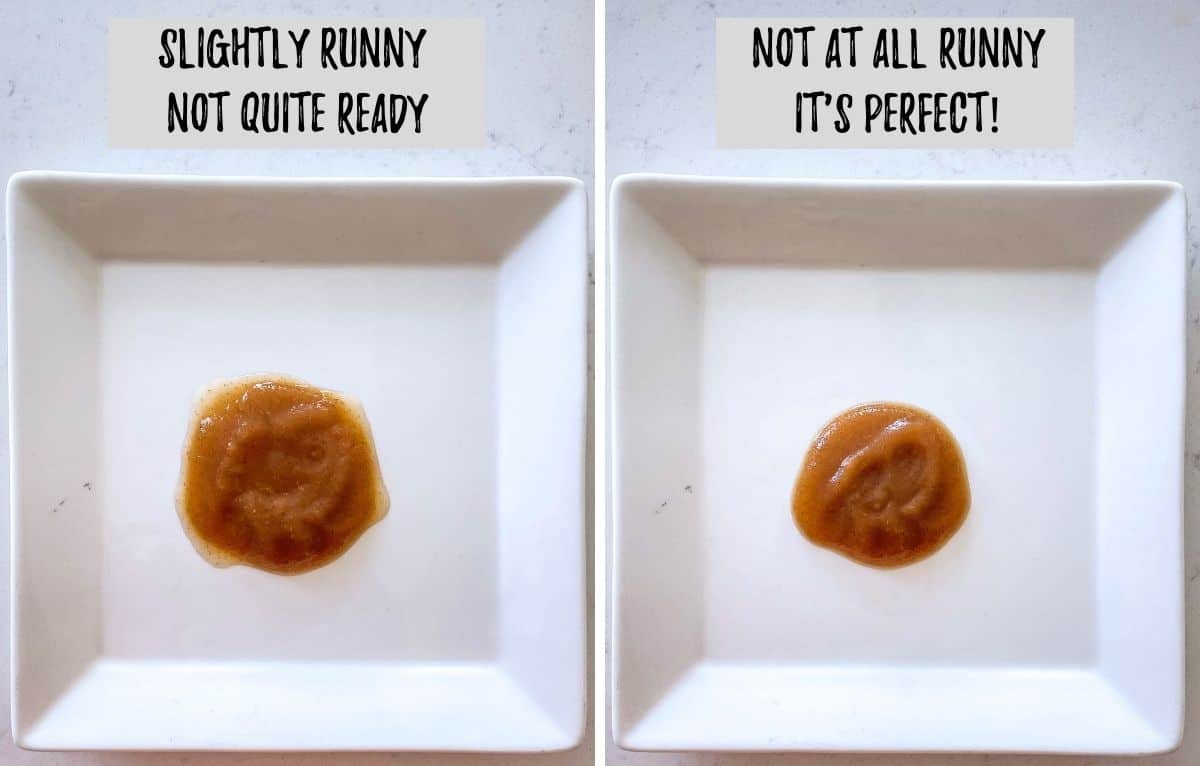
How do you know when it’s ready?
Depending on your final cook method (slow cook or sauté) your apple butter will be ready between 30 minutes to 3 hours, once pureed.
To test the thickness of your apple butter, try this method.
Grab a spoonful of the butter and place on a flat dish. Wait 30-60 seconds to give it a chance to slightly cool.
If the butter runs a little around the edges, it’s not quite ready. If it holds together without running, it’s ready!
Storage
Allow the apple butter to cool slightly and then transfer to CLEAN and DRY jars. Store in your refrigerator for immediate use within 1-2 weeks.
Since this makes about 6 cups, I recommend only keeping 1 jar in the fridge at a time. For the remainder of your batch, you may freeze or can to keep the jars for up to one year.
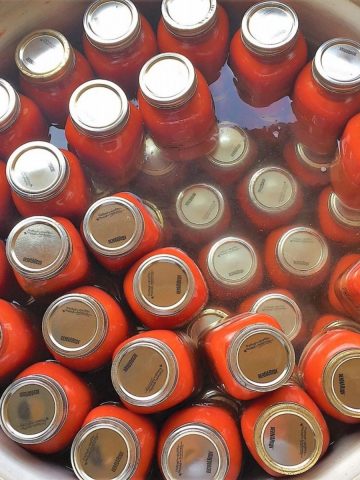
How to can apple butter
- Prepare your water bath canner OR a large stock pot. Add enough water so that there will be 1 inch of water over the tops of your jars. Bring to a boil.
- Using jars that have been thoroughly washed, fill them with the warm apple butter, leaving about ¼ inch of space between the top of the jar and the butter.
- Wipe the rim of the jars with a CLEAN damp rag.
- Place a NEW (don’t reuse lids to ensure proper sealing, but you may reuse rings) lid and clean ring on your jar and tighten.
- Carefully place the jars into the boiling water, using tongs to prevent burns. Then place the lid on top. Process for 20 minutes, then remove the lid and let sit for 5 minutes.
- Now, carefully transfer to a cutting board or towels on your counter and leave them undisturbed until cool. (Hot glass cracks easier when handled.)
- Once completely cooled, make sure the jars have fully sealed by pushing down on the middle of the lid. If it doesn’t give way, it’s sealed. But if it does, place that jar in the fridge and consume within 2 weeks.
- Store sealed jars in a cool dark place for up to 12 months.
How to use it
- Stir some into oatmeal, chia pudding, or smoothies.
- Spread it on toast, bagels or English muffins.
- Top your pancakes or waffles.
- Use it to top desserts like banana bread or almond flour muffins.
Substitutions
- For the apples: I like Fuji apples, but any sweet variety is great. Honeycrisp, Ambrosia and Gala are all great options.
- For the sweetener: If your apples are sweet enough, you won’t need anything else to sweeten. But if you have a sweet tooth, you may use ANY sweetener you like. I like a combo of molasses and maple syrup for their rich flavours. You may also use granulated sugar, if preferred.
- For the spices: I’ve kept this one on the mild side for picky eaters with just cinnamon and a touch of nutmeg. If you prefer a stronger spiced apple butter, double up on the nutmeg and add ¼-1/2 teaspoon of ground ginger, allspice, and/or ground cloves.
- For the acid: I like apple cider vinegar here since it doesn’t have a strong flavour. But you CAN sub for water, if preferred, and make sure to squeeze some lemon juice in after cooking, to prevent the apples from getting too dark.
Variations
Want to take your apple butter to another level?
- Make it spicy – add some red pepper flakes or a dash of cayenne to turn up the heat.
- Make it citrusy– add some orange zest from 1-2 large oranges.
Equipment
For cooking: You’ll need a pressure cooker, I use a 6qt Instant Pot, but other pressure cookers also work.
If you have a multi function pressure cooker that also sautés and/or slow cooks, you’ll only need one cooking appliance. Otherwise, you’ll need to transfer the pureed apples to stove top or a slow cooker.
For blending: An immersion blender is easiest, as you can blend the entire pot of apples in one batch.
However, if you’re not getting a smooth consistency, you may wish to transfer to a stand blender. Do so in batches and use extreme caution when blending hot liquids. Do not overfill!
Expert Tips
- The level of sweetness will depend on the apples you’re using. Use sweet apples for naturally sweet apple butter, and to avoid adding sugar. I like Fuji apples but Honeycrisp or Ambrosia also work well.
- If using tart apples, or a mixture of varieties, you may want to add some sweetener once cooked. Taste and adjust to your level of desired sweetness AFTER cooking so you don’t add any more than needed.
- If you have a good quality blender, there’s no need to peel the apples. They will puree smoothly and add additional fiber and flavour.
More spreads you’ll love
If you tried this recipe, please let me know about it in the comments below. I always love hearing from you! Don't forget to Subscribe to This Healthy Kitchen to be among the first to get my new recipes! You can also FOLLOW ME on Facebook, Instagram, Pinterest and Twitter to see more delicious food and get all the latest updates.
Buon appetito
Rosa
📖 Recipe
Equipment

Ingredients
- 5 pounds apples I like Fuji (approx. 10-12 large apples)
- ⅓ cup apple cider vinegar
- 1 tablespoon pure vanilla extract
- 1 tablespoon cinnamon
- ¼ teaspoon nutmeg
- ⅛ teaspoon sea salt
Optional
- 2-4 tablespoons fancy molasses
- 2-4 tablespoons maple syrup
Instructions
- Add the apple cider vinegar, cinnamon, nutmeg, vanilla and salt to your Instant Pot and whisk together.
- Remove any stickers from your apples, wash them well and cut into quarters. Remove the core and discard. No need to peel the apples. Place them inside your Instant Pot, close the lid and set the valve in the sealing position.
- Set the pot to high pressure for 5 minutes. (It will take about 10-15 minutes to build pressure.) Once the timer completes, allow the pot to naturally release for 20 minutes and then quick release any remaining steam and remove the lid once safe to do so.
- Use an immersion blender (or carefully transfer, in batches to a stand blender) to puree your apples. Once completely smooth, taste for sweetness and add some maple syrup and/or molasses, if needed, to your taste.
Choose ONE Method: Slow Cook OR Saute
- SLOW COOK: Set to slow cook on HIGH. Select slow cook, adjust and then HIGH. Place a glass lid on top with a vent (the IP lid, or another lid that fits) and cook for 2-3 hours until desired thickness is reached, stirring occasionally.
- SAUTE: Set to the sauté function on LOW. Select sauté, adjust, and then then LOW. Cook your apple butter for 30 minutes, using a splatter guard, and whisk often. Use EXTREME CAUTION as it will bubble and may cause burns.
Storage
- Turn off the pot and let cool slightly. Then transfer to clean and dry jars to can, freeze, or give away. (See above for canning directions.)
Sandi says
This apple butter is so amazing!! I eat whole food plant based and wanted a good substitution for jam that is loaded with sugar. This really hits the spot! I did taste and added a little maple syrup but after it simmered and was ready for canning, I think omitting the syrup would have been just fine. Thank you for a tasty treat that’s so healthy!
Rosa says
Thrilled you enjoyed it, Sandi. Thanks very much for taking the time to leave a review. 🙂
Amy says
This was so easy and delicious! My husband asked me to pick up some apple butter the next time I went to the grocery. However, I’ve been trying to get away from processed food. I had loads of apples on my counter so I used what I had, a mix of sweet and a few tart. I added 2 Tbs of maple syrup to counter balance the tart apples. It turned out amazing! My husband is so impressed (ha! So am I!). Thanks for the great recipe. It was so simple to toss in my instant pot. From start to putting the jars in my fridge (and cleaning up) it took just under an hour. I will definitely be making this again! Thank you!
Rosa says
You’re very welcome, Amy! Thrilled you both enjoyed and thank you for taking the time to leave a review. 🙂
Jane Hall says
Made it and canned it in 125ml jars because we like it with pork.
Tastes so good!!!
Rosa says
Glad you like it!
Casey says
Hi there, sounds great. Would it be possible to sub pears for apples? I just harvested several dozen from the tree in my yard … 🍐
Rosa says
I haven’t tried that, but I don’t see why not. 🙂