


This is the time of year when you see all the Italians sitting in their garage making homemade tomato sauce. Ever wonder what their secrets are? I’m about to give you a step by step guide, with photos. The secret is out! 🙂
Reader Feedback:
⭐⭐⭐⭐⭐ I have been wanting to make my own sauce for years, but have always felt very intimidated since I had no one to actually show me. I finally did it this past weekend!! Rosa's step by step instructions and pictures made me feel like I was right there with her learning! I followed her recipe and method and on my own was finally able to make my own! The sauce was amazing and exactly what I had been missing! Thank you soo so much for sharing this! Absolutely wonderful! - Michelle
The end of August to early September is tomato sauce-making season. Growing up in an Italian household means being spoiled with the most amazing homemade tomato sauce all year round. 😉
The process of making tomato sauce is a tradition that I remember partaking in every single year growing up. There are no exceptions! This time of the year is no different than celebrating birthdays or Thanksgiving! It’s never missed. 🙂
We make enough to last us an entire year until we make the next batch the following year. That means the entire family gets together so we have all hands on deck.
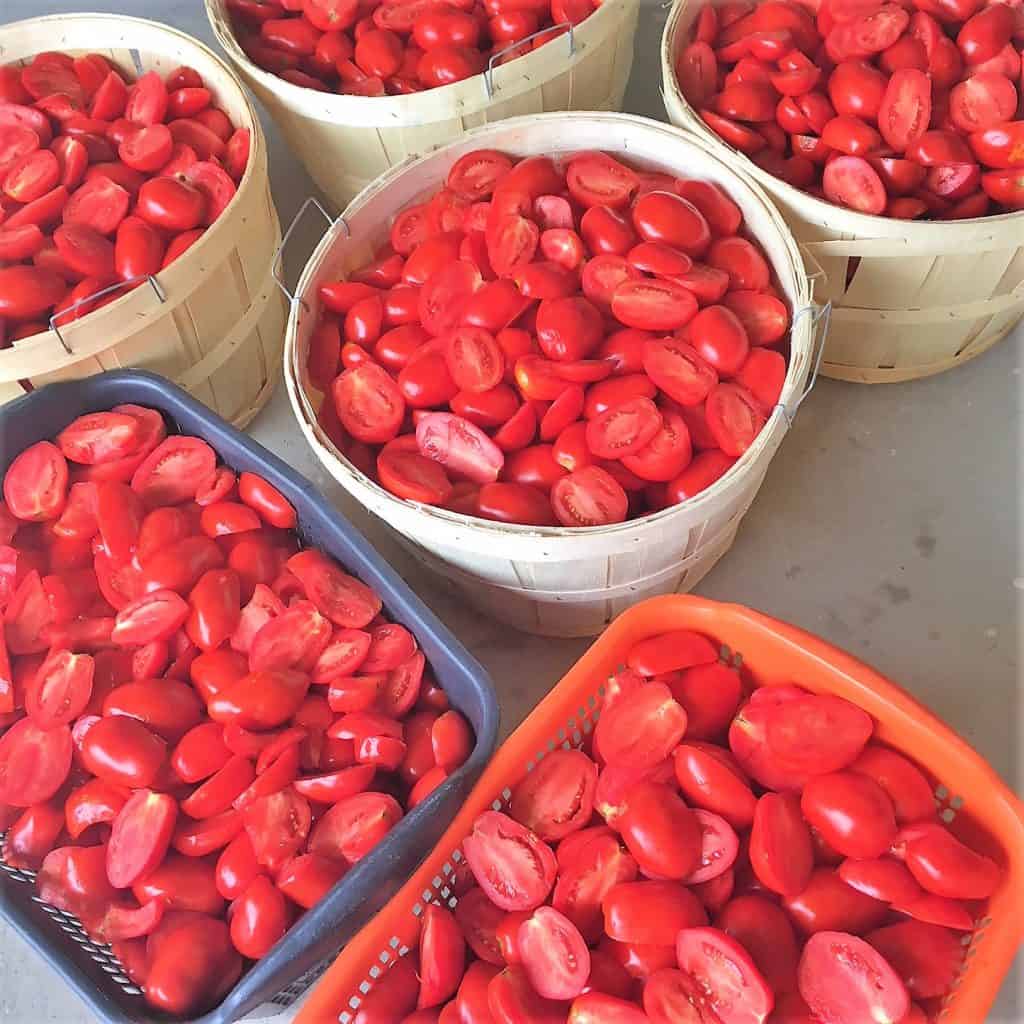
The photos to follow are for a batch of 8 bushels of Roma tomatoes. (We typically produce anywhere between 8 and 12 bushels.)
However, I’ve broken down the steps below so you can make as much or as little as you’d like.
The recipe at the bottom is scaled down to ONE bushel of tomatoes, approx. 50 pounds.
So, this is simple enough for a beginner if that’s where you’re at. 😉
How to make tomato sauce
(This is a summary with step by step photos, full recipe measurements and instructions are in the recipe card below.)
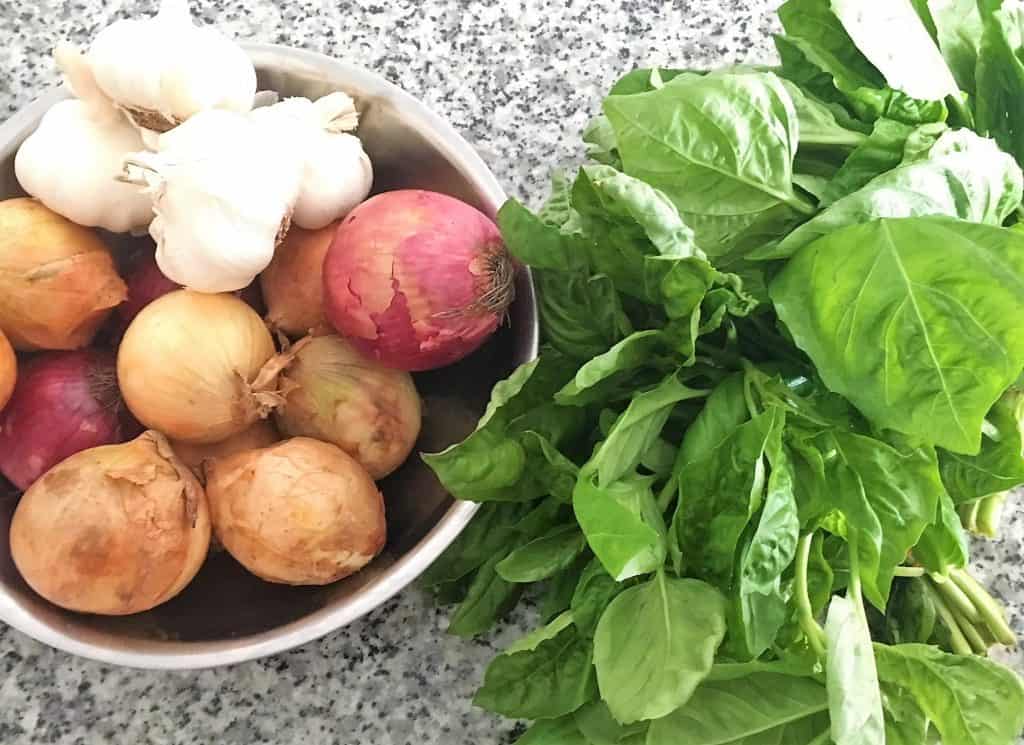
Before you begin
Get everything ready!!!
Grab baskets, bushels, clean and dry mason jars and lids, your food mill or Italian tomato press, etc.
Prepare your onions, garlic, and basil. Peel and cut them so they are ready to go when needed. Then set them aside.
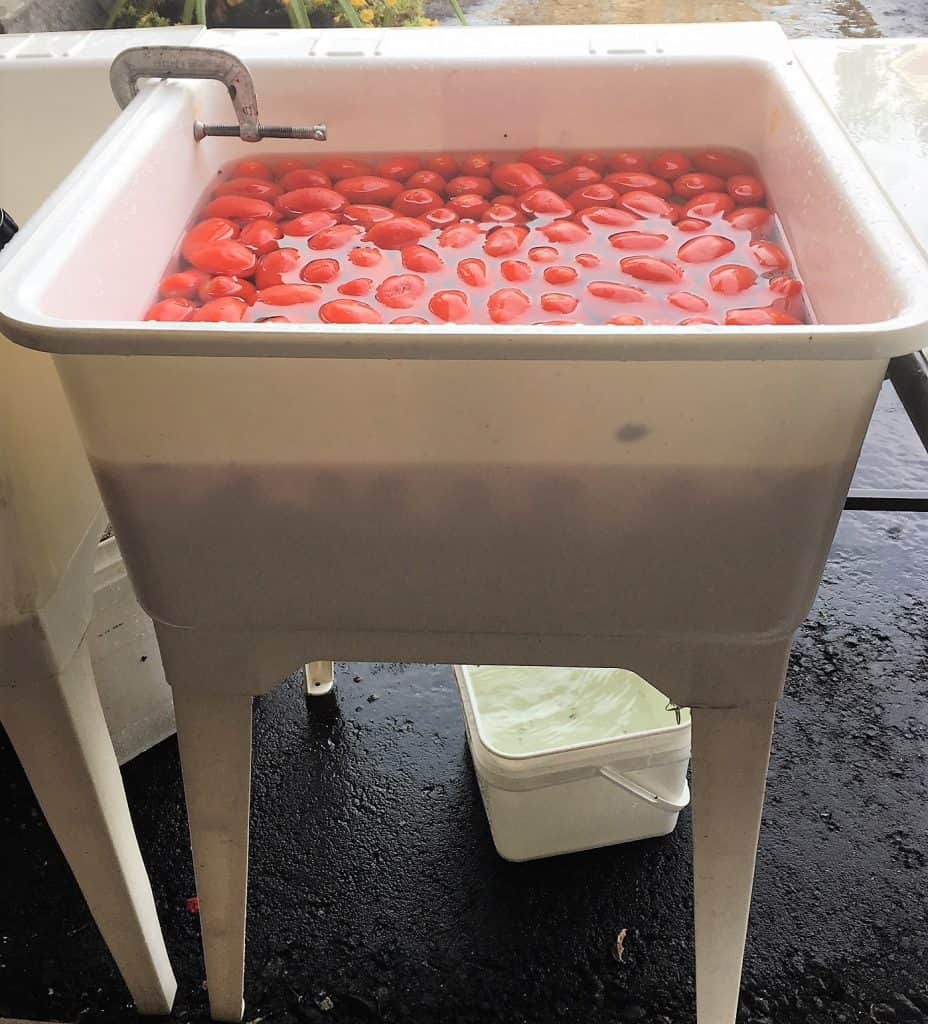
Prepare your tomatoes
Start by thoroughly washing your tomatoes.
We use a giant tub to wash ours since we make large quantities, but of course, you can also do this in your kitchen sink!
Once you’ve washed all your tomatoes, cut each one in half.
The reason for this is to check for any spoiled tomatoes or rotten spots.
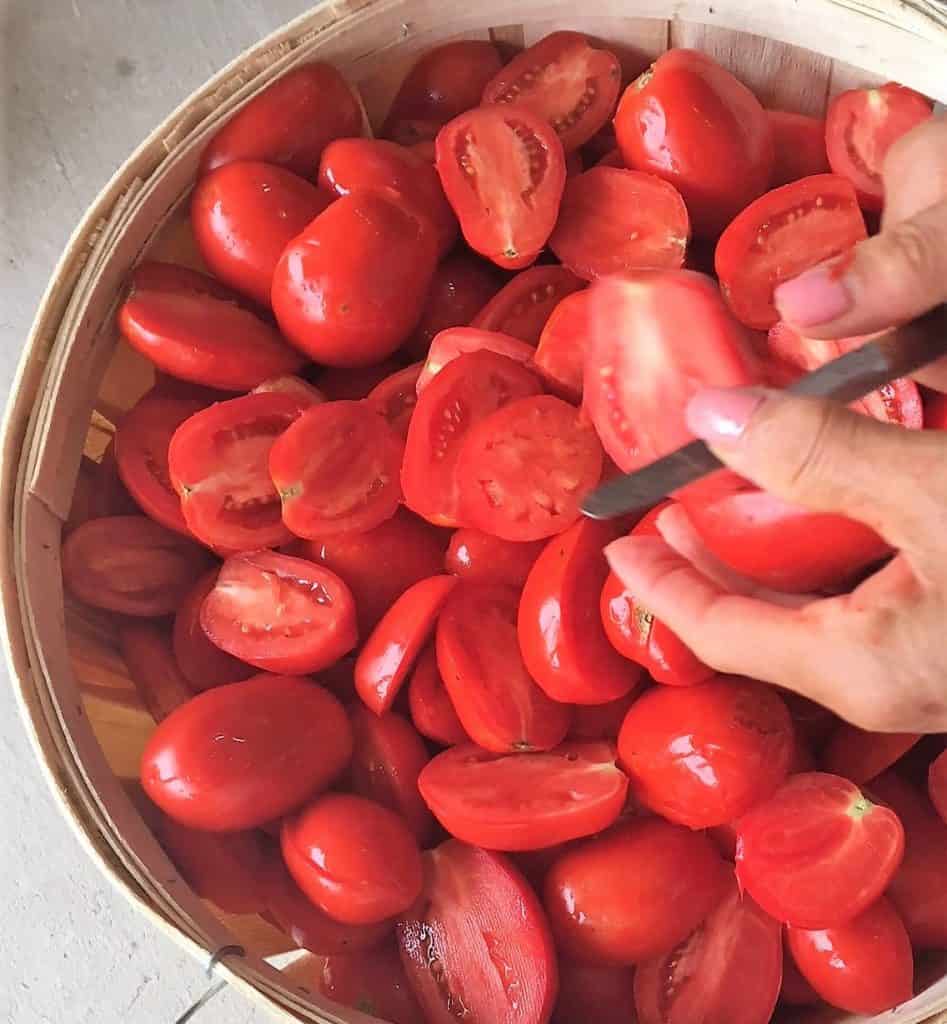
Although the tomatoes may feel firm on the outside, it’s possible to have a few spoiled ones, so it’s safer to check.
You don’t want ANY rotten tomatoes in your sauce, or it may ruin the entire batch.
Cook your tomatoes
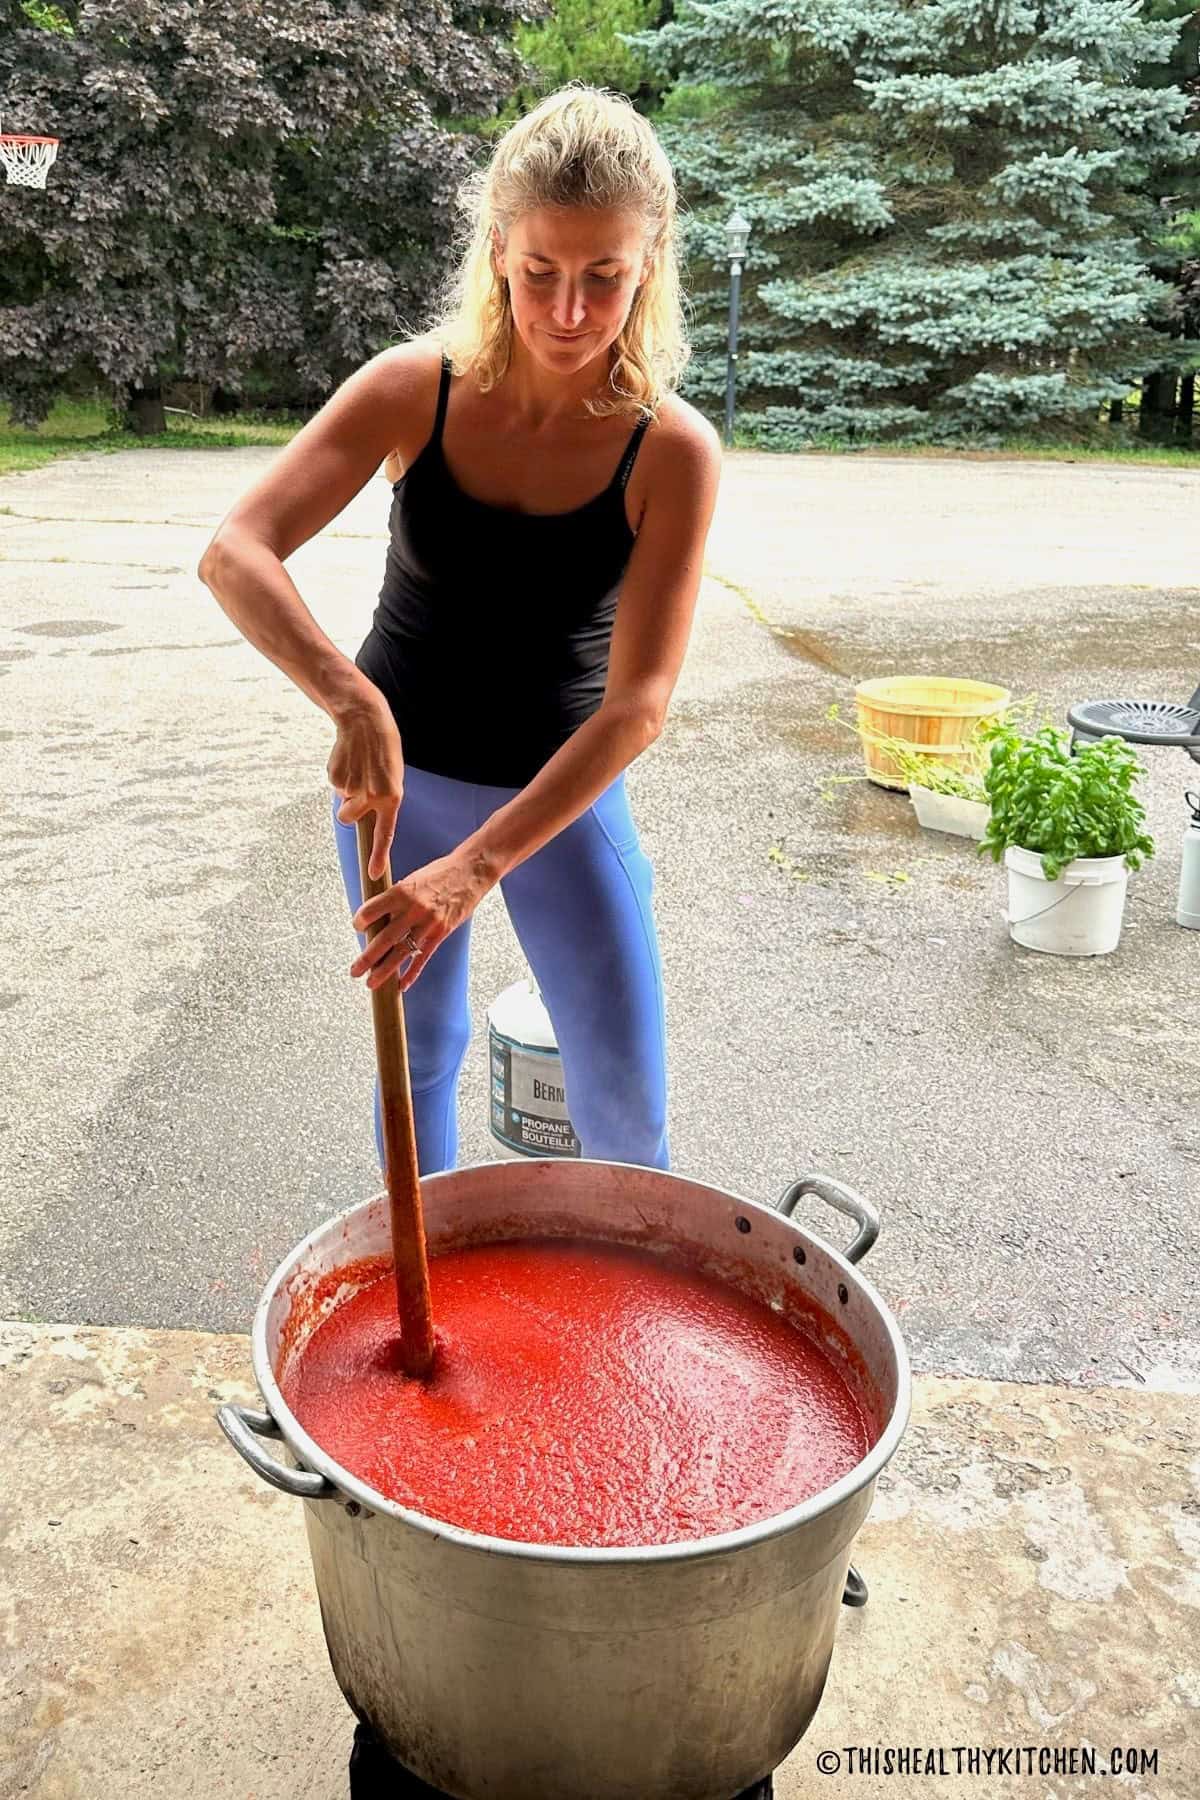
Bring a large pot of water to boil. We use industrial-sized pots with propane burners outside, given the amount of sauce we produce.
That said, you may do this using a large stock pot on your stovetop if you’re making a smaller amount. Or work in batches, as needed.
Add the tomatoes to the boiling water and give them a stir. The cold tomatoes will likely make the water stop boiling.
Once it returns to a boil, it’s almost time to remove the tomatoes and drain them.
Look for the water to appear foamy on top with an orange film from the tomatoes, like the image below.
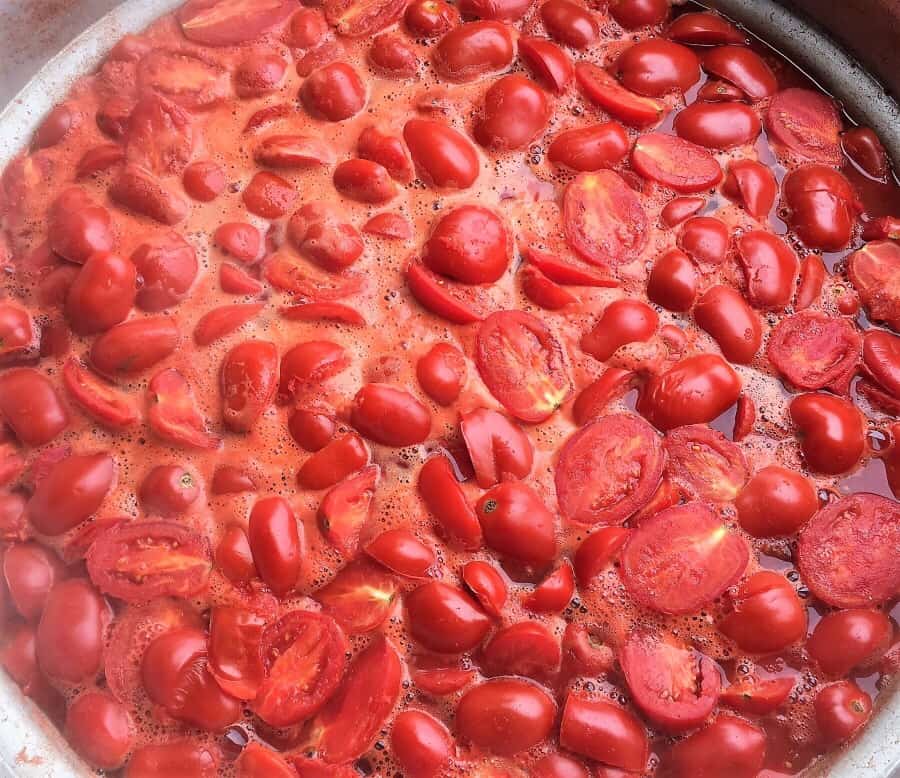
NOTE: DO NOT overcook the tomatoes, or you will be wasting and losing sauce when you drain them.
Drain the tomatoes
Next, you will drain the tomatoes until mostly drained.
Don’t over-drain since the water will have absorbed a lot of the tomato goodness!
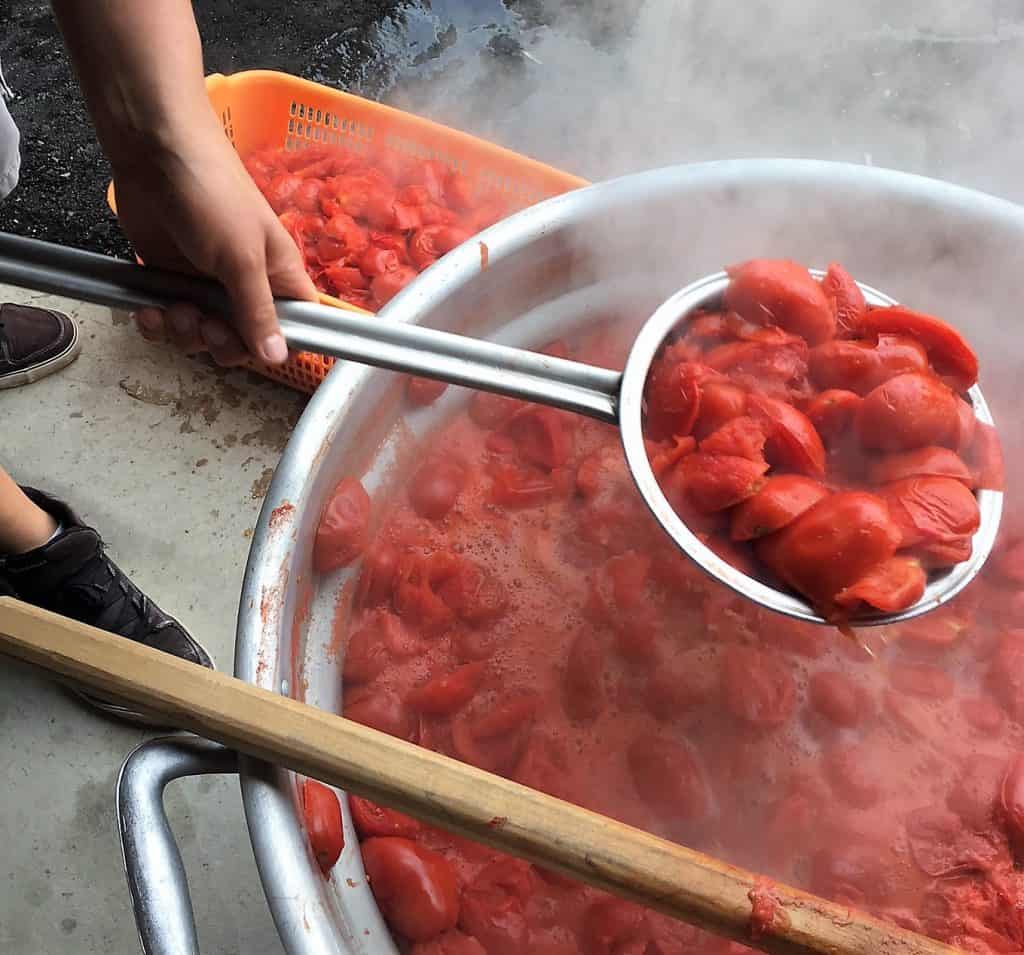
Transfer the cooked tomatoes to a basket or anything large enough to hold them.
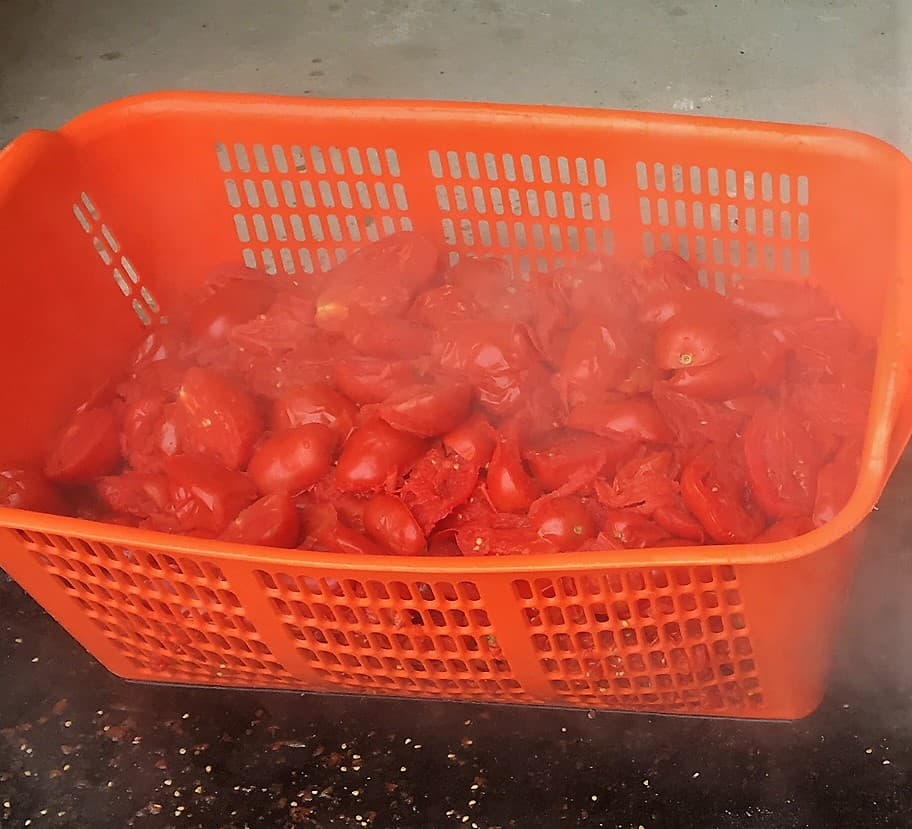
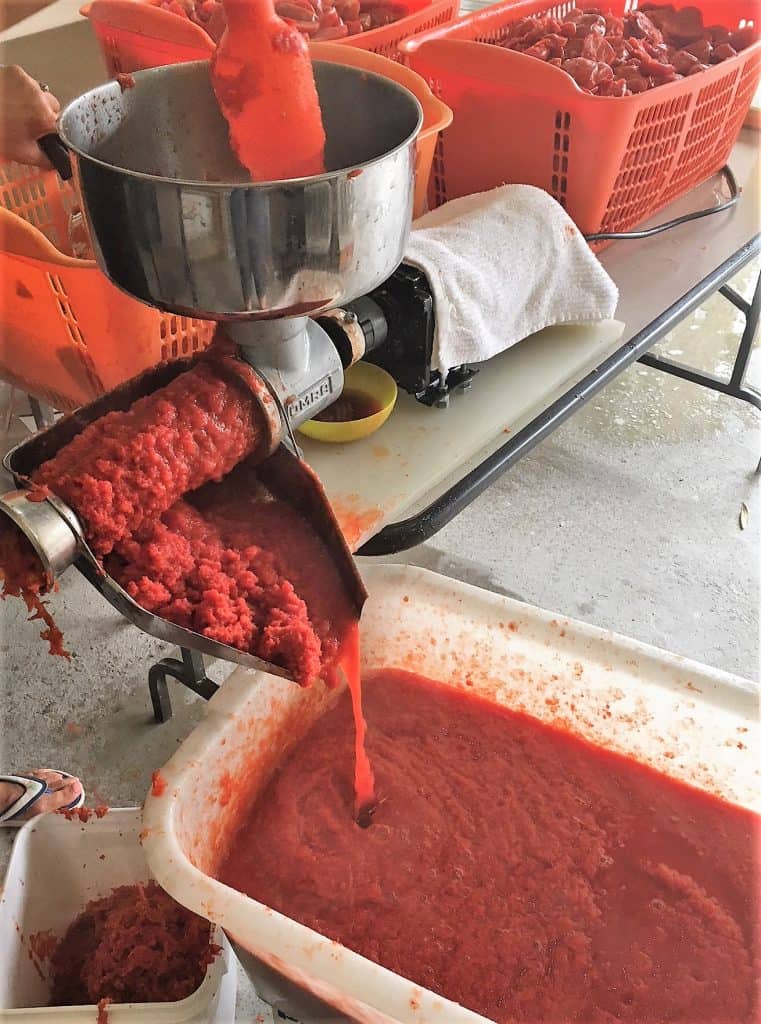
Crush the tomatoes
We use an industrial, motorized Italian tomato press that separates the skin and seeds from the tomato.
It discards the skin and seeds and pours the sauce out. You will need two separate containers/buckets. One to collect the delicious sauce, and another to collect the seeds and skins to be disposed of.
If you’re making a smaller batch, a food mill works fine.
Cook your tomato sauce
Once all the tomatoes have gone through your mill, you will cook the sauce.
Heat the oil, with the chopped onions, garlic, and bay leaves in a large sauce pot.
NOTE: If you’re avoiding oil, you may sauté with water or broth instead. Just be mindful, stir often and add more as needed to prevent sticking.
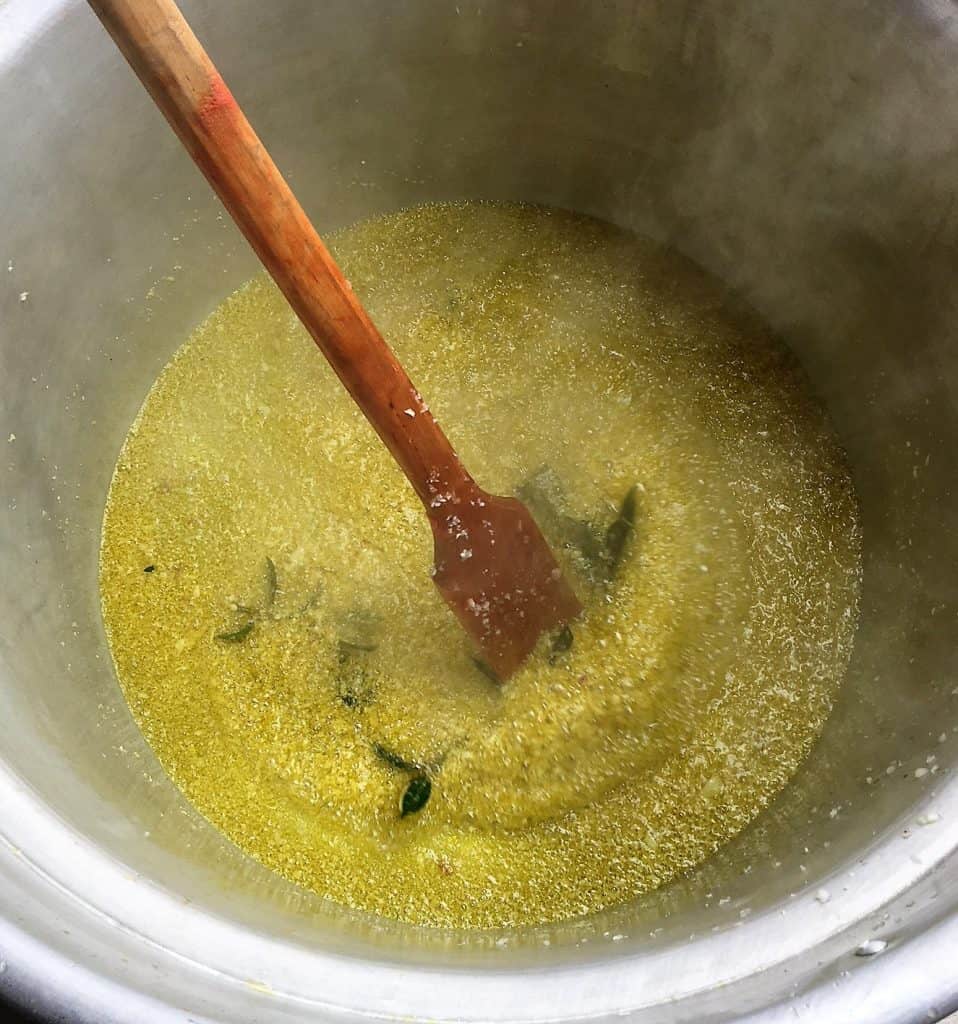
Once golden, add your crushed tomatoes and salt to the pot and bring to a low boil, stirring often.
Make sure to stir often to prevent burning it! (There I am stirring the sauce.) 🙂
Continue cooking and stirring and add the basil around the halfway point. Taste for salt and adjust if needed.
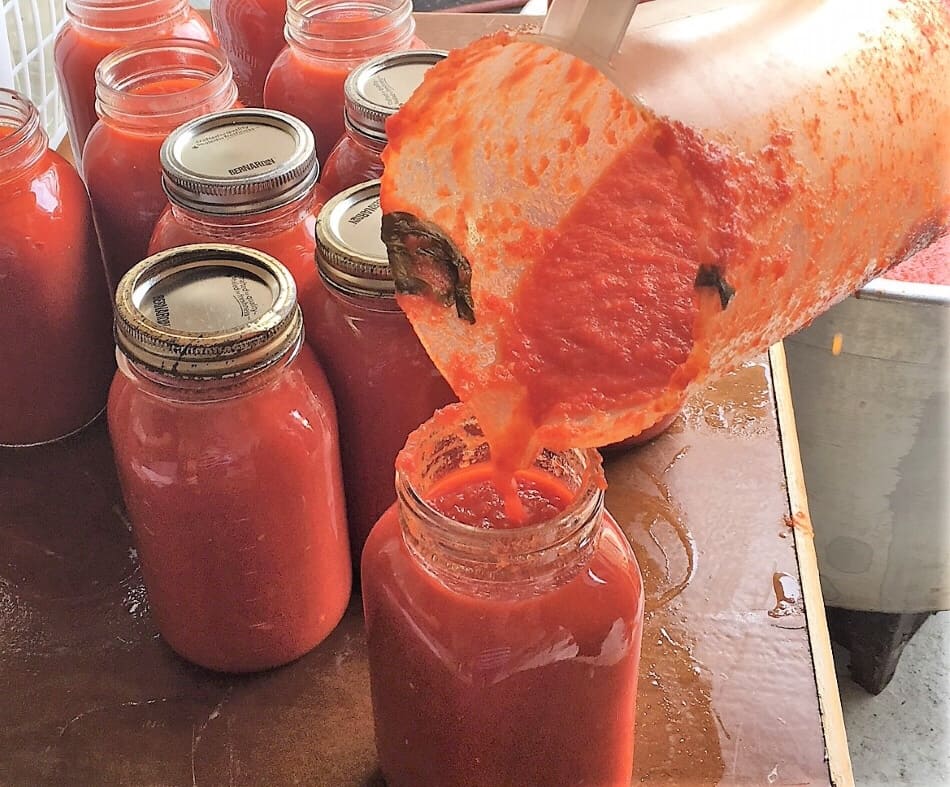
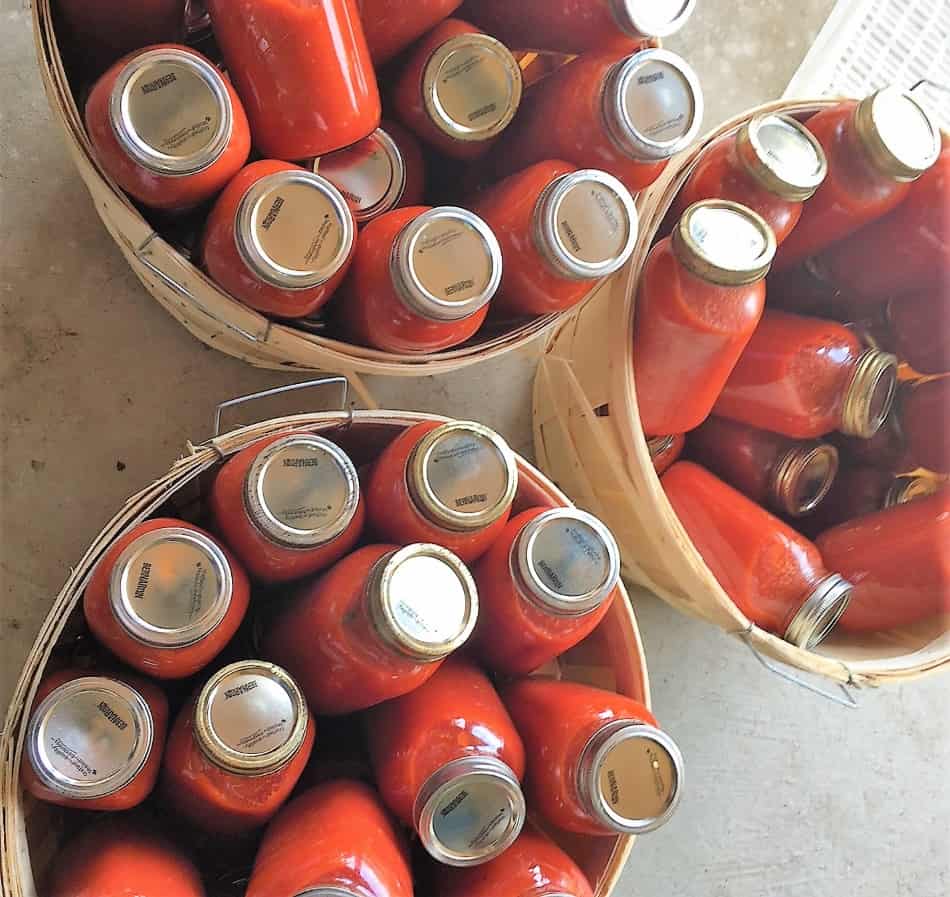
Fill the jars
Once the sauce is fully cooked, you will fill your mason jars and seal them tightly. Use a pitcher or ladle to fill your jars. Then seal each jar with a new lid.
We use NEW Bernardin snap lids each year to ensure a proper seal.
NOTE: You may reuse the jars, and the rings, as long as they are thoroughly washed and dried. But do not reuse the snap lids. New snap lids each time will ensure a proper seal.
EXPERT TIP: Use gloves to handle the jars and seal them tightly. They will be very hot to handle when filling the jars with hot sauce.
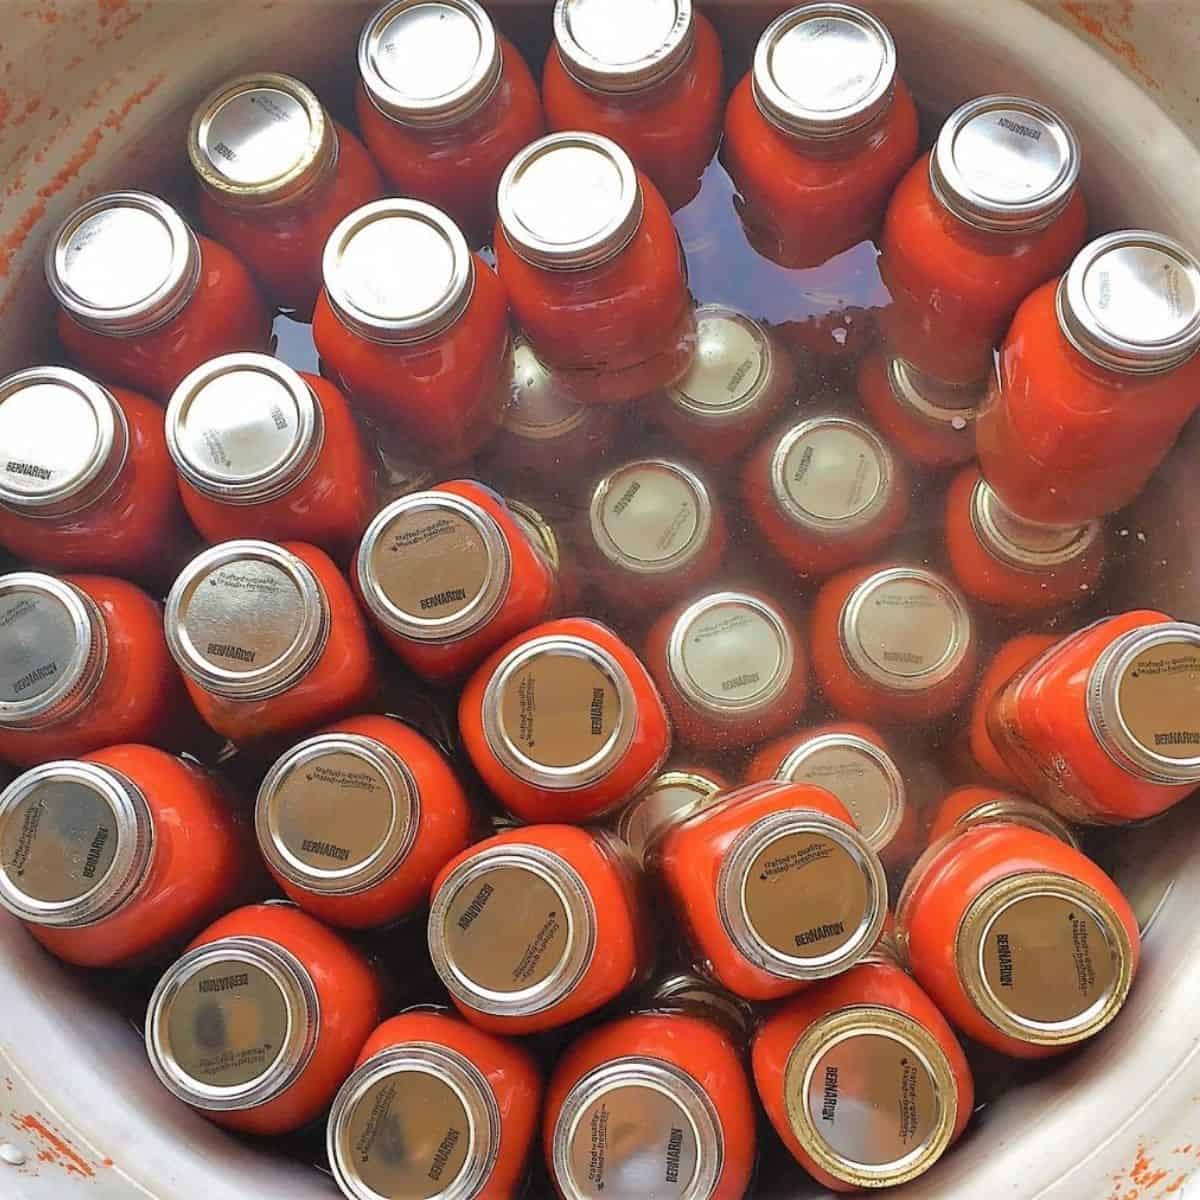
Preserve the jars
To preserve the jars, you will boil them in a water bath to get a proper seal that will keep the sauce from spoiling.
Add the jars to a pot large enough to hold them. (Or use multiple pots.) Then cover them completely with water and boil for at least 30 minutes.
Turn off the heat and DO NOT touch the jars as they will be very hot. Leave them for 8-12 hours or overnight.
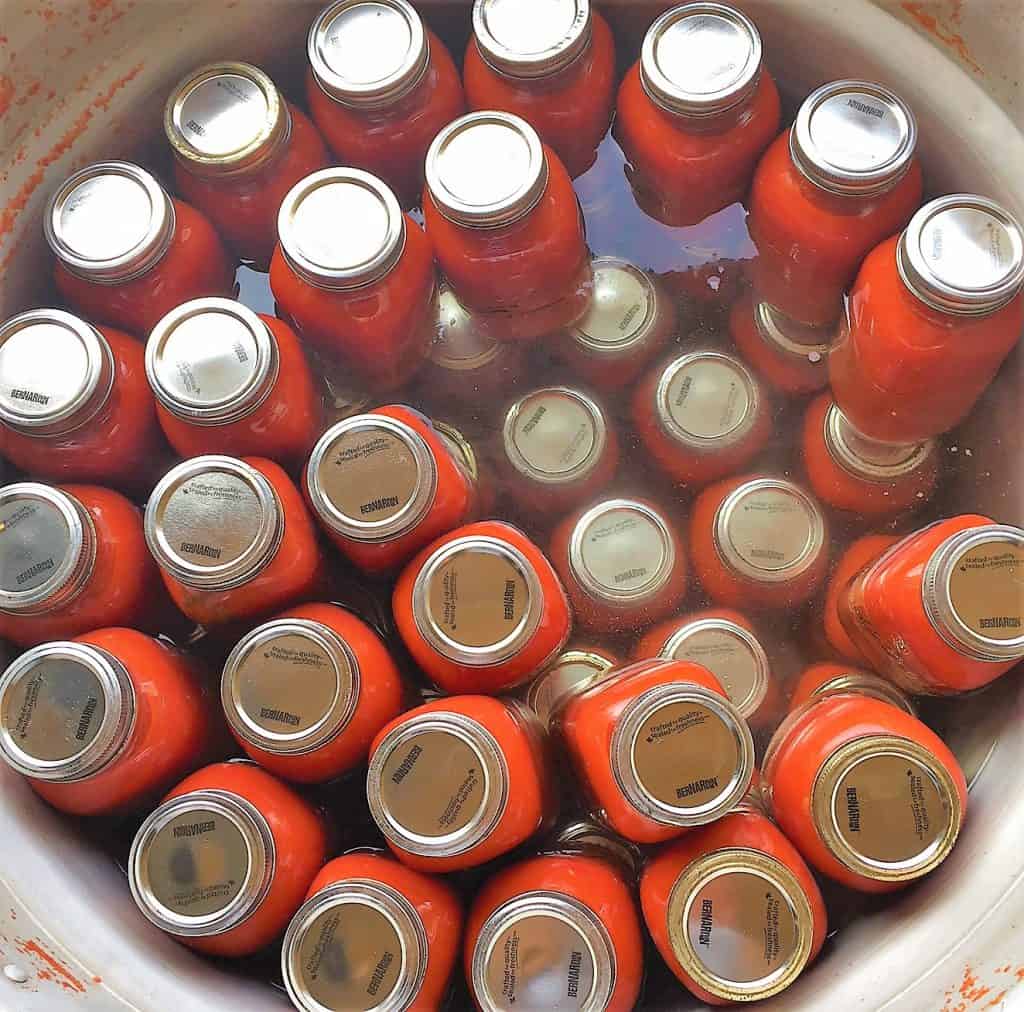
Once cool enough to touch, remove the jars from the pot and store them in a cool dark place.
Now you have homemade tomato sauce ready to use all year long!
The reward after a hard day’s work!
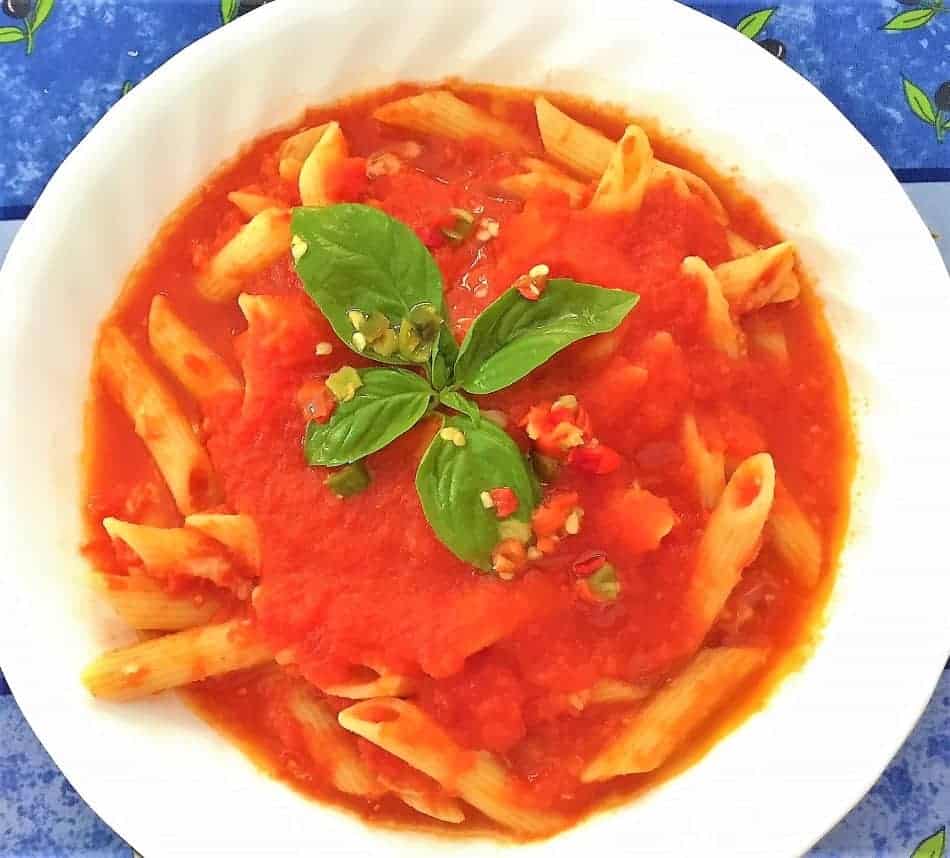
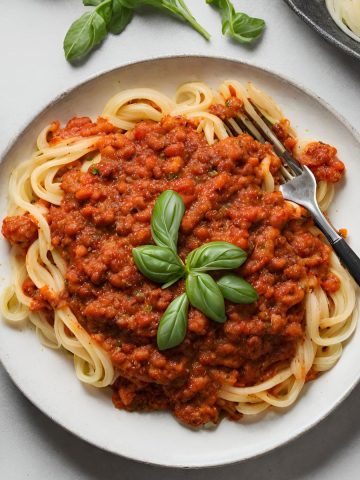
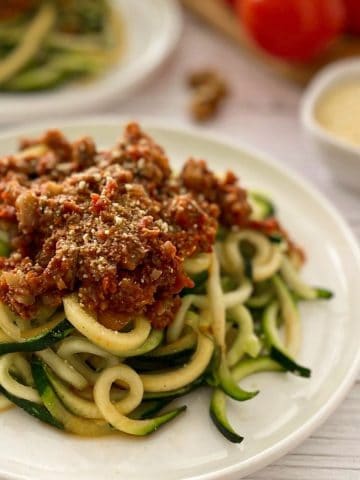
My favourite part of the tradition is enjoying a delicious plate of pasta with the new batch of freshly made homemade tomato sauce! YUM.
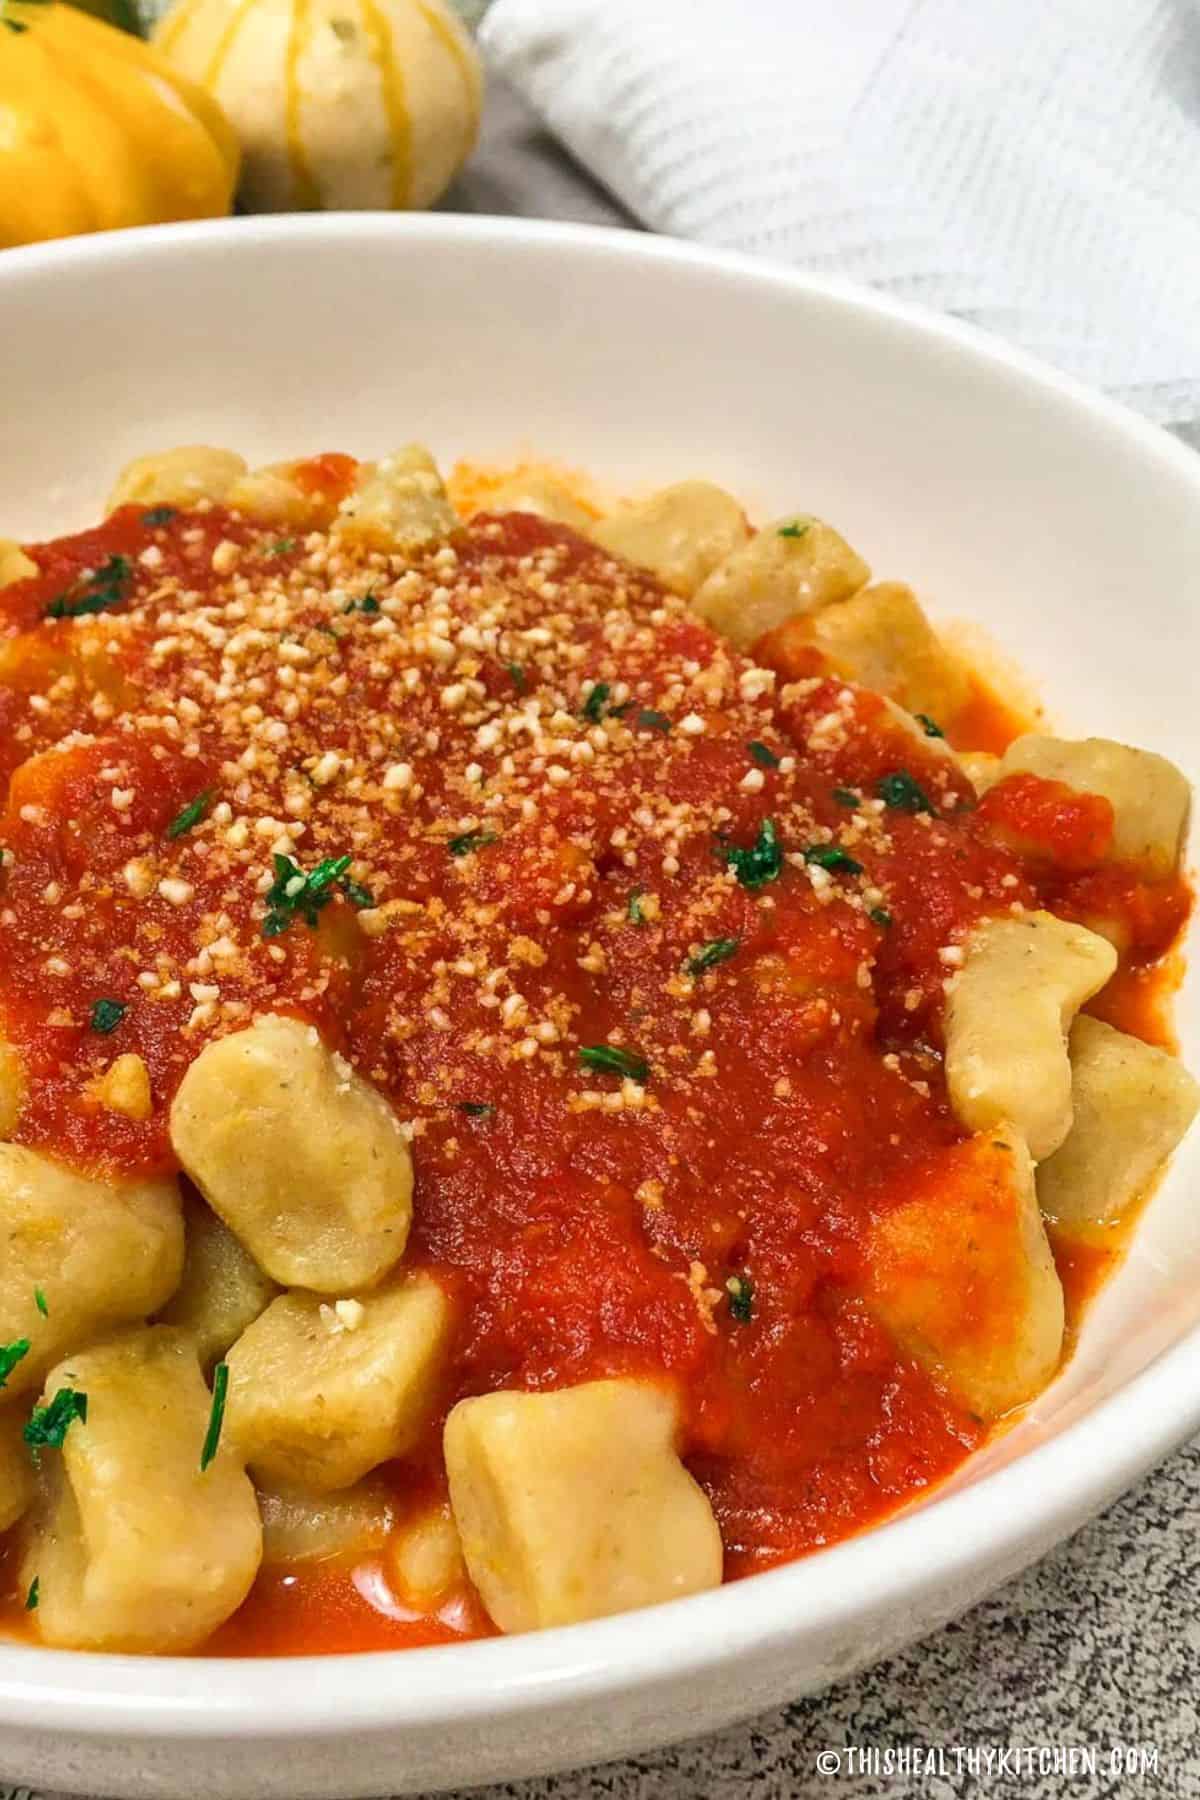
Recipes with homemade tomato sauce


If you tried this recipe, please let me know in the comments below. I always love hearing from you! Don't forget to Subscribe to This Healthy Kitchen to be among the first to get my new recipes! You can also FOLLOW ME on Facebook, Instagram, Pinterest, and YouTube to see more delicious food.
Buon appetito
Rosa
📖 Recipe
Equipment
Ingredients
- 1 bushel Roma or San Marzano tomatoes (approx. 52 pounds) washed
- ½ cup olive oil see notes for oil free
- 2 yellow onions peeled & cut in quarters
- 1 red onion peeled & cut in quarters
- 12 cloves garlic peeled
- 4-5 bay leaves
- 2 tablespoon sea salt or to taste
- 1 cup fresh basil leaves loosely packed
- 10 teaspoons citric acid or lemon juice or vinegar, see notes*
Instructions
- Using a food processor, process your onions and garlic until finely chopped, but not pureed. Set aside.
- Slice each tomato in half, looking for any bad spots as you cut into them. (You do not want to use any rotten tomatoes, as this may ruin the batch of sauce.)
- Bring a large pot of water to a boil and add the cut tomatoes. The cold tomatoes will likely cause the water to stop boiling. Once it returns to a low boil, drain the tomatoes immediately. Do NOT overcook the tomatoes in this step. Drain them once the water starts boiling, and/or once you see that the water is foaming orange on top. (See pic for reference.)

- Use a food mill to crush your tomatoes which will separate the skins and seeds and leave you with only the tomato sauce.
- Heat the oil with the onions, garlic and bay leaves and cook for about 5 minutes, until onions and garlic are slightly golden. Watch carefully not to burn. Add the sauce and salt to the pot and bring to a low boil. Cook for 1 hour, adding the basil in the last 20 minutes or so. Stir often! You do not want any sauce to burn at the bottom of the pot, or you may spoil the entire batch. Taste for salt, and adjust if desired.
- Now depending on the size of jars you're using, add the citric acid to the bottom of each jar. *see notes
- Carefully fill your jars leaving ¼" space from rim of the jar. Then tightly seal your mason jars using Bernardin lids and rings.
- Heat a couple inches of water in a large pot and place the sealed jars into your pot once heated. Do not add the jars to cold water! The jars are very hot, and adding them to a pot of cold water may cause them to crack. Once the jars have all been placed in the pot, slowly fill with enough water to cover all the jars and bring to a boil for at least 30 minutes, then turn off the heat and let them sit for 12 hours or overnight. (So call it a day.) Once the water and jars are cooled enough to handle, remove from the pot and store in a cold dark place for up to 12 months.

Steve says
I want to try this and make sauce for the whole year for myself and family. My question(s) are what and where did you get your pots, burners, and mill? Thanks so much!
Rosa says
Hi Steve, we purchased our items at a local Italian specialty store that sells commercial grade products, called Nella Cucina. Look for a commercial kitchen store near you if you’d like to make sauce in these quantities. Enjoy! 🙂
Heather says
Fantastic recipe, thank you so much!!! I did a bushel, the taste is amazing. My kids gave it 5 stars on taste and consistency. Question thought, my sauce really doesn’t apply to the pasta, is that normal?
Thanks again, tummy yummy 🙂
Rosa says
Thrilled you and your family enjoyed Heather. Thanks for taking the time to leave a review. 🙂
There could be various reasons for the sauce not sticking, so it’s hard to say for sure without knowing your full process.
Some examples: don’t add oil to the boiling pasta water if you are doing so. Make sure to heat the sauce before mixing with the pasta and mix immediately once drained, don’t let it cool down first. Also, you could reserve a few tablespoons of the starchy pasta water when draining to mix with the sauce to help it stick better. Hope that helps!
maria tortorici says
Hello Rosa,
May I ask why you would add the cut tomatoes in boiling water. In our tradition we cook the tomatoes without cooking it water.
Rosa says
Hi Maria, we slice them in half to make sure there are no brown spots or rotten tomatoes. Sometimes they can look perfect on the outside, but they’re rotten in the center, so we take this extra step to make sure we don’t spoil our batch of sauce. We then do a quick boil to make them easier to process through the food mill. When the tomatoes are slightly softened, they’re easier to process.
Debbie says
I did it Rosa! We made 2 bushels of tomatoes this weekend and your step by step directions really helped us not feel overwhelmed!! Thank you SO much for doing this! Appreciate you.
Rosa says
Yay!! Absolutely thrilled you made some sauce and that you found my guide helpful. Thanks so much for the review. 🙂
Michelle says
I have been wanting to make my own sauce for years, but have always felt very intimidated since I had no one to actually show me. I finally did it this past weekend!! Rosa’s step by step instructions and pictures made me feel like I was right there with her learning! I followed her recipe and method and on my own was finally able to make my own! The sauce was amazing and exactly what I had been missing! Thank you soo so much for sharing this! Absolutely wonderful!
Rosa says
Aww thanks so much Michelle! I’m so glad you found it helpful. 🙂
carol says
Love it, it was simple to do and enjoyed the family time. question why the lemon?
Rosa says
Glad you enjoyed Carol. The lemon juice, OR citric acid is to preserve the tomato sauce so it doesn’t spoil.
Mamadjang Jallow says
This is great, i have learned a lot from here.
Rosa says
Glad to hear it!
Linda says
Do you leave the skins on the tomatoes?
rosa says
Hi Linda, no I don’t. I use a food mill to separate the seeds and skins. You may also do this by hand if you have a smaller batch of tomatoes but a food mill will definitely be faster. 🙂
Alexandra @ It’s Not Complicated Recipes says
I love this! A great family tradition – and a delicious one too. I would love to try this 🙂
rosa says
Thanks so much Alexandra! It’s a great excuse to get the family together. All hands on deck for this one! 🙂