

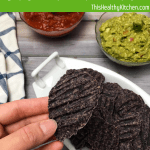
Black bean chips are a healthy alternative to your favourite salty snack. This guilt free treat is simple to make, using only 4 ingredients, and super tasty with a crunch!
Potato chips are definitely a weakness of mine. There’s something about a salty snack that really satisfies.
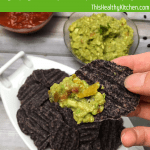
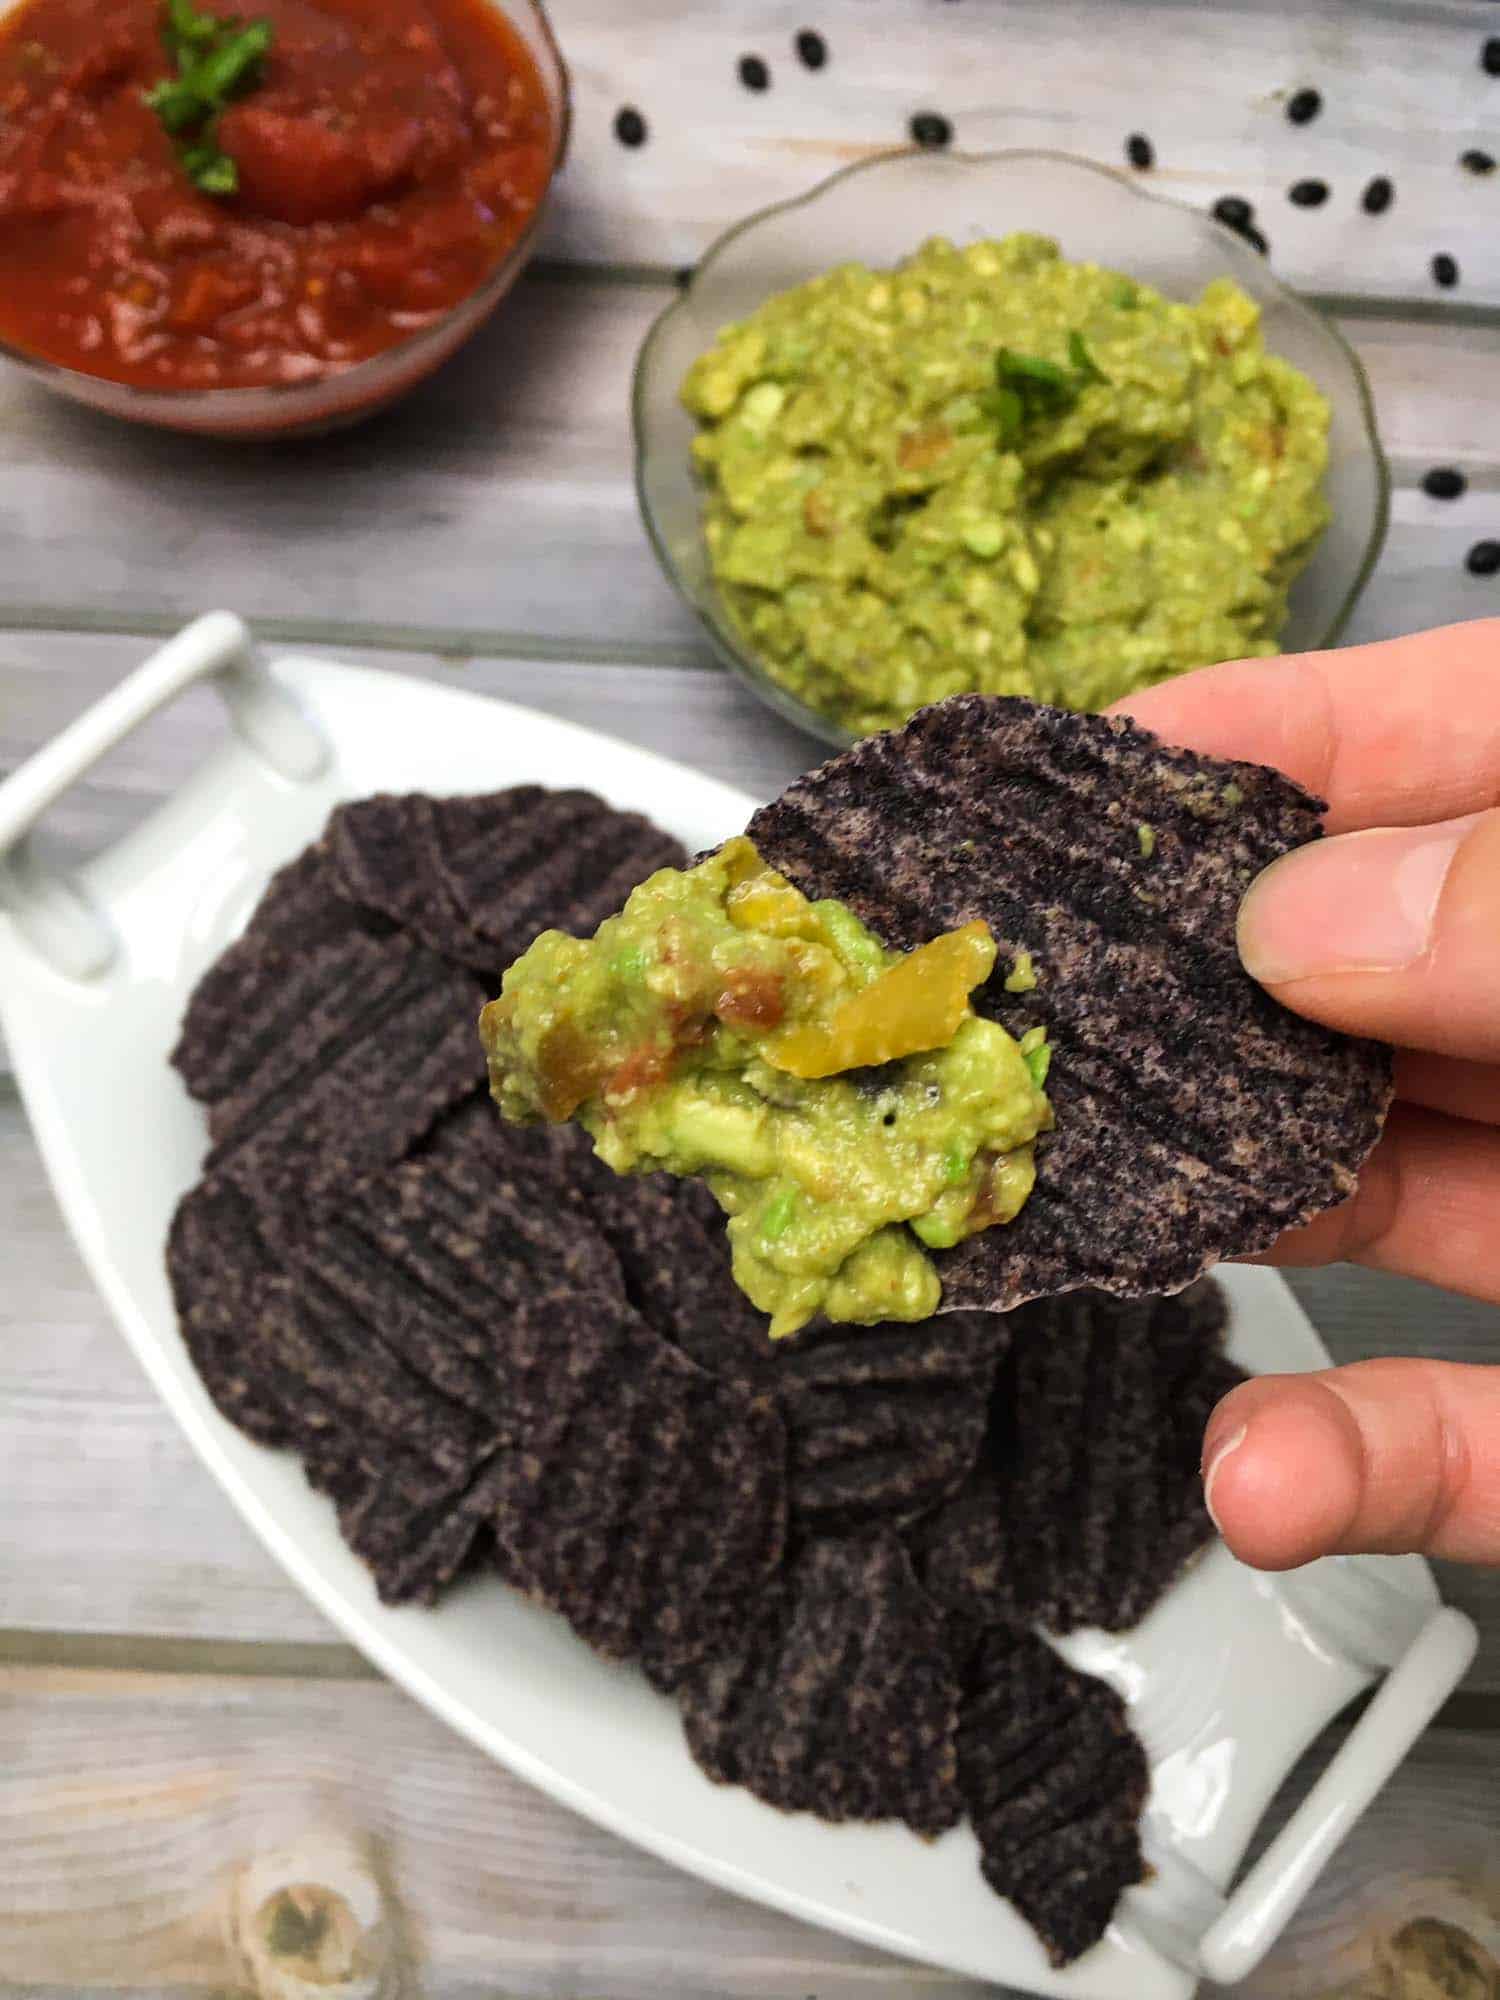
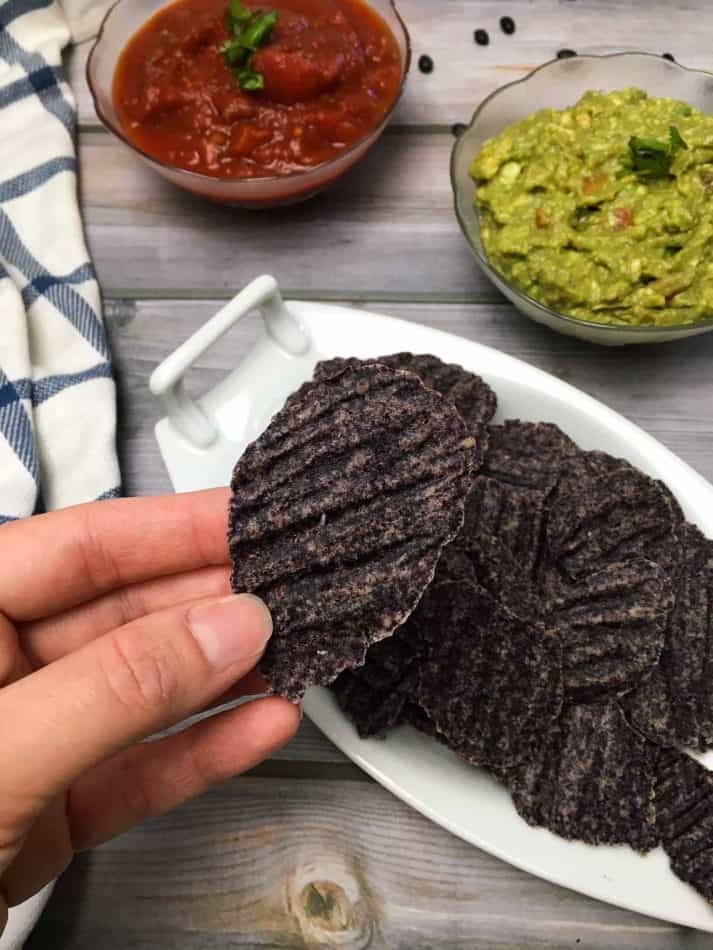
These black bean chips fix that salt craving, all while providing a healthy protein boost in a completely wholesome snack. Pair it with my EASY guacamole or your favourite salsa for the ultimate treat.
How do you make black bean chips?
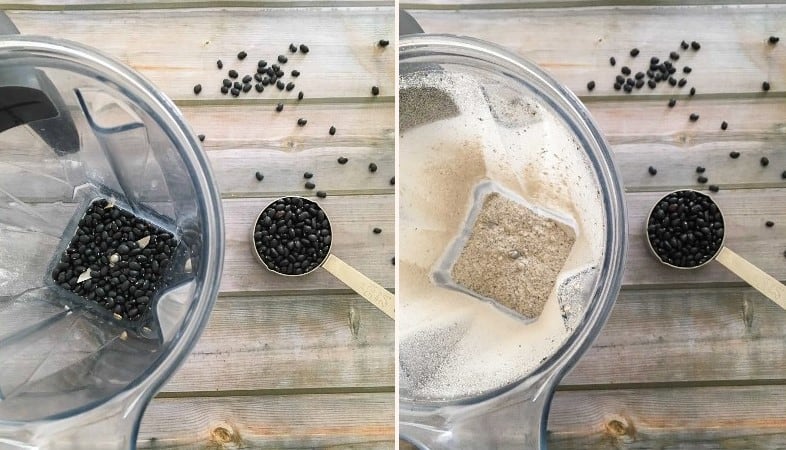
Making the black bean flour.
Start by making the black bean flour if that’s not something you already have on hand. It’s very simple to make in a high powered blender, like a Vitamix.
Measure out half a cup of dry black beans and process them until a flour consistency is reached. This will take about 15-20 seconds to pulverize.
If there are a few black specs remaining, no worries! That’s just the black bean skins which are a little tougher to break down. For this chip recipe, the flour doesn’t need to be perfectly fine, so you’re good to go.
Making the black bean chip batter.
Transfer the flour to a medium mixing bowl and add your salt to your desired preference of saltiness. I like half a teaspoon for this recipe. Next, add the tablespoon of oil and using a fork, mix well until incorporated.
If you’re avoiding oil, I have tried making this without, and it does work, however, you need to use extra care when flipping your chips. They tend to get a little stuck to the parchment paper when baking, so carefully scrape the bottom of each chip with a large fork to flip them.
Next, add the water, pouring slowly until a slightly runny batter is reached. Start with only half a cup and add the remaining, up to ¾ cup of water, as needed.
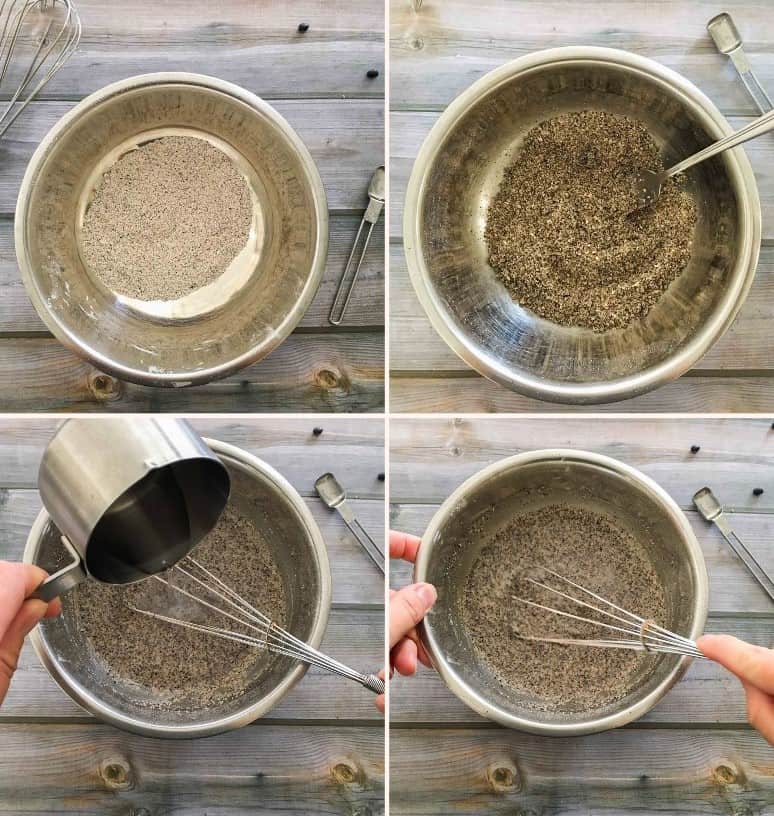
The consistency you’re looking for is that the batter spreads slightly when dropping onto your parchment paper.
Pour teaspoon amounts of batter onto your tray and it should spread slightly as you pour. You don’t want it too watery, so just a slight spread.
Leave plenty of room in between each chip, and using a fork, spread the chip further by gently pressing down and spreading to the sides. Don’t worry about shapes and sizes, just try and get them nice and thin for ultimate crispiness.
Baking your black bean chips.
Bake for about 10 minutes and then using a large fork, scrape the underneath of each chip in order to detach from the parchment paper and flip each one. Using a fork will help them lift easier, and leave your chips with beautiful ridges as shown below. Yes, you have to flip each one if you want crispy chips. Then bake for another 8-10 minutes, watching carefully not to burn them.
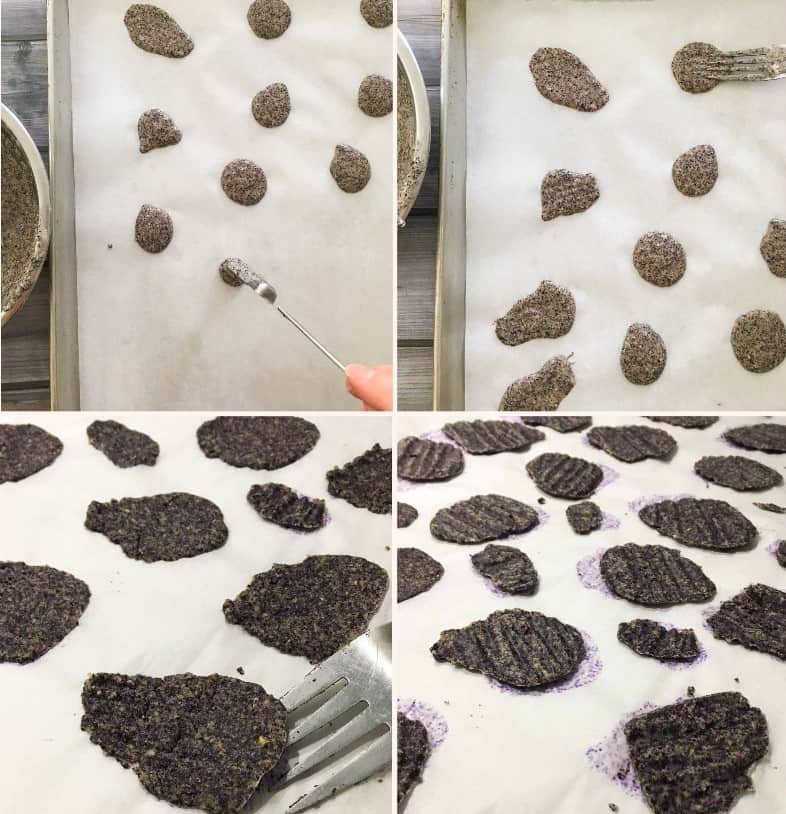
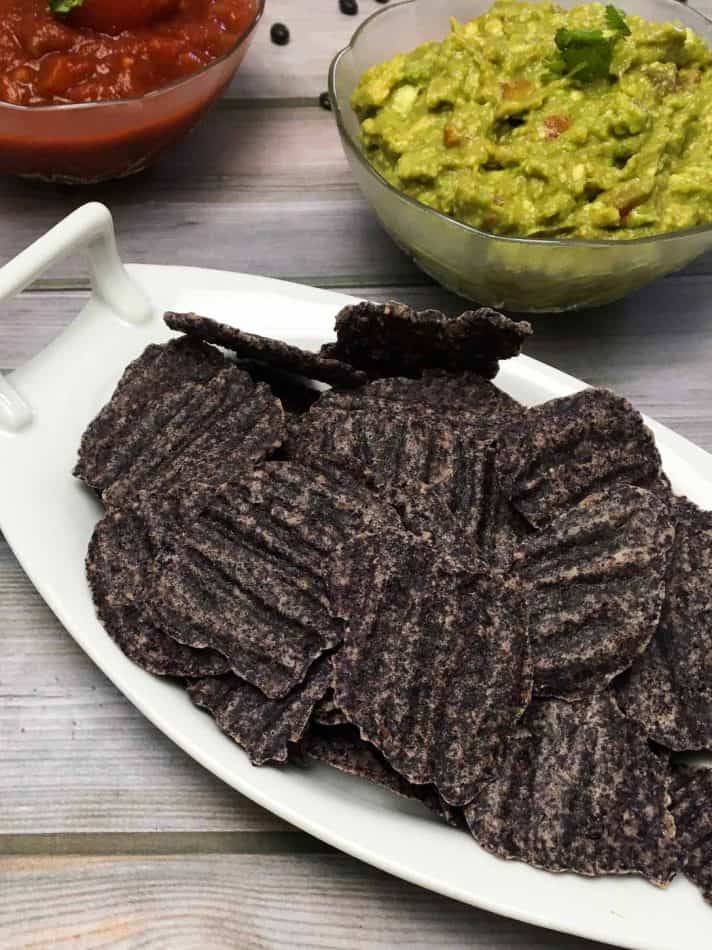
Once baked, remove the trays from the oven and let cool to room temperature before handling. They will become firmer as they cool.
If possible, leave the chips in a single layer until ready to serve. Overlapping them in a bowl will cause them to lose some of their crispiness.
What to serve with black bean chips?
Enjoy your chips with guacamole, salsa, or even some Sweet & Spicy Mango Salsa!
More healthy snack recipes!
- White Bean Protein Crackers [Oil Free Option]
- Healthy Peanut Butter Chickpea Cookies
- Sweet & Spicy Baked Plantain Chips
If you tried this recipe, please let me know about it in the comments below. I always love hearing from you! Don't forget to Subscribe to This Healthy Kitchen to be among the first to get my new recipes! You can also FOLLOW ME on Facebook, Instagram, Pinterest and Twitter to see more delicious food and get all the latest updates.
Buon appetito,
Rosa
📖 Recipe

Ingredients
- ½ cup black bean flour I grind black beans in my Vitamix
- 1 tablespoon avocado oil or other cooking oil, don't use olive oil (see notes below for oil free option)
- ½-2/3 cup water
- ½-1 teaspoon sea salt to taste
Instructions
- Preheat oven to 350 degrees F and line two baking sheets with parchment paper.
- If you do not have black bean flour on hand, you can make some in a powerful blender, like a Vitamix. Measure half a cup of dry black beans and blend on high until a flour like consistency is reached. It will take about 15-20 seconds.
- Combine the salt and bean flour in a medium bowl. Then add the oil and mix well. Use a fork to get the oil mixed in and incorporated. Then slowly pour the water, starting with ½ a cup, and adding more as needed to reach a slightly runny batter.
- Pour teaspoons of batter onto your baking sheet, leaving plenty of space in between each one. The chips should spread slightly. Then, using a fork, press and stretch each chip GENTLY to spread the batter nice and thin for maximum crispiness.
- Bake for 10 minutes, then using a fork, flip your chips and bake for an additional 8-10 minutes, watching closely so they don't burn. **see note 3
- Remove from the oven and let your chips cool completely before handling. These chips pair particularly well with homemade guacamole, or you may enjoy as is.
Cris says
I was thinking that if you’re going to wet the bean flour anyway, couldn’t you soak the beans and then grind them and add water to the consistency needed? Would save some wear and tear on you kitchen blender.
Karen says
The flour you make from dry beans with the liquid binds into a batter. If you soak the beans and grind it’s not going to form a binding paste more Iike a grainy porridge. If you cook the beans you can smash making a paste.
Ashley Jones says
This looks amazing and fairly simple to do.
Kelly Hubbard says
I made this last night and it is delicious!
Rosa says
So glad you enjoyed!
Kathryn says
Made these for a snack on new year’s eve and dipped with hummus. Delicious!
Rosa says
Yay! Thanks for sharing Kathryn! 🙂
Jody says
These turned out great! Easier than I thought too! Nice and crispy.
Rosa says
Thanks for sharing Jody! Glad you enjoyed.
Andrew says
Hi Rosa!
I was curious about the best method to store left-overs? Just in an air-tight container in the pantry? I hope to make several servings at once. Can’t wait to try these out.
Thanks!
Andrew
Rosa says
Hi Andrew, once completely cooled to room temperature, you can store in a container in the pantry. However, these do taste best when freshly made as they will start to lose their crispiness after a day or so. Enjoy! 🙂
Diane says
Delicious!! Worked perfect for me to sub for tortilla chips.
Rosa says
Wonderful, thanks for sharing Diane.
Karen says
Hi Jamie, I wonder if these stay crisper in the refrigerator, like my store bought stuff does, in the summer? I love the ridges idea. And, I wonder if they crisp back up well in a toaster oven, even easier because of the ridges? I’m a cinch for re-crisping pizza and other foods, because crunchy is my favorite.
I just saw your recipe and am planning to make bbchips soon. You might call me a big dipper. I have quac, vegan queso and garlic dips, for breakfast, lunch or snack at work, all the time. Trying to avoid buying things packaged in MYLAR so very excited to make my own chips! ~ K
Karen says
Hullo… “Hi Rosa” is how my post should start. I don’t see an option to edit it. Sorry. ;^ \ ~ K
rosa says
No worries Karen. 😉
I haven’t tried putting these in the fridge but if you try that I’d love to hear if that keeps them crispier. Reheating them will add some crunch, just watch carefully not to burn them.
Lee says
Thanks for the recipe … I’ve been looking for one like it. I wonder why no olive oil? And what can you use to replace Avocado?
rosa says
Hi Lee, my pleasure, hope you enjoy the chips. Olive oil is best used in raw applications as it shouldn’t be heated at too high a temperature. If you don’t have avocado oil, I recommend any other neutral flavoured oil. Hope that helps! 🙂
Jamie says
Wow I love these homemade black bean chips! Definitely better tasting and healthier than anything store bought!
rosa says
Thanks so much Jamie! Enjoy 🙂